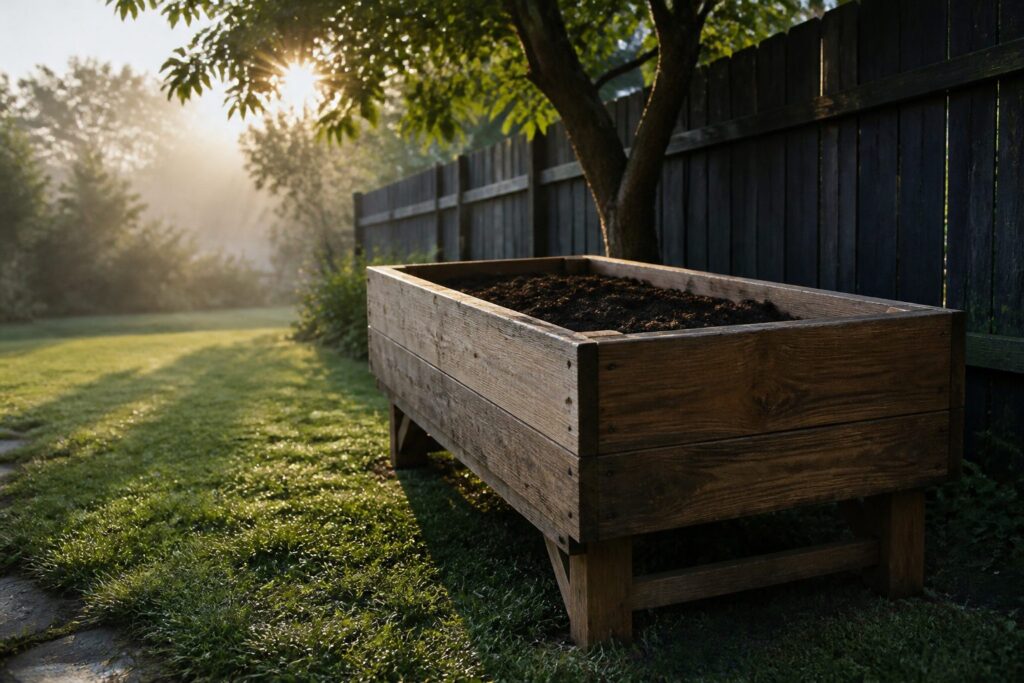
A planter box is a framed container, built from dimensional lumber and set on legs or on the ground, that holds soil and plants above grade.
What separates a box that lasts five seasons from one that warps in two is the wood you choose at the lumber rack: cedar fence pickets run about $33 for a medium build, while treated pine cuts that cost further but needs replacing sooner.
[link-whisper-related-posts]Wood That Lasts Outdoors
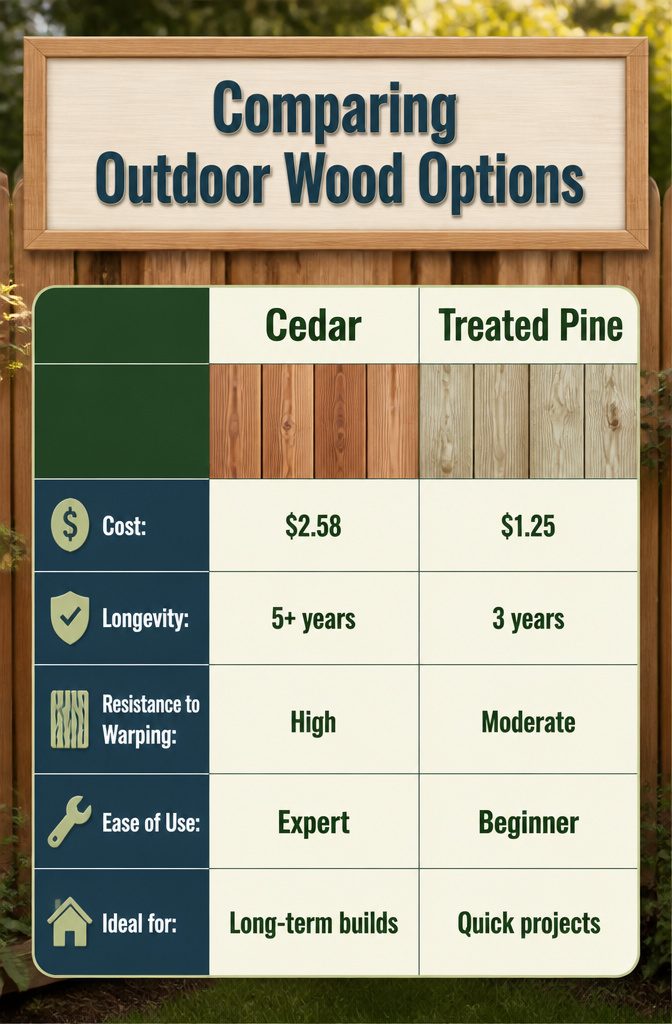
Cedar runs about $2.58 per fence plank and will outlast anything else in this list, which is why I reach for it when the box has to survive five-plus seasons without rebuilding.
The upfront sting fades when you are not replacing rotted corners in year three.
Treated pine is what most big-box plans specify, and for good reason: a 2x4x8 and 1×8 boards of YellaWood or similar pretreated stock resist warping far better than raw lumber, and the price lets you build two boxes for the cost of one cedar unit.
For a first build or a rental you may leave behind, this is where I would start.
Redwood sits between them on both cost and longevity, though availability varies by region and the performance gap rarely justifies hunting for it specially.
Fence pickets shave the material total down to roughly $33 for thirteen boards, but at roughly 5/8 inch thick they need more internal framing to keep from bowing outward once soil and water press against them.
I have seen picket boxes built with 2×2 legs and 1×2 top boards that hold fine, yet the cut list grows longer and the assembly time with it. Budget an extra hour of framing for every dollar saved on wood.
Tools Worth Having
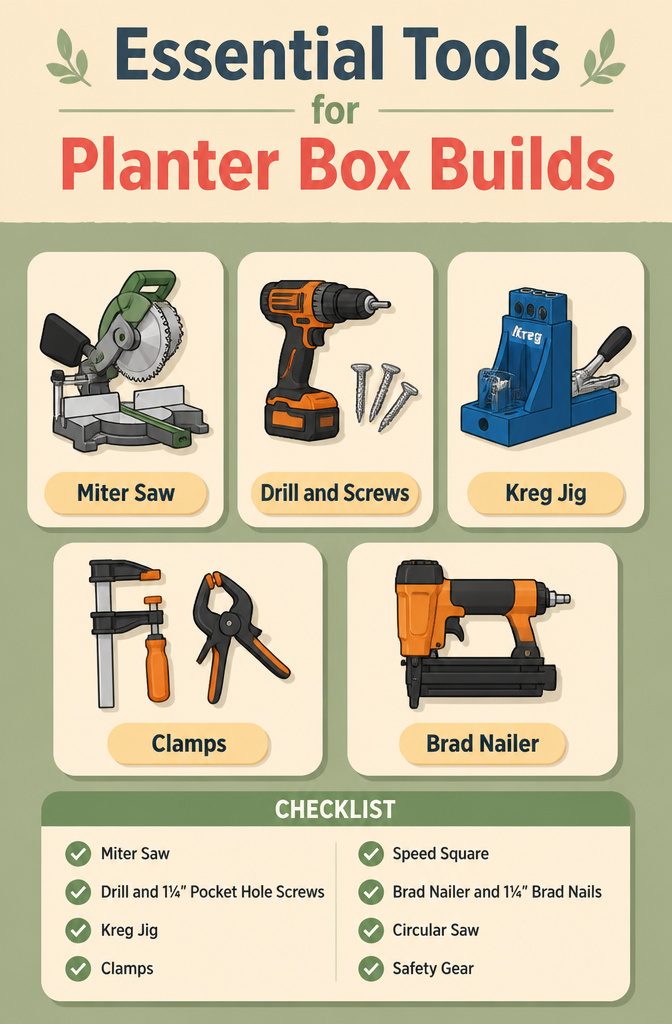
A miter saw is the one power tool I would not try to substitute; the clean crosscuts it makes on 2×2 and 2×4 stock are what keep planter box corners from looking handmade in the wrong way.
A circular saw can manage the same cuts with a steadier hand and a speed square for guidance, which is worth remembering if you are borrowing tools for a single weekend build.
For assembly, a drill and 1¼″ pocket hole screws do the actual holding, and clamps keep the frame square while you drive them.
Corner clamps are useful but not required; a basic clamp paired with a speed square handles the same job with a little more patience.
The Kreg Jig is what makes pocket-hole joinery manageable if you have not done it before. It drills the angled holes consistently, and that consistency matters more than speed on a first build.
A brad nailer and 1¼″ brad nails appear in some plans for attaching picket skins to the frame, though screws work there too if you prefer fewer tools.
I would skip the finish nailer and table saw unless you already own them; neither changes the outcome enough to justify a rental fee.
It may take beginners more than a day to build this, but it’s not overly complicated and requires only basic tools.
That timeline is honest, and it applies to most of these builds: one solid Saturday, not a rushed afternoon.
Borrow the miter saw, buy the Kreg Jig if you plan a second project, and you are set without a full shop.
Cut to Size
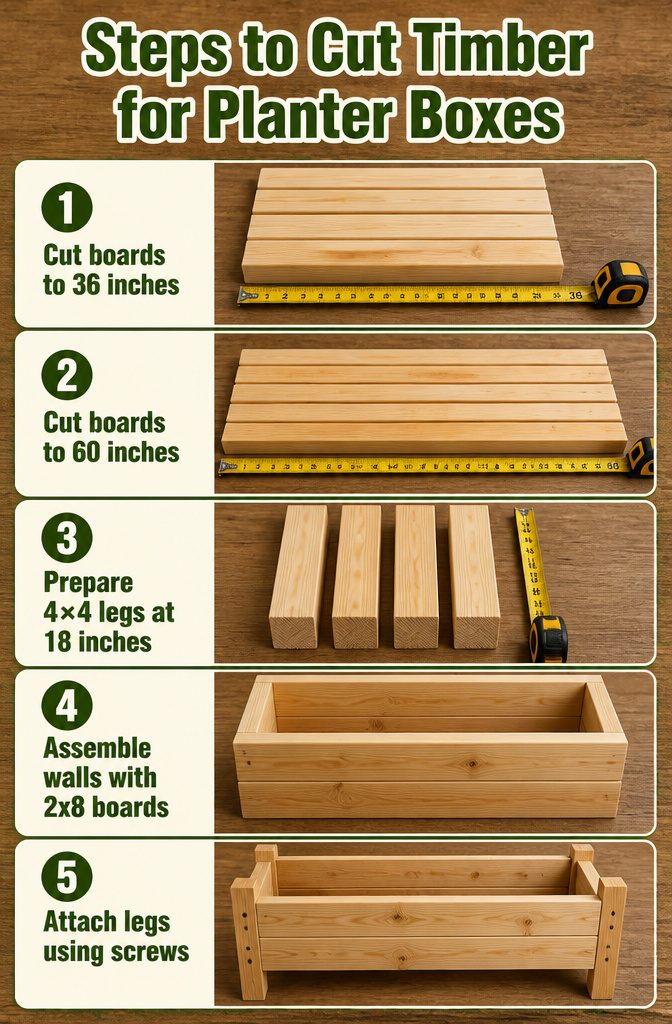
A standard 2×6 comes in eight-foot lengths, so the medium box is designed to leave zero waste: six boards cut to 36 inches and six cut to 60 inches.
Those two numbers add up to exactly ninety-six, which means one short side and one long side come from the same piece.
I would skip any other combination; paying for lumber you throw away is not where this budget should go.
The legs are 4×4 cut to 18 inches.
That height leaves them sticking slightly above the box walls, which matters if you want to cap the corners later with solar lights. Four per box.
For the large build, the dimensions shift to 8 feet by 4 feet, a footprint that matches common raised-bed spacing and lets you reach the center from either side without stepping in.
Here the lumber is 2×8 for the walls, 2×4 for the base supports, and the same 4×4 legs at 18 inches.
No rip cuts needed on the wall boards if you buy 2x8x8 stock; the width of the board becomes the depth of the planter. Six of each board, six legs.
Assemble the Frame
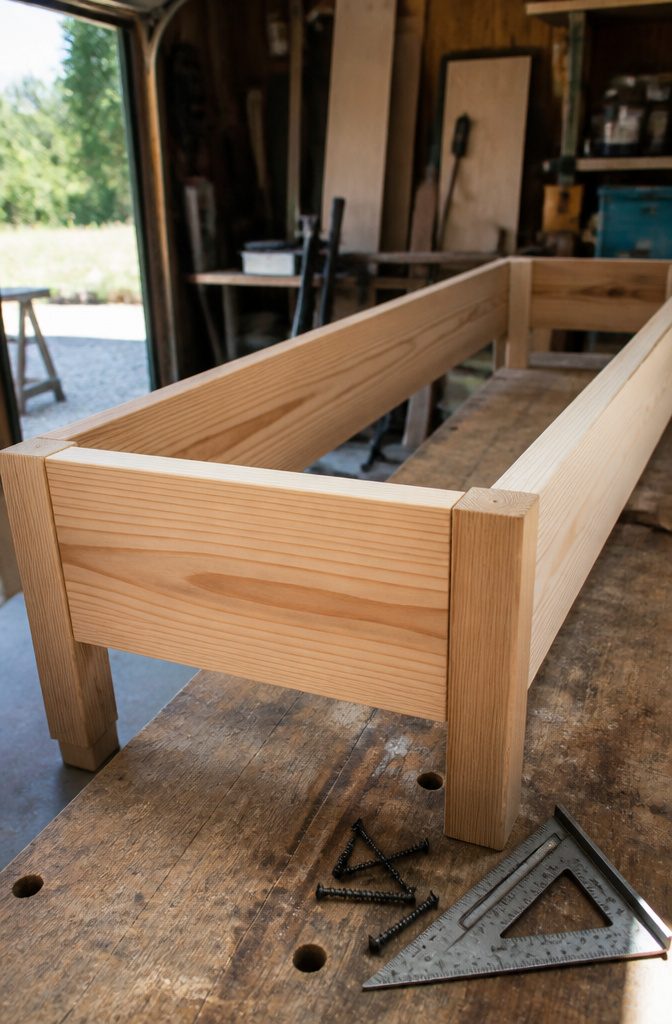
The corners of a planter box take the stress every time you move it, every time soil settles, and every time a summer thunderstorm swells the wood. Two screws per joint minimum, and make them count.
I build the long sides first, clamping the horizontal boards to the vertical legs so the edges sit flush. A speed square keeps the angle honest if you do not own corner clamps.
With the sides flat on the work surface, I drive 3-inch exterior screws through the face of the side piece into the leg or support behind it.
The joint is simple, visible, and strong enough for a box that stays put.
A Kreg jig changes the game by hiding the fastener. You drill pocket holes into the ends of the horizontal pieces, typically the 43¼-inch and 12-inch boards, then drive screws from the inside so nothing shows on the face.
The tool costs extra and adds a step, but the result looks cleaner and holds just as well.
For a box that sits against a fence or behind a garage, I would skip it. For one that frames a patio seating area, I would use it on the two long sides at minimum.
Once both long sides are built, connect them with the short boards, two near the top and two near the bottom, plus a fifth 12-inch piece across the middle of the bottom for support.
The short pieces should cover the edge of the long sides so the load transfers straight through, not into the screws alone.
Bottom and Drainage
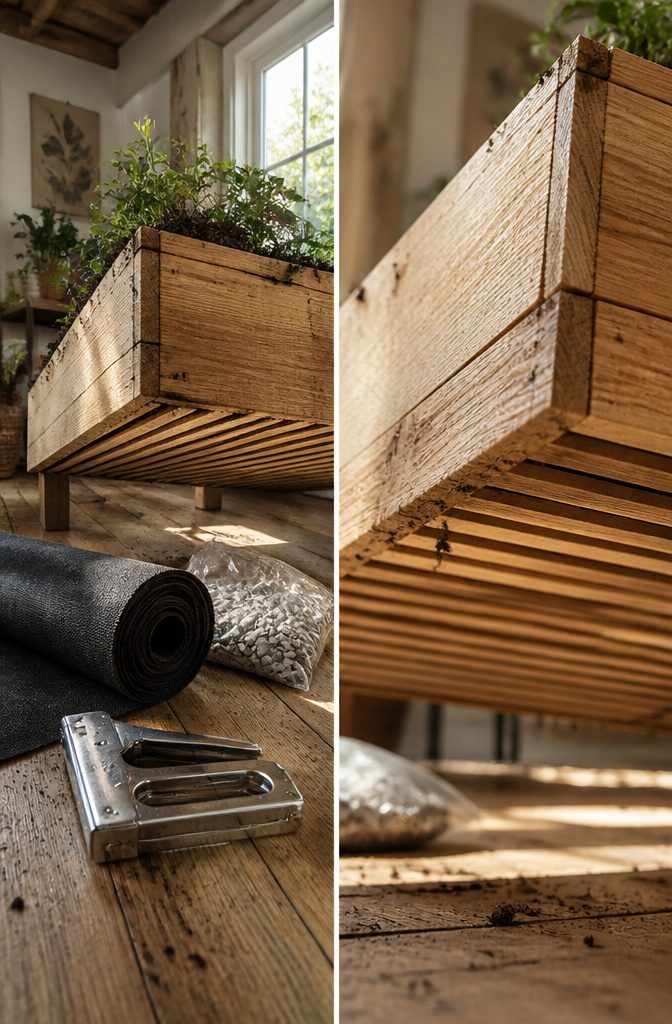
The bottom of a planter box has to do two jobs at once: hold soil and let water out.
I use ½-inch gaps between slatted boards rather than a solid panel, which saves material and starts the drainage before the water ever reaches the layer below.
Three approaches compete from there. Drilled holes clog within a season or two as fine soil packs against them, so I skip that method unless I want to re-drill every spring.
Landscape fabric stapled across the slats slows that clogging and still lets water through, though it will eventually blind over and need replacing.
Gravel buys the most time, a two-inch layer above the slats that creates a reservoir space where water collects and seeps out gradually instead of carrying soil with it.
Standing water rots roots and rots wood both, so some exit path is non-negotiable. My own boxes run slatted bottoms with landscape fabric on top, which hits the weekend-timeline budget without the gravel haul.
The fabric tears when I dig heavily around mature tomatoes, but a fresh sheet costs a few dollars and ten minutes every third year.
Finish the Exterior
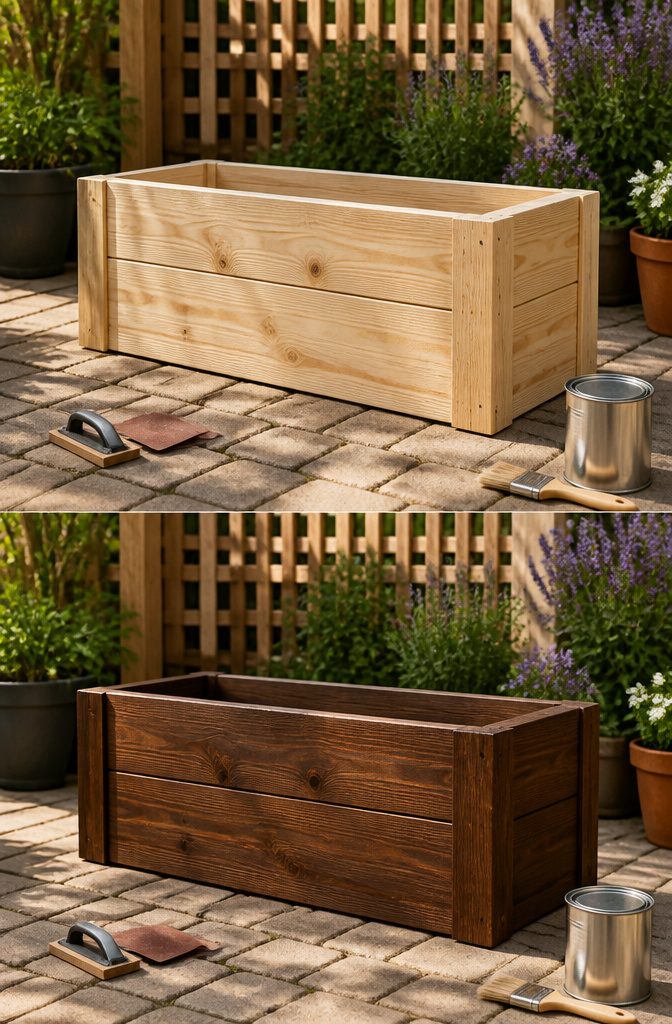
Sanding matters most if you plan to stain. Bare wood grabs pigment unevenly, and rough spots turn dark while smooth areas stay light.
A quick pass with 120-grit paper fixes that. Paint is more forgiving of skipped prep, though filled screw holes still show through unless you sand them flush.
I would fill and sand for a painted box going against siding or near a front door; for boxes tucked behind a fence, I would skip it.
Three ways to finish, and each commits you to different upkeep. Exterior paint like Behr Black hides the grain completely but gives the longest color life, two coats over a primer coat if you want to be thorough.
Only paint the top board inside; soil and moisture ruin anything lower anyway. Semi-transparent stain, something like Valspar in Chocolate Chip, keeps the wood texture visible but needs reapplication every two to three years in full sun.
Spar urethane on cedar brings out warm tones and handles rain well, though it will crack and peel eventually, not just fade.
Raw cedar left to weather gray is the choice I would make for a yard with native plantings or anywhere the box should disappear into the background.
It saves a weekend of work now and every maintenance cycle after, and cedar holds up fine without any finish at all. Color is the compromise: you get weathered silver, not wood warmth.
Mineral oil is food-safe and cheap, but it is not a true outdoor finish. I would use it only for a small herb box on a protected balcony, and even then I would reapply twice a season.
Fill and Plant
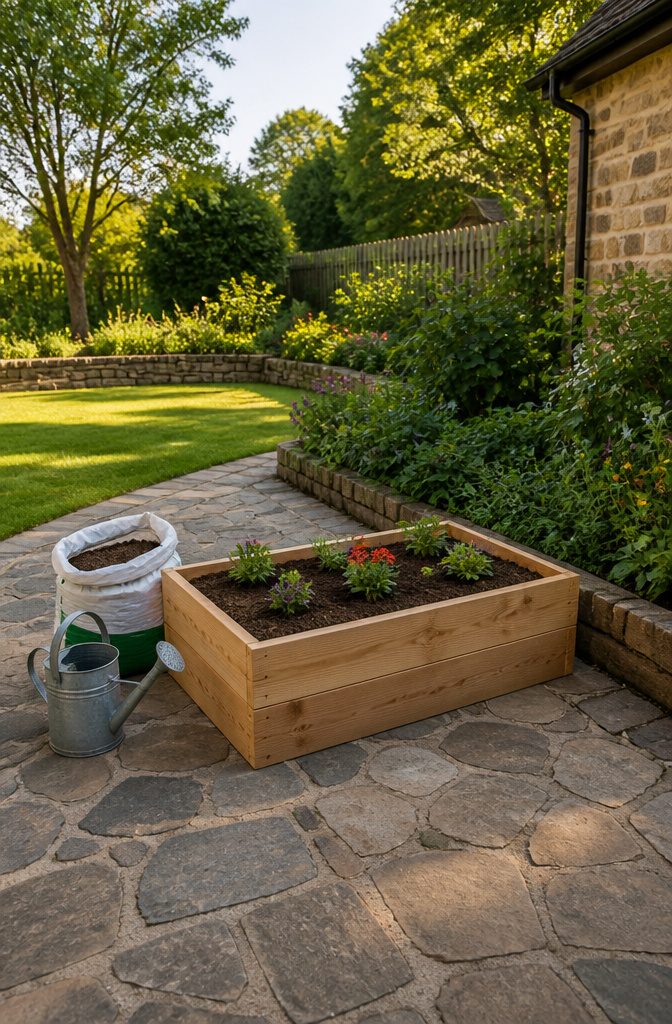
A standard potting mix is the safe starting point for filling your planter box.
Custom soil blends are not necessary for a weekend build; bagged mix is designed to drain well and carry enough nutrition to get plants established without guessing at ratios.
The choice that actually matters is flowers or vegetables. Flowers give you color faster and forgive a slightly shallow box.
Vegetables, especially a single tomato plant or a few herb patches, want more root depth and more consistent water. The planter size you built in the earlier steps decides which direction is realistic.
A small box on a porch looks better stuffed with blooms. A deeper box on a deck or in the yard earns its keep with something you can cook.
Add a few rocks at the bottom if you lined the box, then soil to within an inch of the rim.
That inch keeps water from spilling over when you water. Set plants at the same depth they came in, firm the soil around them, and water until it drains from the weep holes you added.
If you are growing tomatoes, peas, or cucumbers, plan now for a trellis before the roots spread and make retrofitting awkward.
Designs That Change the Build
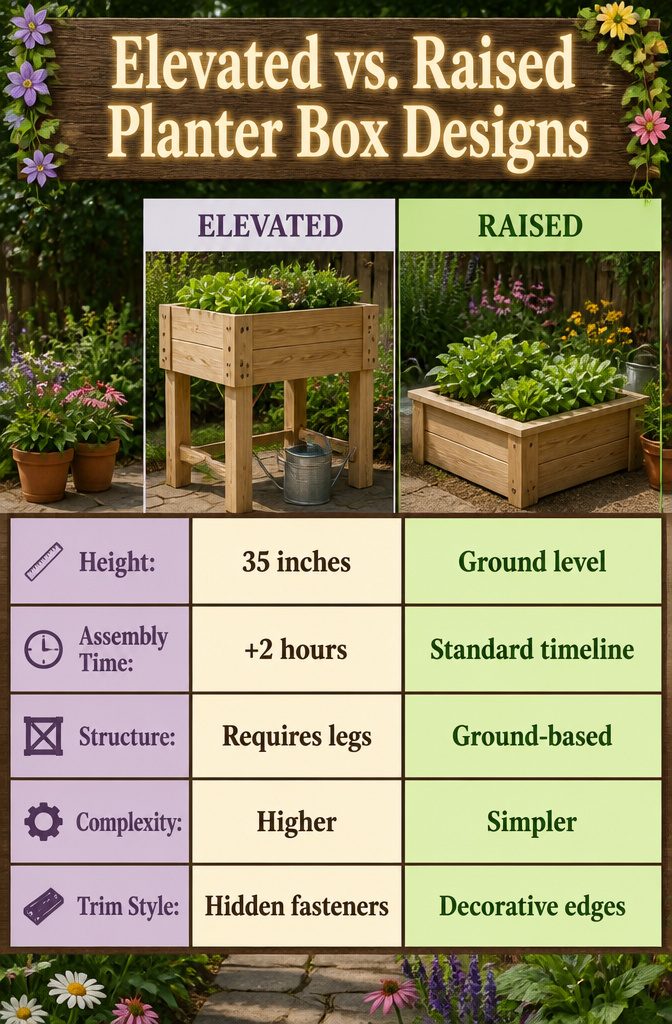
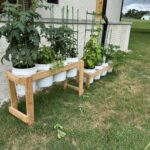
Elevated planter boxes sit on legs, which means you are building a small table first, then a box on top.
The legs run 35 inches on the common build, and that height needs cross-bracing or the whole thing racks sideways the first time you lean on it.
Add two hours for the leg assembly alone, and budget for extra 2×4 stock plus pocket-hole screws you would not need on a ground-level box.
Raised boxes skip the legs entirely. They sit flat on the ground or on a patio, but they still lift the soil line up to save your back and keep rabbits out of the lettuce.
The structure is simpler, so the cut list shrinks and the weekend timeline holds.
Modern styling usually means hiding the fasteners.
Pocket holes face inward or get plugged, and the trim boards sit flush without the decorative cap you see on farmhouse builds. That look costs more time in sanding and fitting, but the exterior reads cleaner from ten feet away.
I would pick raised for a first build, elevated only if bending is genuinely hard on you, and modern trim only after you have cut a few boxes square enough to trust your joints.
What This Costs
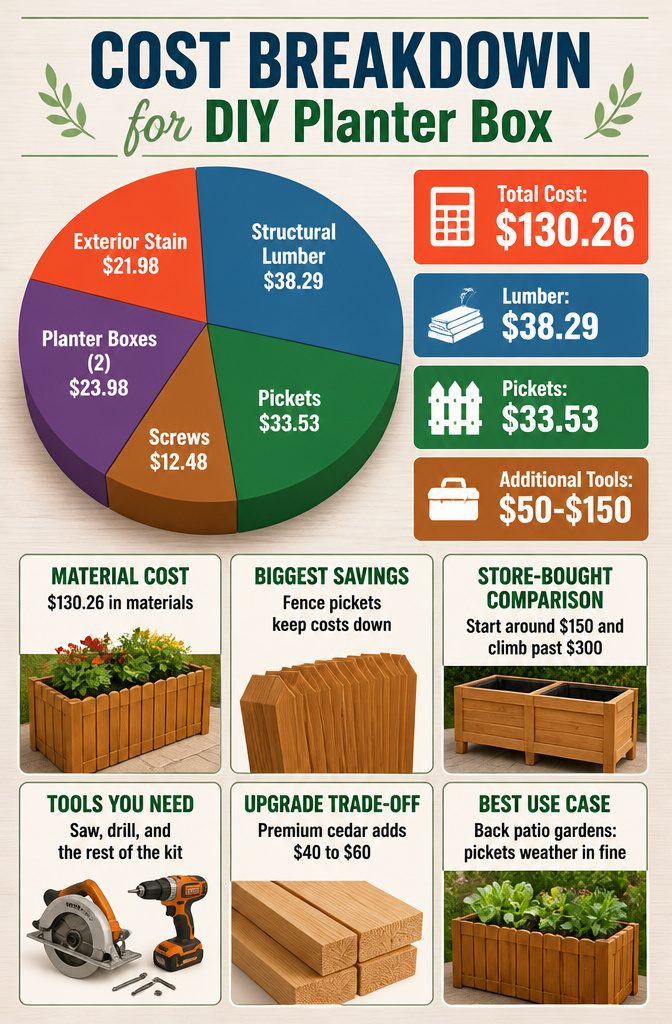
A medium-to-large DIY planter runs about $130.26 in materials, which breaks down to $38.29 for structural lumber, $33.53 for thirteen cedar fence pickets at $2.58 each, $12.48 for screws, $23.98 for a pair of plastic planter boxes to drop inside, and $21.98 for a quart of exterior stain.
That total assumes you already own a saw, drill, and the rest of the kit; factor in another $50 to $150 if you are starting from empty shelves.
Store-bought cedar planters of comparable size typically start around $150 and climb past $300 for anything with real heft.
The savings are real, but smaller than the Pinterest photos suggest. Fence pickets are the budget hero here; swap in premium cedar boards and you add $40 to $60 without changing the footprint.
I would skip the premium lumber unless the box sits at your front entry where the grain shows. For a back patio vegetable garden, the pickets weather in fine.
Elevated Boxes for Easier Gardening
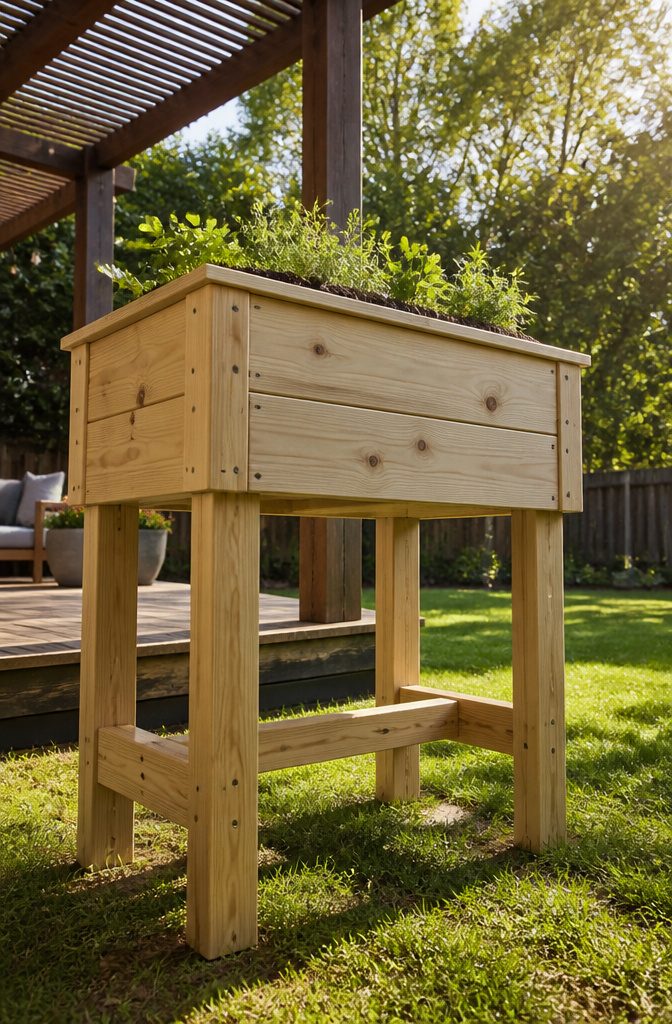
Elevated planter boxes sit on legs or a frame that lifts the soil 30 inches or more off the ground.
That height saves your back during planting, weeding, and harvest, and the gap underneath cuts down on rabbits and some crawling pests. Drainage sometimes improves, too, since water exits freely instead of pooling against a patio or lawn.
The trade-offs are real.
Four 35-inch 2×4 legs plus extra bracing add lumber and cuts to a project that is already lumber-heavy. One build with benches calls for a full pocket-hole setup and nearly a dozen separate board lengths.
The cost climbs accordingly, and if the legs are not perfectly square or the bracing is light, the box racks over a season of soil weight and wet cycles.
For a weekend build on a few hundred dollars, I would skip the legs unless bending is genuinely hard on my knees or pests have already destroyed two ground-level plantings.
A standard box on feet or a simple shelf gets most of the drainage benefit with half the structure.
The legs must be solid, or the whole thing warps; that is the detail that decides whether this style is worth the extra Saturday.
Frequently Asked Questions
What wood should I use for a planter box?
Cedar is the longest-lasting choice at about $2.58 per fence plank and will survive five-plus seasons without rebuilding.
Treated pine resists warping better than raw lumber and costs roughly half as much, making it the practical starting point for a first build or a rental.
Fence pickets cut the material total to around $33 for thirteen boards, but their 5/8-inch thickness needs extra internal framing to prevent bowing under soil and water pressure.
How do I ensure proper drainage in my planter box?
Leave ½-inch gaps between slatted bottom boards rather than using a solid panel, which saves material and lets water escape before it pools. Skip drilled holes alone since they clog within a season or two as soil packs against them.
A layer of landscape fabric across the slats slows clogging and still lets water through, or add a two-inch gravel layer above the slats to create a reservoir where water collects and seeps out gradually without carrying soil with it.
What are the dimensions for a planter box?
The medium build uses six boards cut to 36 inches and six cut to 60 inches, a combination that adds to exactly 96 inches and leaves zero waste from standard eight-foot 2×6 stock.
The large build shifts to 8 feet by 4 feet, matching common raised-bed spacing so you can reach the center from either side without stepping in.
Both use 4×4 legs cut to 18 inches, a height that leaves them slightly above the box walls for optional corner caps or solar lights later.
Is it cheaper to build or buy a raised bed?
Building a medium-to-large DIY planter runs about $130.26 in materials, while store-bought cedar planters of comparable size start around $150 and climb past $300 for anything with real heft.
The savings are real but smaller than social media suggests, and that $130 figure assumes you already own a saw, drill, and basic kit.
Factor in another $50 to $150 if you are starting from empty shelves, which narrows or erases the gap against entry-level store options.
How much would it cost to build my own planter box?
A typical DIY build costs $130.26, broken down as $38.29 for structural lumber, $33.53 for thirteen cedar fence pickets, $12.48 for screws, $23.98 for two plastic planter boxes to drop inside, and $21.98 for a quart of exterior stain.
Fence pickets are the budget hero; swapping in premium cedar boards adds $40 to $60 without changing the footprint. Skip the premium unless the box sits at your front entry where the grain shows.
What is the best material to use to build a raised planter box?
Cedar outlasts everything else and holds up fine without any finish at all, though it costs the most up front.
Treated pine resists warping far better than raw lumber and lets you build two boxes for the price of one cedar unit, making it the smart pick for a first build.
For the bottom and drainage, slatted boards with gaps beat a solid panel, and landscape fabric or gravel on top of those slats prevents soil from washing out while still letting water escape.