Garden pathways run from free wood chips that need topping up each year to mortared stone that costs weekends of cutting and fitting, and the right choice depends more on your soil than on your style.
Before picking a material, I walk the route after a hard rain to see where water pools. Gravel sinks into puddles over clay, and wood rots where drainage stalls.
[link-whisper-related-posts]1. Gravel Pathways
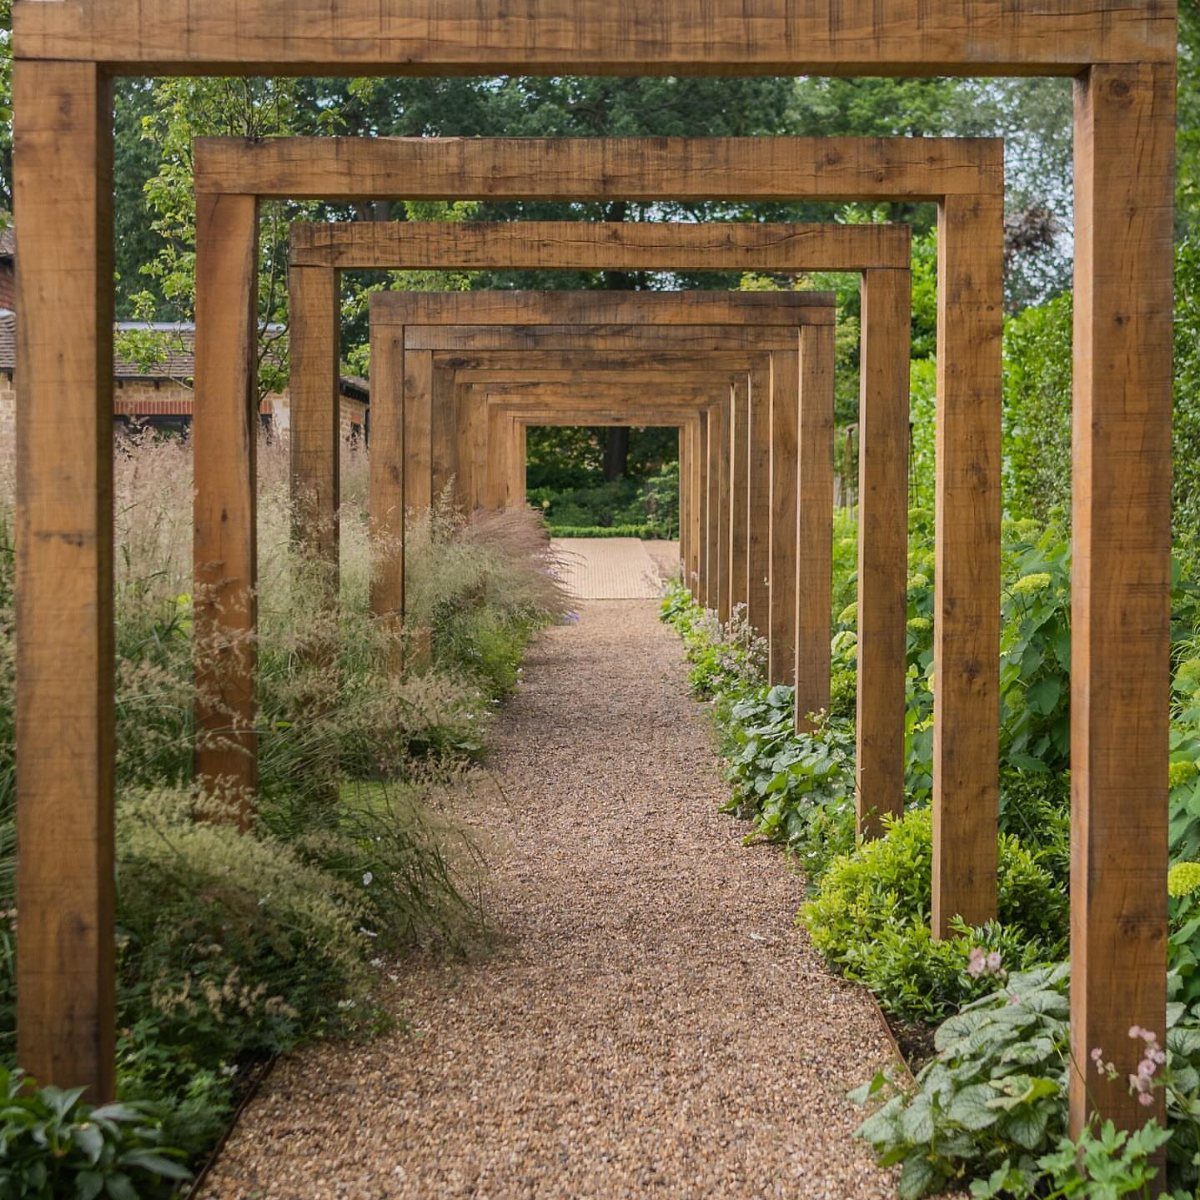
A gravel path with wooden beam arches overhead turns a simple walkway into a garden room.
I like this version because the structure gives the gravel something to push against; without a frame, gravel spreads into the lawn inside a season.
Check your drainage first. Water pools in gravel if the ground underneath holds it, and you will rake the stone back into place after every hard rain.
The arches here are spaced close enough to feel deliberate; wider spacing looks accidental. Budget for a gravel path runs mostly to the lumber edging that keeps the stone in place.
2. Stepping Stones
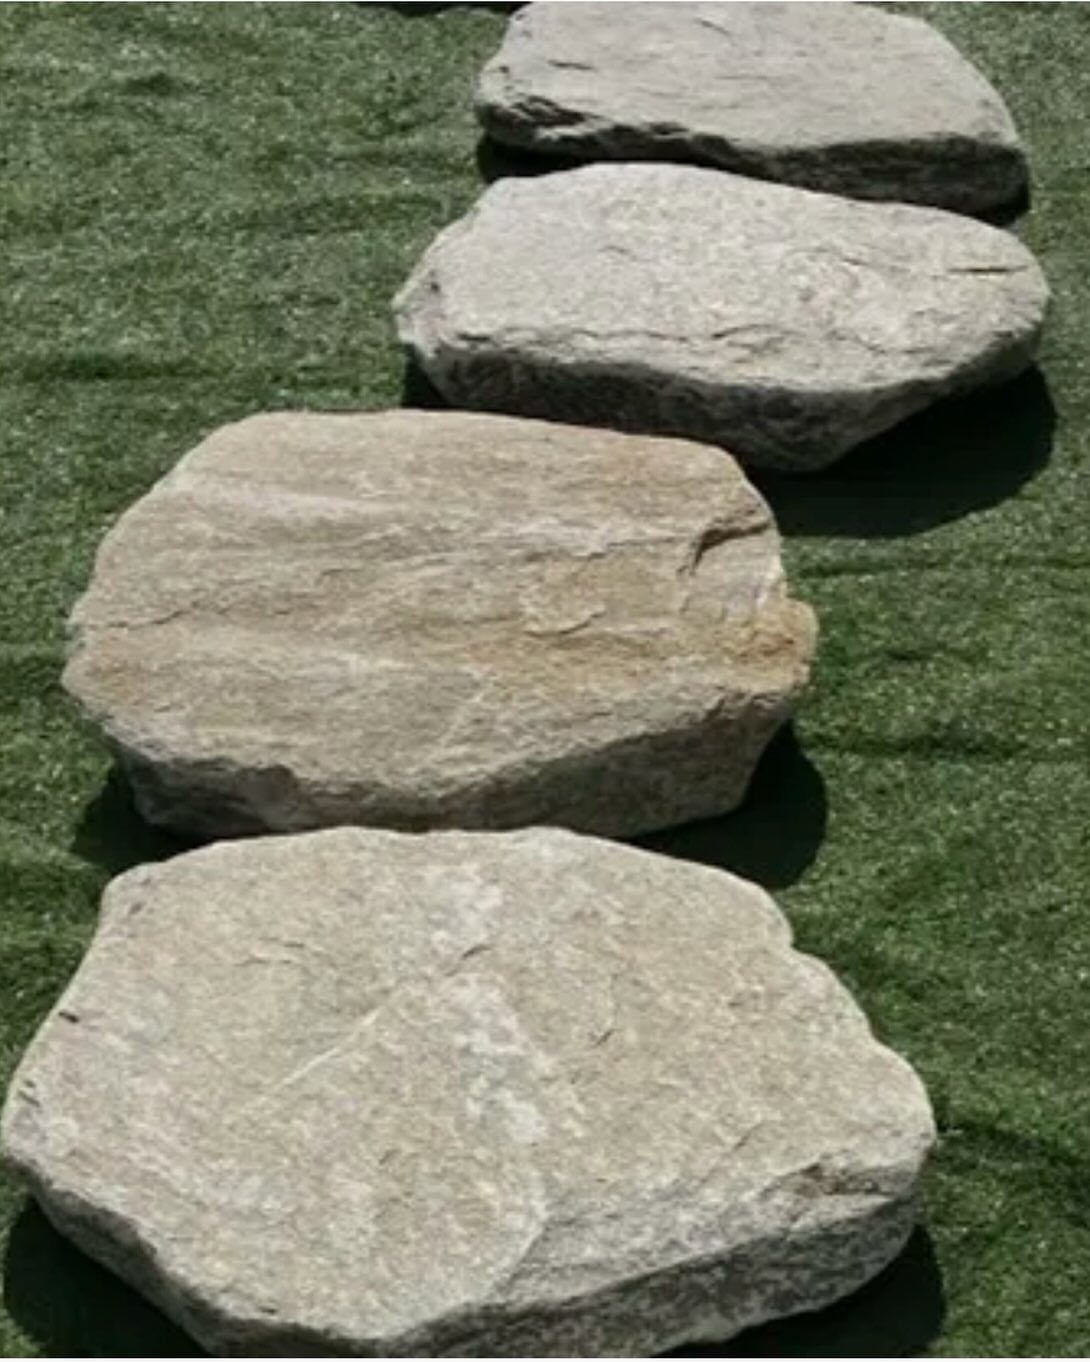
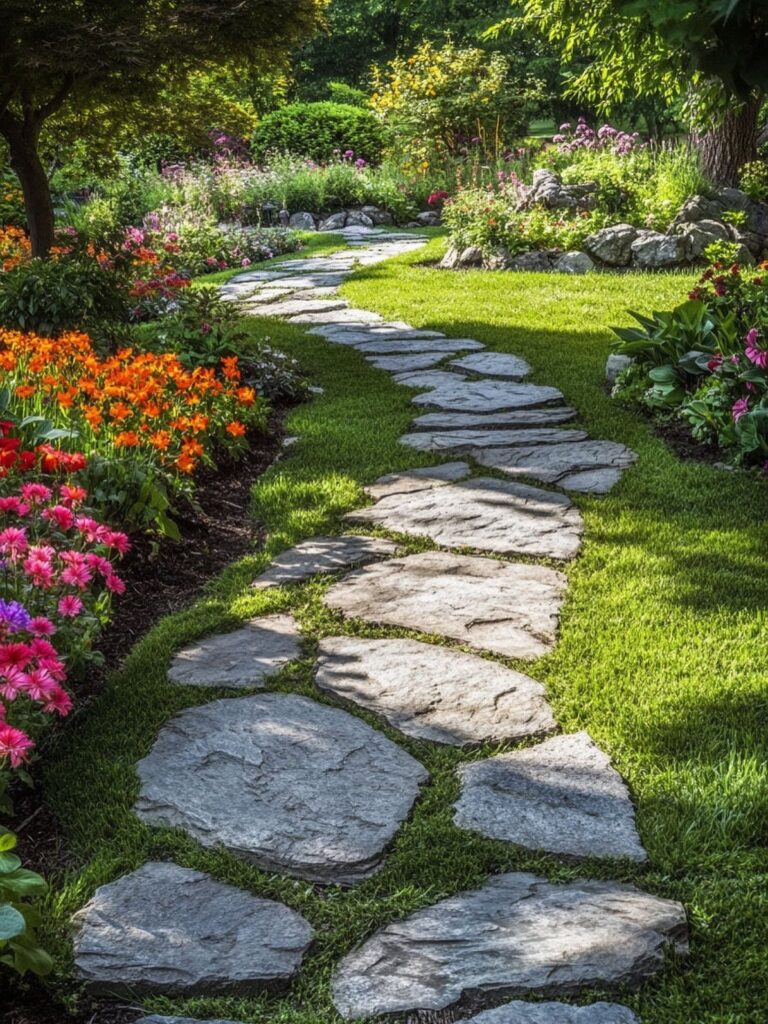
Thick, rough-cut slabs work best when you want the grass to stay visible between them.
I would set these slightly low, not flush, so the mower deck passes over without catching. The gaps also let water through, which matters if your yard slopes even a little.
Measure your stride before you buy.
Place cardboard where the stones will sit and walk it twice; a stride-width apart suits most people. Natural stone slabs cost more at a yard, or you can cast concrete in a form for a fraction of the price.
Either way, dig out a couple of inches and set each piece on a bed of sand so it does not rock.
Lay stones a comfortable distance apart for stepping, with about 18 to 24 inches between the center part of the stones. Steps should be uniformly shaped, 4 to 8 inches tall and at least 12 inches deep.
3. Brick Pathway
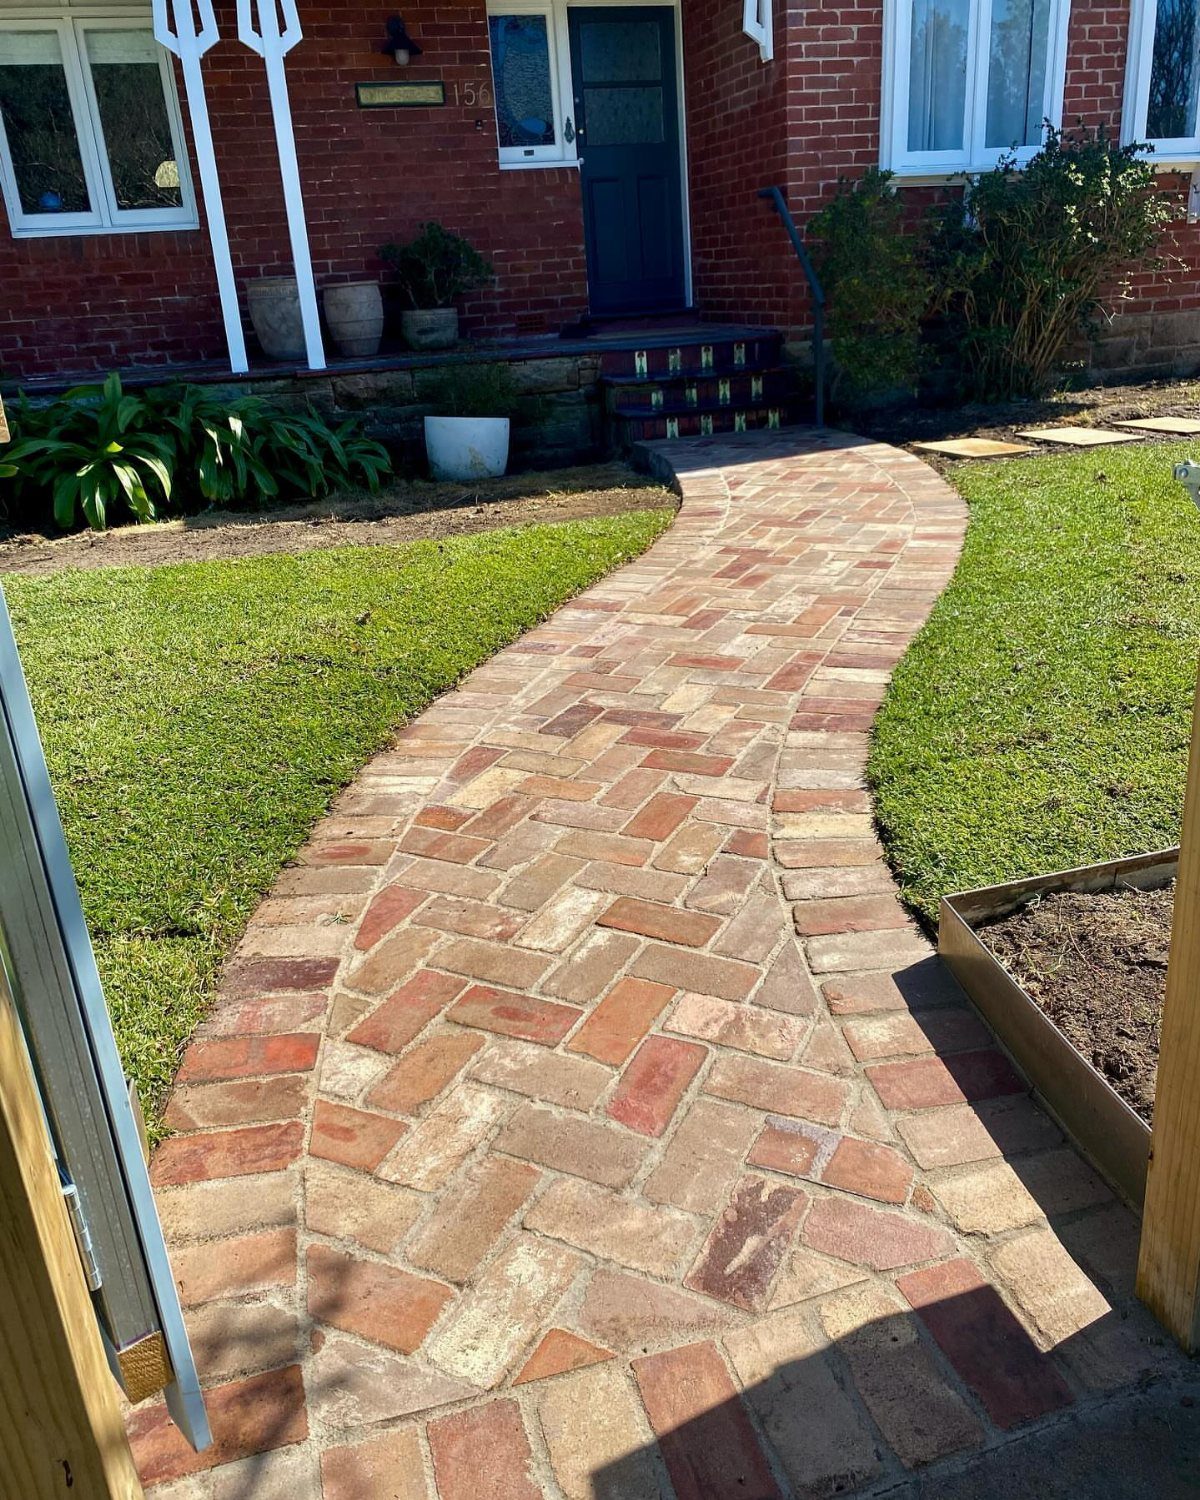
Herringbone is the pattern I would choose for a brick path that curves. The angled joints lock together under foot traffic better than running bond, and the curve reads as intentional rather than a mistake in a straight pattern.
The border bricks are laid flat, soldier-course style, which contains the herringbone field without a separate edging material.
That saves a step and looks cleaner. Standard modular brick is cheap per piece; figure several per square foot for herringbone, and buy extra for cuts and breakage.
Clay brick holds color for decades, but it is slick when wet; if your path stays shaded, I would look at textured pavers instead.
4. Wood Pathways
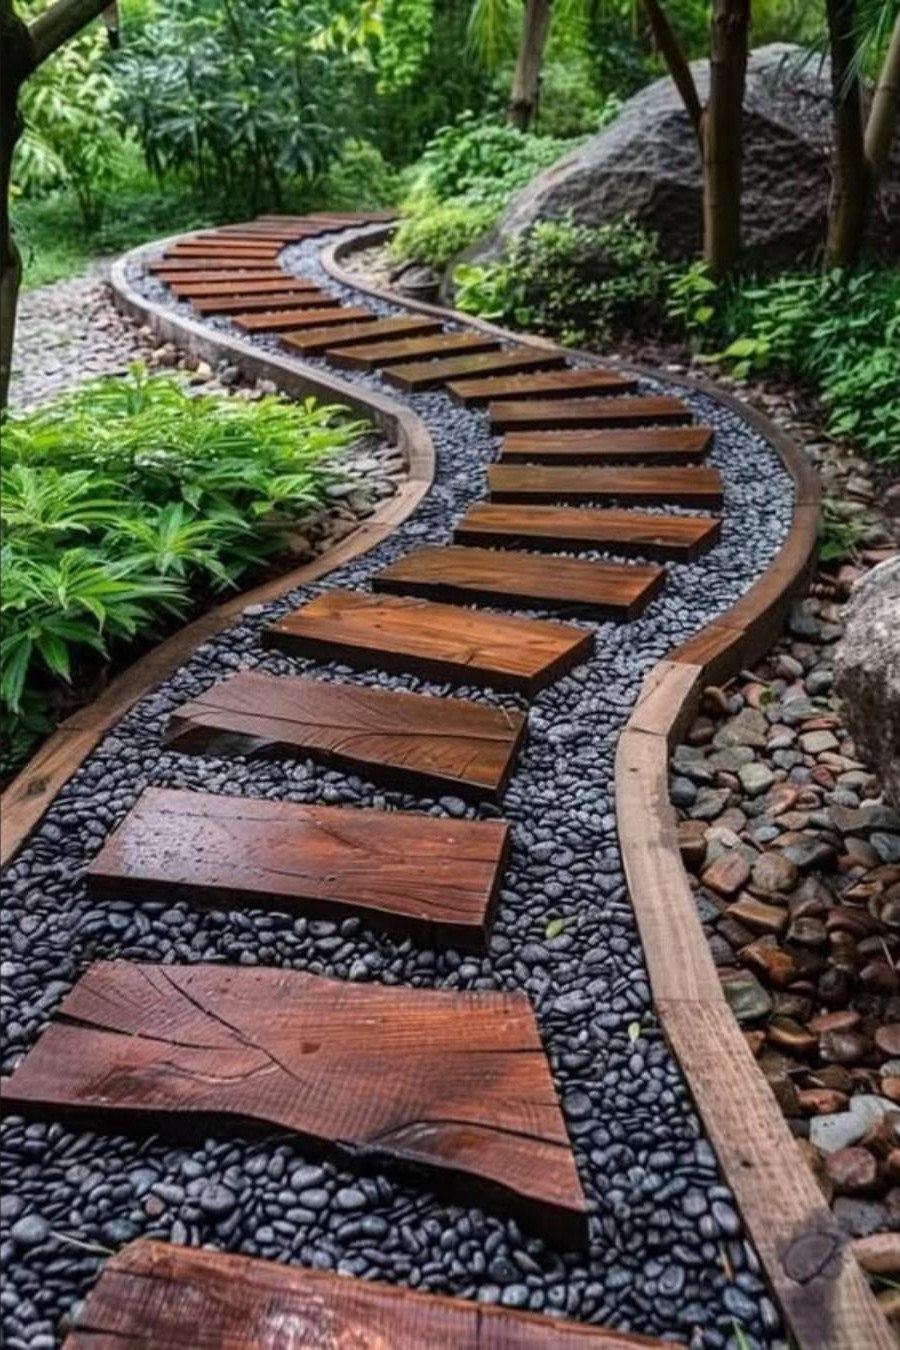
Dark planks set into darker gravel read as one continuous surface, which I prefer to the high-contrast versions where the wood looks dropped onto the stone.
The curved edging here follows the same rhythm as the path itself; the whole thing looks planned rather than assembled from leftovers.
Use rot-resistant species or pressure-treated lumber rated for ground contact. Even then, I would expect a handful of years before the planks start to soften.
The irregular shapes are cut freehand with a jigsaw; if you want cleaner lines, rip deck boards to width and leave a small gap for drainage.
Either approach, lay landscape fabric under the gravel first or you will be weeding between stones by July.
5. Wood Chip Paths
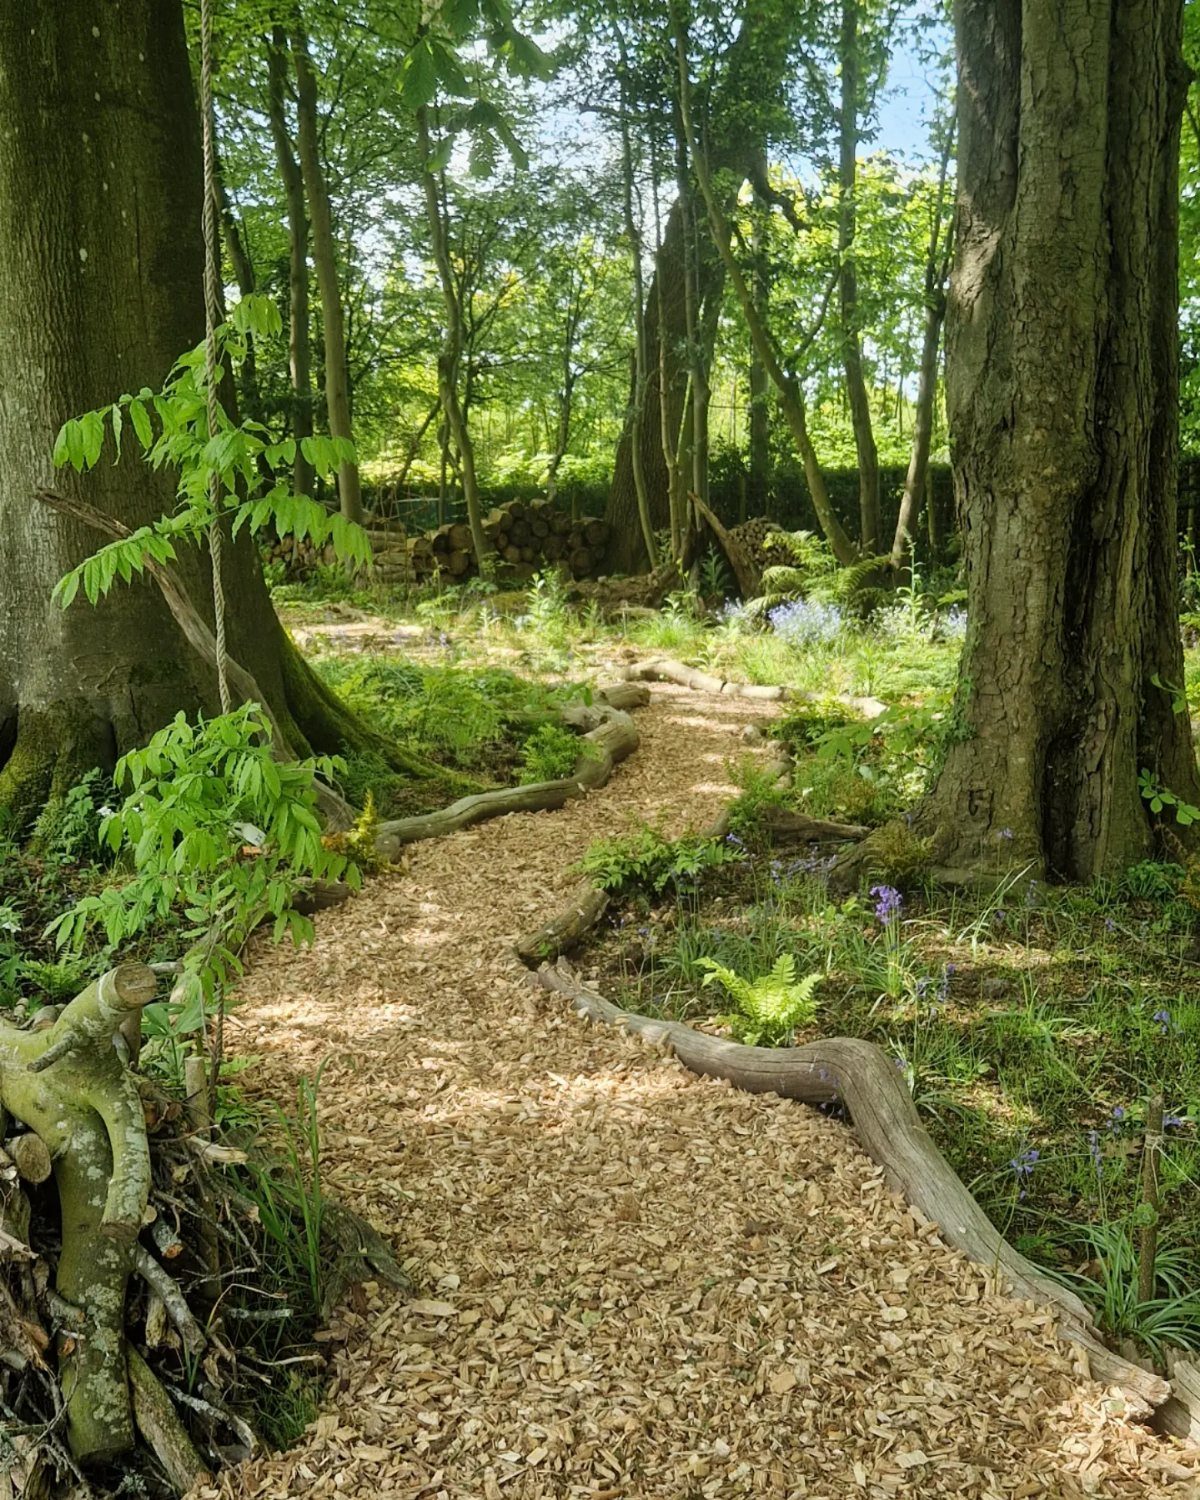
Wood chips are the cheapest path surface that still looks like a decision. I would use them for a route that winds through trees, where grass struggles anyway and the informal edge blends into the understory.
The log edging here is doing real work: without it, chips migrate into the planting beds and thin in the center.
Fresh chips take nitrogen from the soil as they break down, so keep them back from the base of any plant you care about.
Expect to top up each year; a cubic yard covers a decent patch at that depth and can be delivered for under a tank of gas.
After a couple of years the oldest chips break down into something like soil, which is either a maintenance cycle or a design feature depending on your patience.
6. DIY Stone Walkways
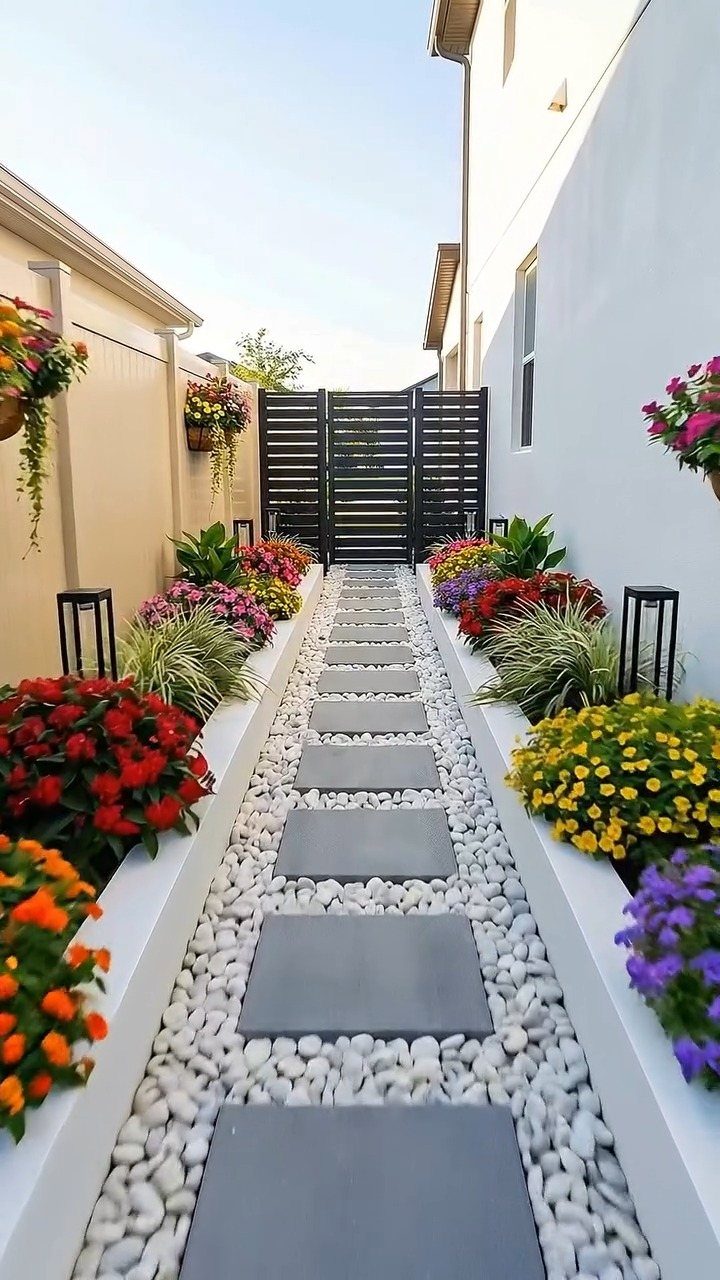
The pavers sit on top of the rock, not mortared in. That means you can lift and relevel if frost heave shifts one, but it also means they rock slightly until the gravel settles.
Tamp the base, add a shallow bed of sand, set the paver, then sweep rock tight to the edges.
The beds are built from stacked retaining wall block; a shallow bed is enough for annuals and small perennials, though I would go deeper if you want shrubs.
7. Mosaic Walkways
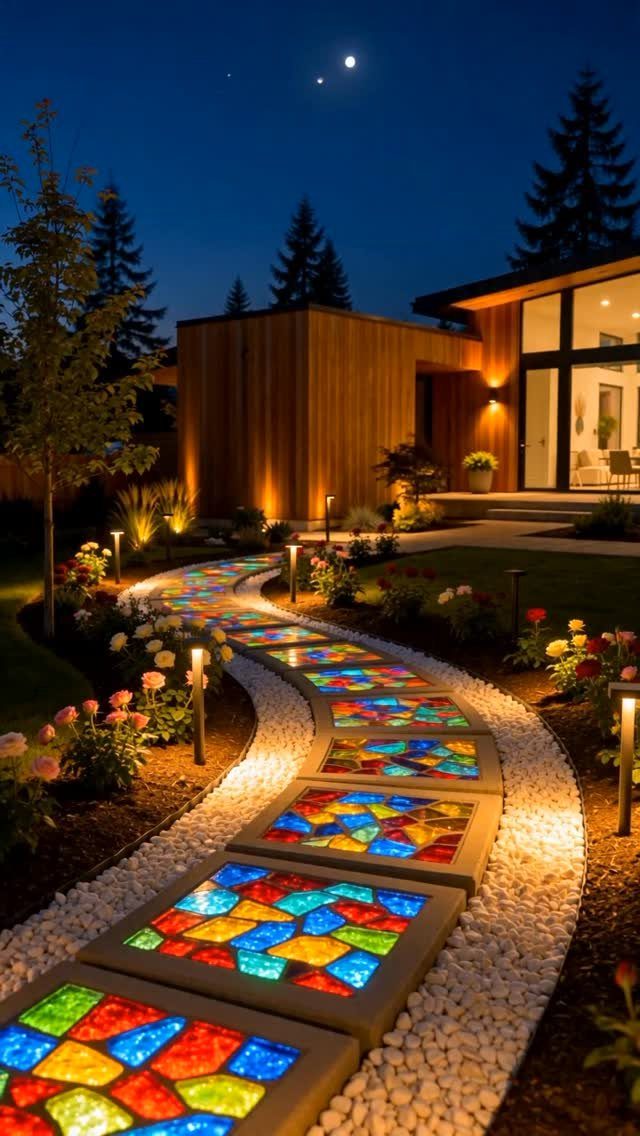
A mosaic path is the most personal surface on this list, built from glass or tile set into mortar rather than laid like pavers.
I would keep the pattern simple; too many colors read as clutter underfoot, and the glow you get at night comes from reflection, not from the pieces themselves.
The illuminated tesserae in this mosaic walkway glow from within the pavers themselves, not from any surface reflection.
That surround is doing the work, not the mosaic alone. If you try this, expect weekends of cutting and fitting; the mortar bed has to be level or your ankle will notice every lip.
I would build a short test section first to see how the colors read at dusk, when you will actually use the path.
8. Mixed Material Pathways
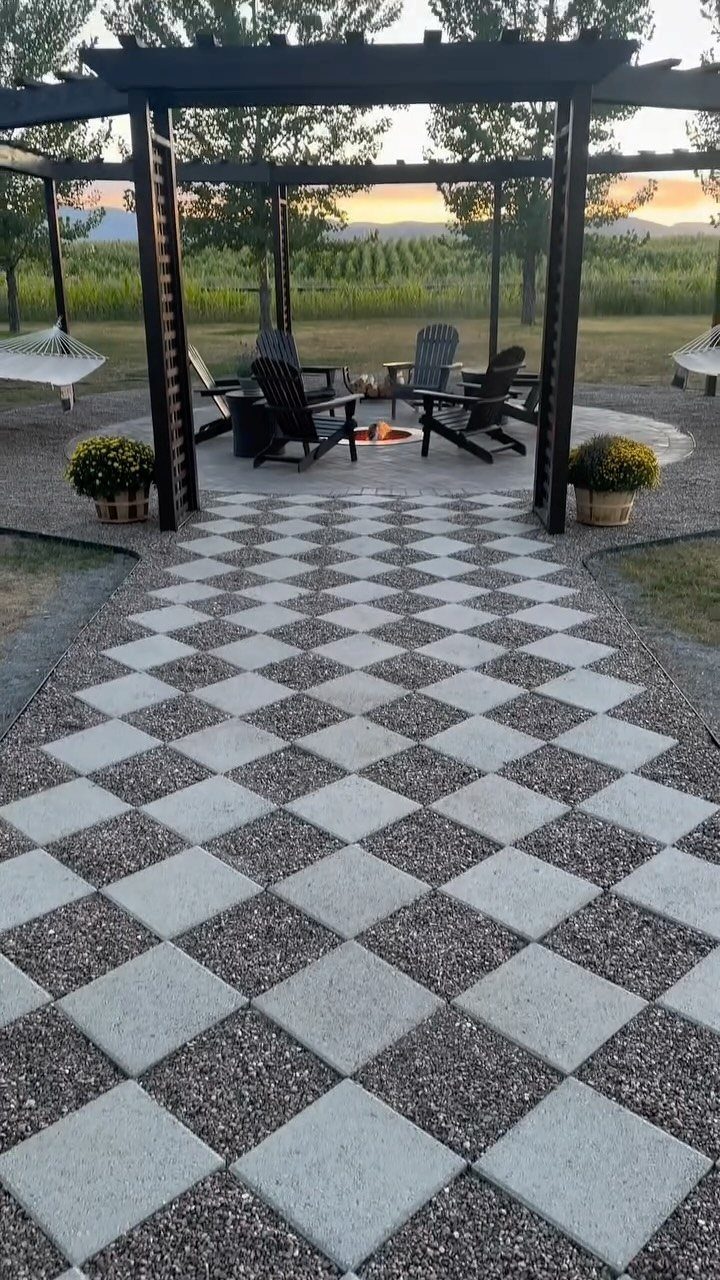
Checkerboard pavers and gravel trade the uniform look for something easier to install straight. You lay the paver grid first, leaving gaps, then sweep stone into the open squares; no cutting to fit a curve, no pattern to maintain.
The gravel handles drainage between the pavers, which matters under a pergola where rain drips through.
The contrast here is sharp: light concrete against dark stone. I would reverse it for a shaded yard, where pale gravel brightens the path.
The pergola overhead makes this read as a room, not a corridor, which is worth planning for if your destination is a fire pit or seating area you will use after dark.
Tamp the gravel well or it will shift underfoot and expose the fabric beneath.
9. Reclaimed Brick Paths
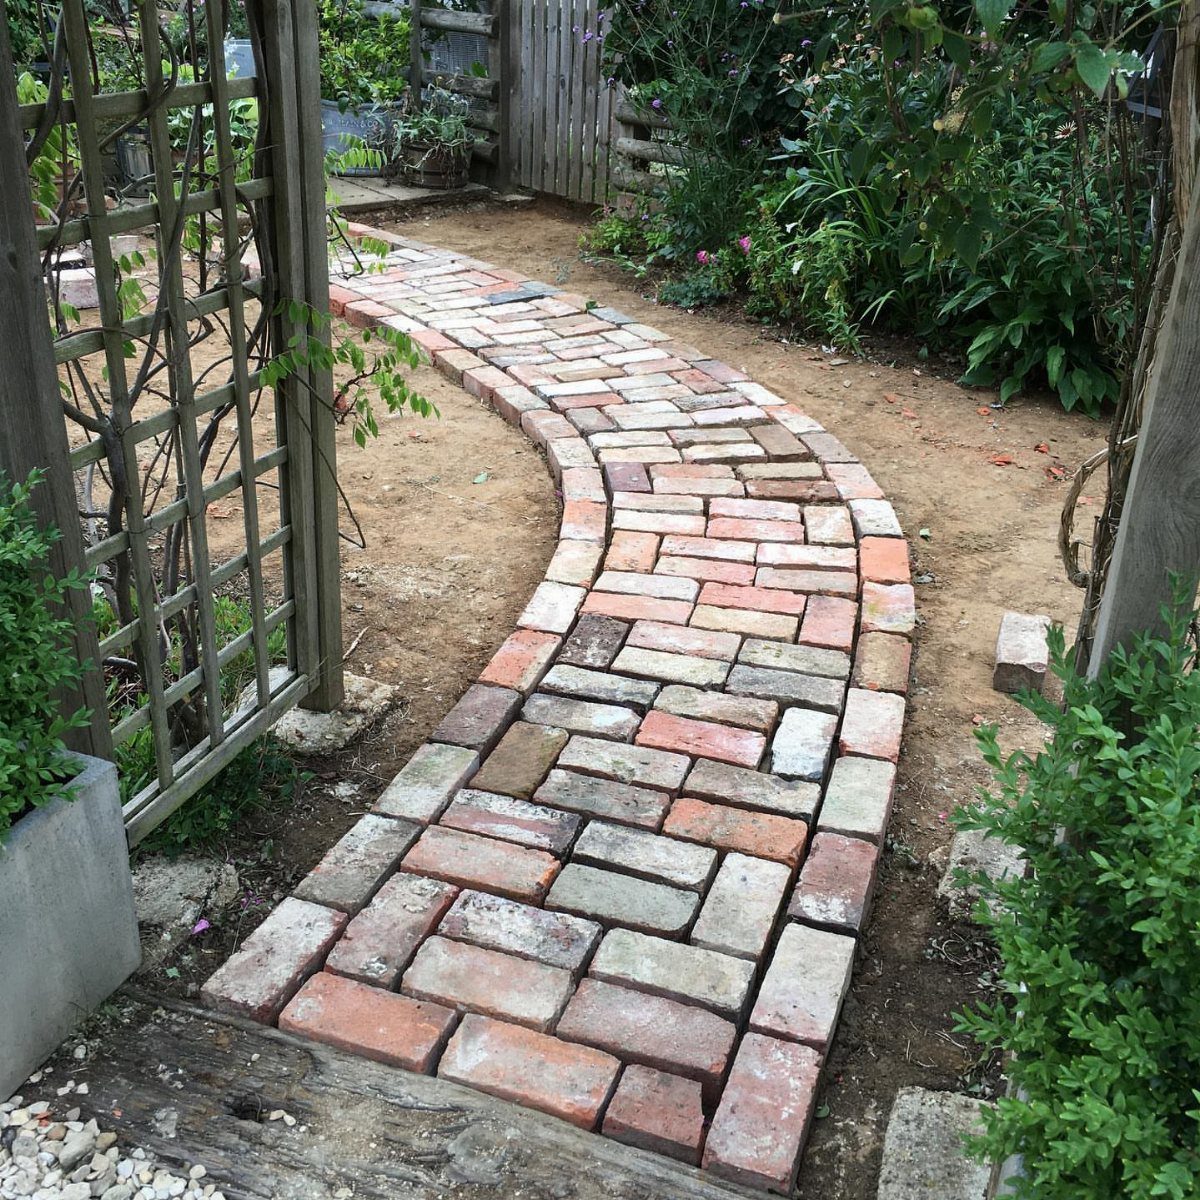
Salvaged brick carries color variation that new clay cannot match, and the soft edges read as settled in, not installed last weekend.
Herringbone brick laid straight into soil, not sand or mortar, only works where the ground drains well and stays firm.
I would check each brick for remaining mortar clinging to the sides; knock it off or the piece will not sit flat.
The bare soil joint is a choice, not a shortcut: it lets plants edge in, which suits an informal garden but will need edging if you want the line to hold.
Expect to weed. The trellis alongside gives the curve something to head toward, which I think matters more than the pattern itself; a path without a destination looks like a patio that got lost.
10. Concrete Paver Pathway with Solar Lights
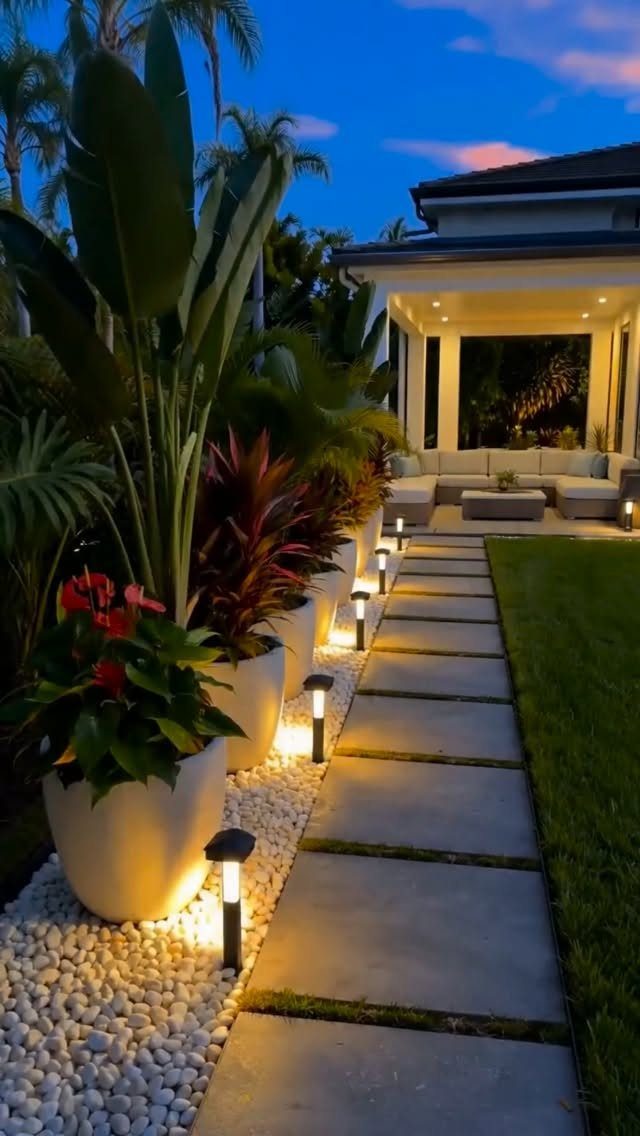
Large rectangular pavers set with grass joints look lighter than a solid runway, and the gaps let water through to the soil instead of sheeting off.
The white pebble border here is doing visual work, separating the path from the lawn so the grass does not swallow the edges.
The solar lights are spaced to catch footfall, not to read as runway markers; I would set them slightly offset from the path center so they illuminate the paver face, not the space between.
Concrete pavers this size are heavy to move but cover ground fast; plan on buying more than you think and having help on hand for delivery day.
The tropical planting in pots can be shifted when the light changes, which is the advantage of not planting directly against a path you need to maintain.
Choosing Path Materials
I start every path decision with how the ground behaves in my yard, not how the material looks in a photo.
Water is the material that undoes every other one: gravel sits in puddles over clay, wood rots where drainage stalls, and bark chips turn to mud then dust in the wrong spot.
Walk the line after a hard rain and watch where the water wants to go before you choose what goes on top.
Climate extremes matter for the work, not just the look.
Bitter cold heaves pavers out of level; extreme heat softens some plastics and warps wood. I check local codes only when the path ties to a driveway or patio, since permits stack cost and delay.
Slopes steer the choice toward brick, pavers, or planks; gravel and bark migrate downhill unless you cage them, and that framing costs more than the surface.
A path on firm, well-draining ground gives you more options.
A path on silt or clay, or one that shoots straight down a grade, narrows them fast. Match the material to the ground it sits on, and the maintenance drops by half.
Budget Considerations
I borrow tools before I buy them. Measure the path before you shop; knowing the square footage keeps you from overbuying stone or gravel by the truckload, and the leftover bags in a garage are a small tragedy.
Mulch and bark chips run cheapest at the start. A local landscape company may drop them free rather than pay landfill fees, though you take what they have that week.
The real cost hits fast: chips settle and thin out every year, so the low front-end price turns into yearly topping up by the wheelbarrow.
Flagstone and pavers cost more to acquire but sit still for decades; gravel splits the difference, cheap to lay, cheap to top up.
Salvaged brick and used pavers cut the material bill if you have patience and a vehicle to collect them.
I would not plan the pattern until the pieces are in hand; a herringbone field built from found brick means sorting for size first, then designing around what matched.
Set the budget with the second number in mind: what the surface costs to keep, not just to install.
Frequently Asked Questions
What is the cheapest option for a garden path?
Wood chips cost the least of any material that still reads as a finished path rather than a shortcut; gravel sits one rung above them in price.
Gravel costs more up front but settles into a longer cycle of occasional raking and rare refills.
What are some creative walkway ideas for my garden?
A mosaic path in glass or tile is the most personal option, though it takes weekends of cutting and fitting.
For something faster, checkerboard pavers with gravel swept into the gaps need no curved cuts and handle rain under a pergola. Reclaimed brick with bare soil joints lets plants edge in, which reads as settled rather than installed last weekend.