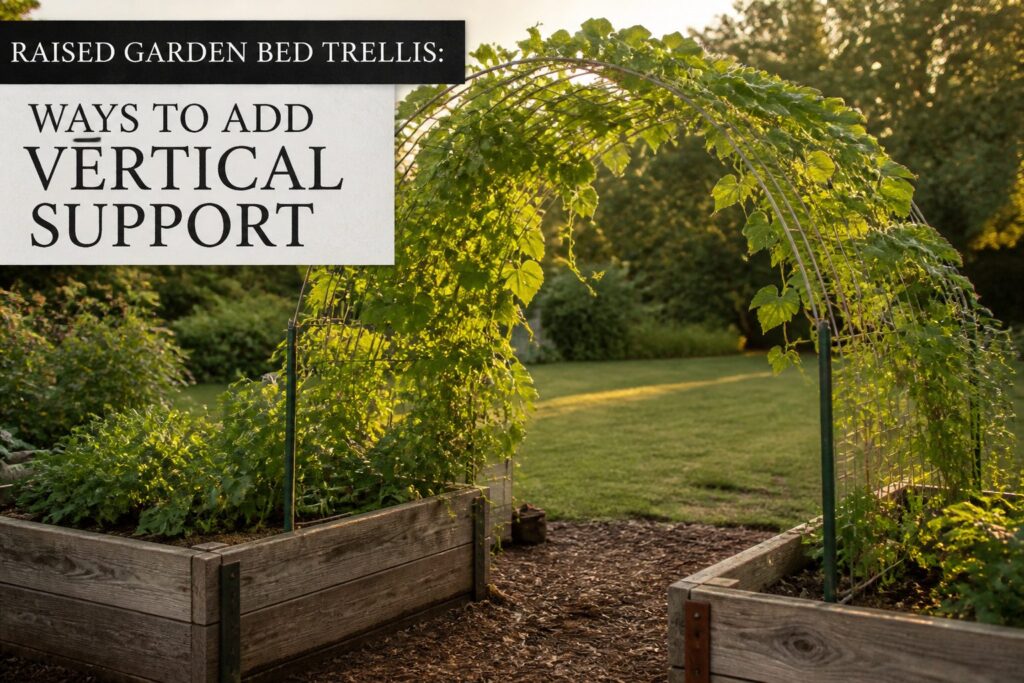
A cattle panel bent into an arch between two raised beds gives you 5 to 6.5 feet of vertical growing space for about $25, but only if you drive the support posts a full foot into the ground first.
Skip that depth and the whole structure leans by August under the weight of full-grown vines.
The narrower wire spacing along one edge of the panel has to face upward, a detail you mark before the first post goes in, or the trellis finishes lopsided no matter how tight your zip ties.
[link-whisper-related-posts]1. Install Support Posts
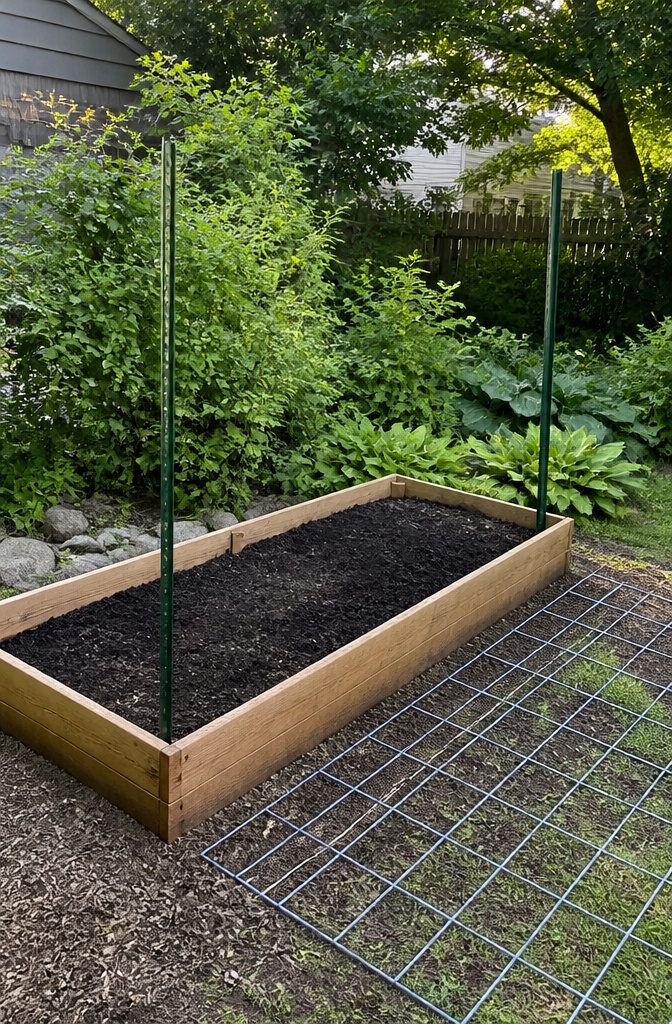
Two fence posts driven into the ground at the back corners of your raised bed are what keep the whole trellis from leaning or pulling free by August.
I would use T-posts, which run about $4 each, and a post driver rather than trying to hammer them in by hand.
A post driver gives you the weight to set them a foot below ground level, and that depth matters more than the post height you see above the soil.
Before you drive anything, lay your cattle panel across the bed to mark exactly where the posts need to land.
One long edge of a standard panel has narrower wire spacing, so getting the orientation right now saves you from a lopsided trellis later. Pound the first post, check for wobble, then do the second.
If the bed itself is braced against a second raised bed with about 4 feet of clearance between them, the posts gain even more stability once the panel is bent and wired into place.
This is the step worth doing slowly. Every other trellis style in this article builds on these two anchors, and a post that lists even an inch will throw off the whole structure.
2. Position the Trellis
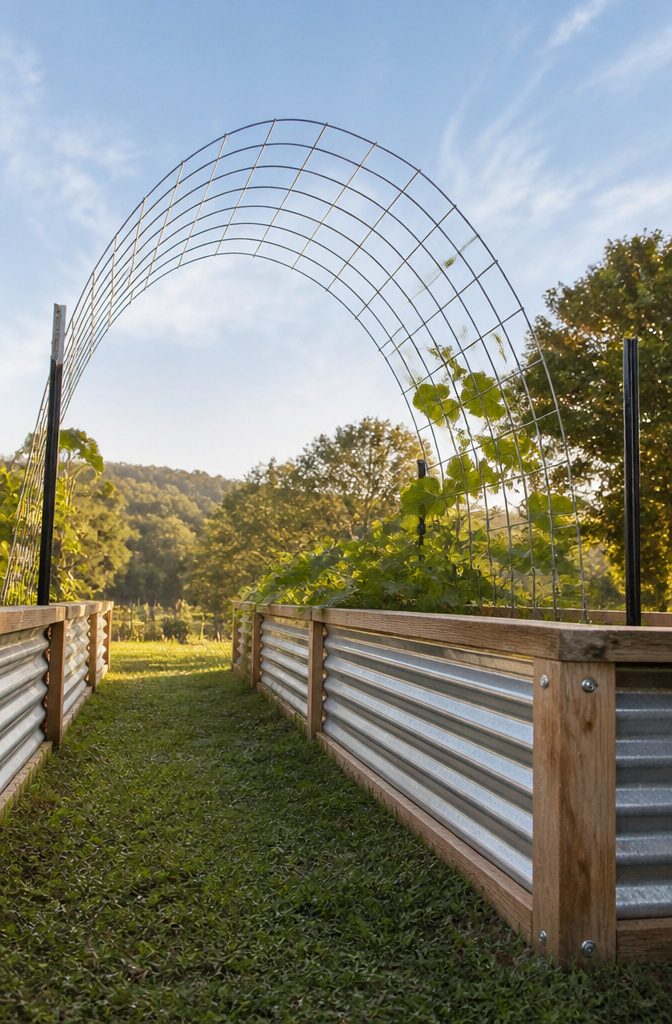
A 16-foot cattle panel runs about $25 and measures 34 inches across, which is the piece that makes this whole setup affordable.
Drive your posts into the outer back corners of two raised beds set roughly 3 feet apart, then bend the panel into an arch between them.
The curve is what gives the structure its stiffness; a flat panel wobbles, but the arch carries wind without complaining. Most climbing vegetables want 5 to 6.5 feet of height (1.5 to 2 meters), and a standard panel lands right in that window.
Go taller only if your vines are truly aggressive, because every extra foot multiplies the wind load and tests whatever you’ve driven into the ground.
A second pair of hands matters here. One person can wrestle 50 inches of steel alone, but bending it evenly while keeping the base aligned with both posts is a job that goes smoother with someone on the opposite end.
Once the curve looks right and the panel sits between the posts, you’re ready to lock it in place.
3. Secure the Trellis
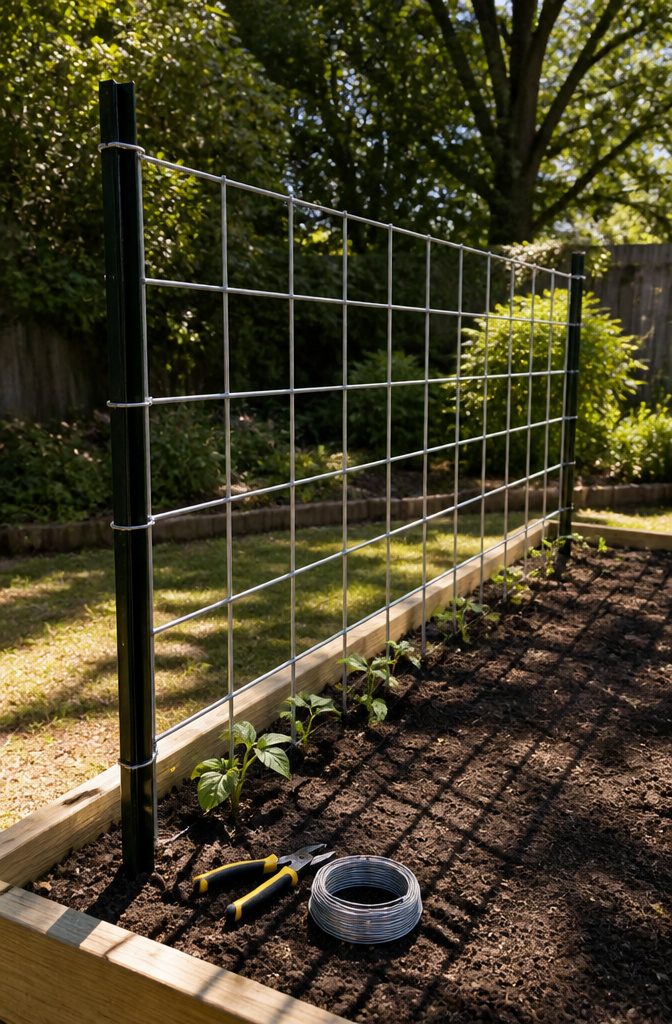
Zip ties or wire ties both work, but wire ties hold up longer against sun and temperature swings. I would skip the plastic if the bed sits in full southern exposure all summer.
A cattle panel or 4 by 8 foot wire mesh sheet needs at least four attachment points per post, spaced from ground level to the top.
That spacing keeps the panel from bowing outward once the vines fill out and catch wind. Two people make the job faster, one holding the panel upright while the other threads the ties and pulls them tight.
Cut the excess tie length and sand or file the sharp end. The ten minutes you spend securing the trellis saves a season of re-tightening or, worse, watching a heavy tomato vine pull the whole panel loose in a storm.
A tight grid pattern gives more support points than wide lattice, and that stability matters more than how the trellis looks in March before anything has climbed it.
4. Plant at the Base
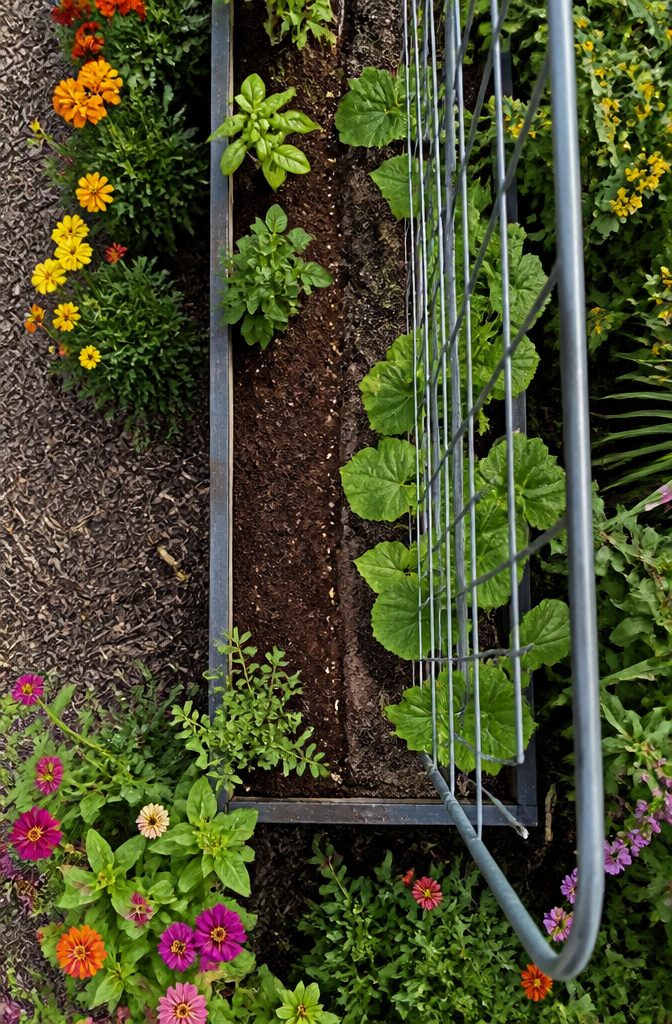
Seeds or seedlings go in right at the base of the trellis, close enough that a young vine can lean over and grab the support on its own.
Plant seeds 1/4 to 1/2 inch deep, which is shallow enough for quick germination but deep enough that a hard rain won’t wash them away.
For pole beans, space them 2 to 6 inches apart depending on the variety; check your seed packet, because some bush-type climbers want more room at the soil line than aggressive twining varieties.
I would not crowd the base with extra crops, though some gardeners layer lettuce or herbs in front of the trellis to squeeze more from the bed.
That works on paper, but in a weekend project with a few hundred dollars in it, the lettuce competes for water and nutrients while the vines are still small and vulnerable.
Give the climbers a clean run at the trellis for the first month, then decide if you still want that second layer once the vines are established.
5. Guide and Maintain Growth
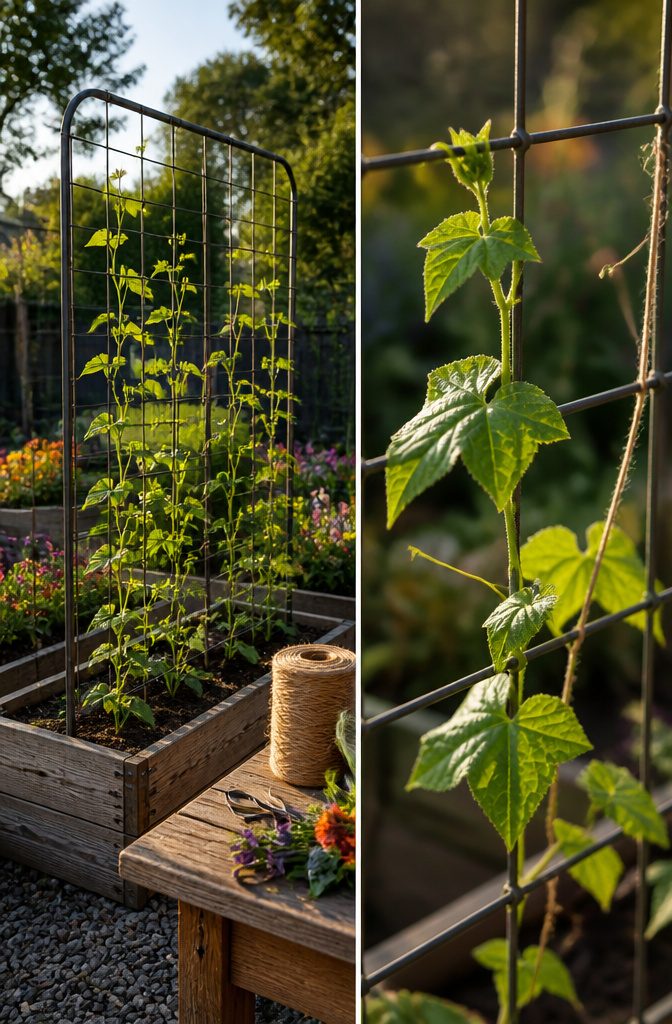
Check plants every morning while the stems are still soft, and guide new growth onto the trellis before it sets in the wrong direction.
I use garden twine for tomatoes that do not climb on their own, looping it loosely around the fresh growth every 7 to 10 days so the tie does not cut the stem as it thickens.
For beans, peas, and cucumbers, the tendrils usually find the wire or mesh themselves, but a gentle nudge toward the nearest vertical saves a tangle later.
Fruits need watching too. Small melons and winter squash grown vertically will split their own stems under their weight unless you add a sling.
A strip of old t-shirt or burlap tied to the trellis and cupped under the fruit does the job without marking the skin.
Indeterminate tomatoes, pole beans like Emerite, and tall Sugar Snap peas up to 7 feet all repay this attention with cleaner air circulation and fruit that does not rot against the soil.
Skip the daily check and you will spend a Saturday untangling instead of harvesting.
6. Harvest from Vertical Growth
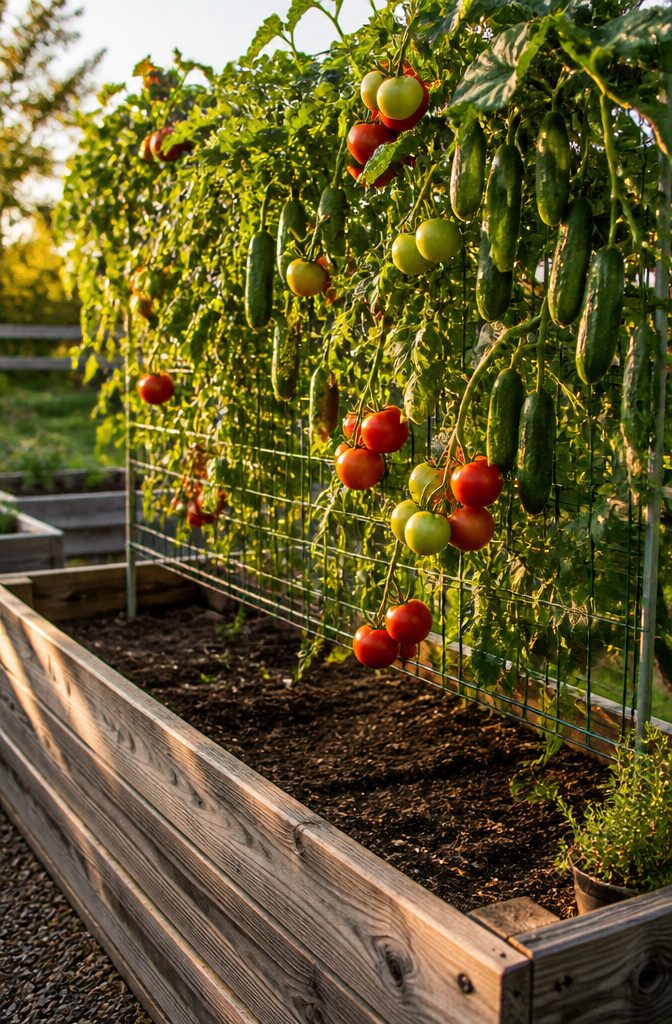
A trellis on a raised bed brings the fruit to a height where you do not have to kneel or hunt beneath leaves.
Cucumbers hang clear of the soil, tomatoes cluster at chest level, and pole beans dangle in rows you can see and reach.
That vertical positioning means harvesting takes half the bending, and your back notices the difference after a morning of picking.
The structure also keeps produce dry and off the ground, so you spend less time cutting away the slug-nibbled or rot-softened portion of an otherwise good vegetable.
Ripe fruit shows itself against the open grid instead of hiding under a sprawling canopy.
I find that visibility matters more than I expected; when I can spot a zucchini the day it is ready, it comes in at the right size rather than turning into a baseball bat because I missed it for a week.
A loaded trellis can lean or sag mid-season under the weight of a full crop.
Check the frame when the first heavy fruit sets, and add a brace if the posts start to bow. A five-minute reinforcement in July saves the whole geometry of the bed by August.
7. Wire Panel Trellis
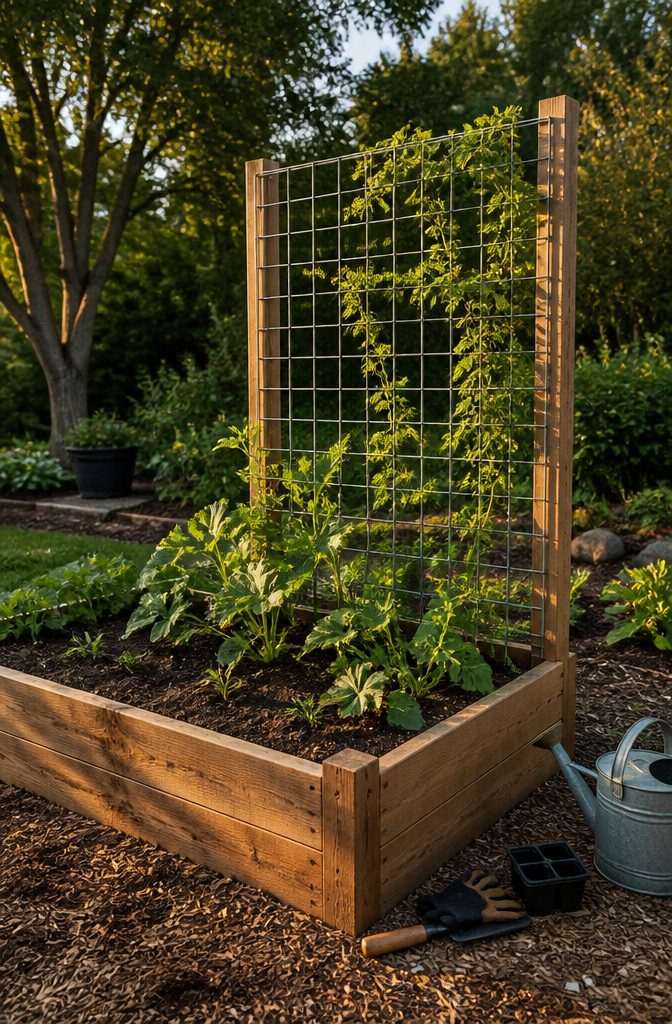
Metal mesh or a repurposed cattle panel turns into a sturdy, flat screen with a rugged grid that heavy vines can actually grip.
I would mount it to wooden posts screwed into the back of the raised bed, or look for a kit that connects straight to the bed frame for cleaner lines and less hardware.
Cattle panels come in 16-foot lengths and run about 4 feet wide, so one panel often spans two beds if you bend it into an arch between them.
For a flat wall, 4 by 8 foot sheets of metal mesh work the same way and zip-tie neatly to stakes.
The rigid grid openings give tendrils and stems plenty of attachment points, and the weight capacity handles bottle gourds, squash, and climbing beans without sagging.
Galvanized steel holds up season after season, which matters if you are not rebuilding your setup every spring. Cost drops sharply if you catch second-hand livestock panels at a barn sale or farm auction.
8. Arch Trellis
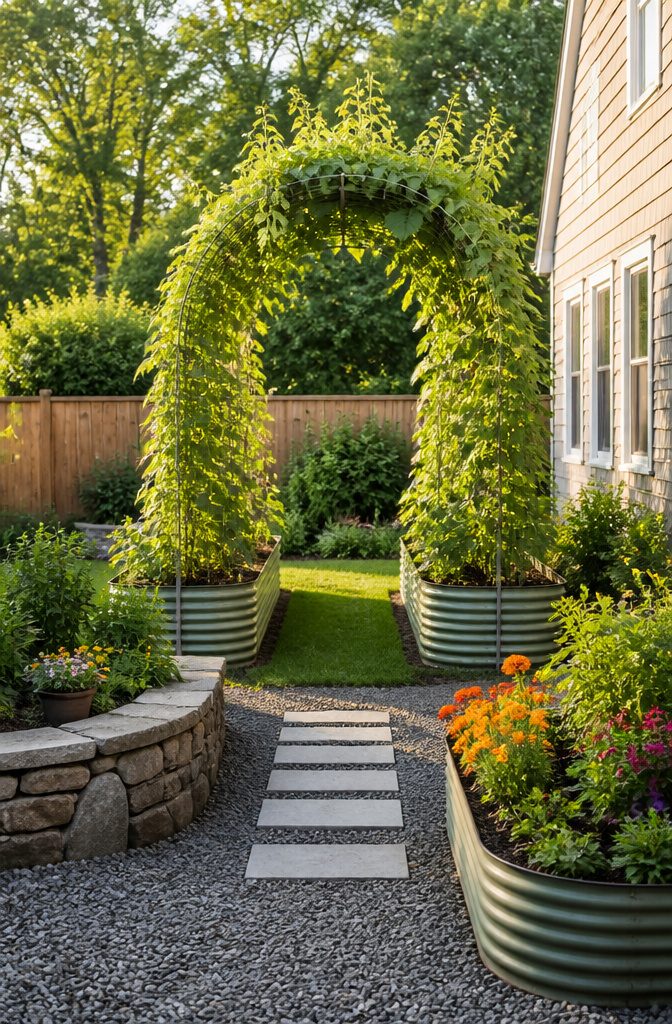
An arch trellis turns the gap between two raised beds into a walkway covered in beans or cucumbers, not just a support stuck against a wall.
The curved frame creates a tunnel effect that works as a garden entrance while it grows food.
Cattle panels or wire mesh bent into an arch give the strength heavy vines need. Wood strapping screwed to the bed boards anchors the bottom so wind does not lift the whole structure once the foliage fills in.
A tight grid pattern beats wide lattice here: more points for tendrils to grab and less sag under the weight of a full crop.
The downside is permanence. An arch trellis commits that path to climbers for the season, so you are walking through damp leaves to harvest.
For a layout where the beds run parallel and you want the garden to look finished even in May before the plants take over, this is the option that wins.
9. A-Frame Trellis
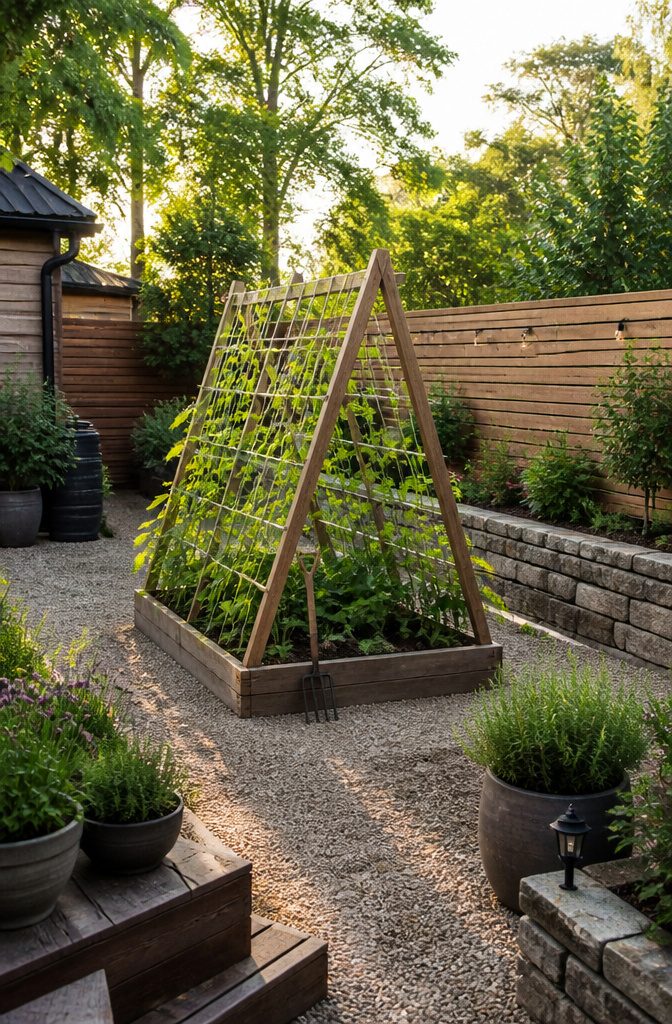
An A-frame trellis gives you a stable, tent-like frame over the bed, with two angled sides meeting at a peak.
That geometry matters: the spread base resists tipping even under the weight of heavy-fruiting vines like cucumbers, melons, and squash. The sloped faces also give you more climbing surface than a flat vertical panel of the same footprint.
The open tunnel underneath is the detail that makes this design worth building.
Shade-tolerant crops, lettuce or spinach or mizuna, sit in the cooler soil beneath the canopy while the vines occupy the air above. In a compact raised bed, that stacking is how you pull more food from the same square feet.
Set the frame in place in spring, before you sow seeds or set out seedlings.
A temporary build lets you lift it out at season’s end and store it flat through winter, which I would do rather than leave wood to rot against wet soil.
Store it, and it lasts years; leave it, and you are rebuilding in two seasons.
10. String Trellis
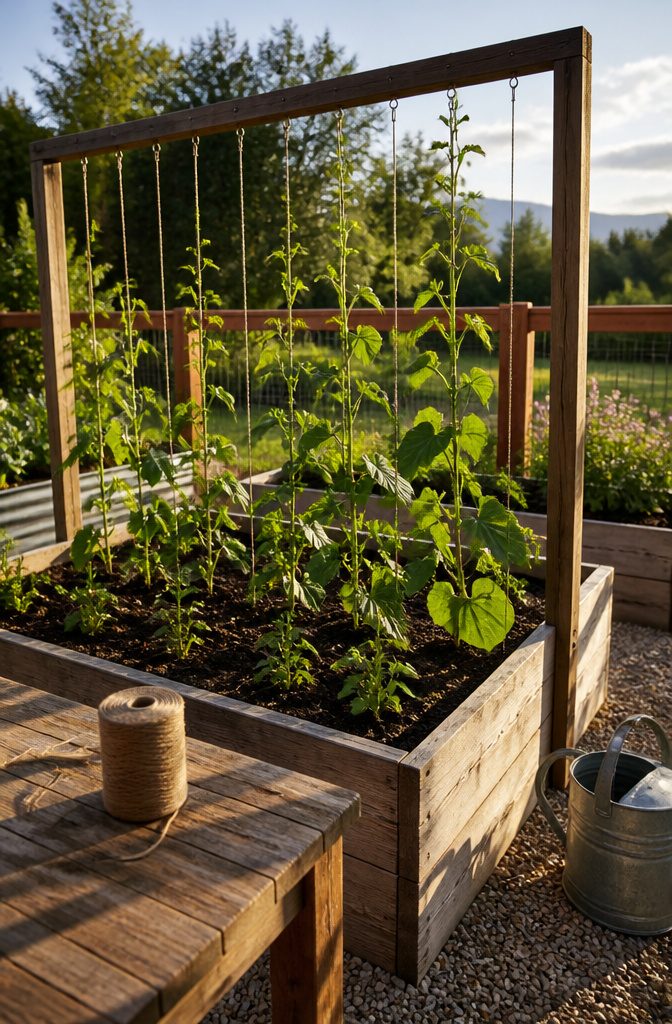
A string trellis starts with a sturdy top and bottom frame, wood or metal, with durable twine stretched vertically between them. The frame carries the real load; the twine just gives peas, pole beans, and indeterminate tomatoes something to grip.
I would build the frame to outlast the strings, because the twine gets cut down with the plants at season’s end and replaced each spring.
That replacement is the point, not a flaw. Fresh twine means no overwintering disease or tangled residue to fight come March.
Some designs run the twine through eye hooks, which lets you tension or restring without rebuilding anything. You could hang garden netting from those same hooks instead, though I find netting harder to clean and more likely to sag.
The tennis racquet-style approach, with adjustable tension on individual strings, solves that problem for crops that need a tighter climb.
This setup suits lighter vines.
A heavy indeterminate tomato in full fruit will test it, and a dense cucumber tangle might too. For those, I would choose a tighter grid or a heavier frame.
But for a weekend build under a hundred dollars in lumber and twine, the string trellis wins on speed and on the clean start it gives you every season.
11. Ladder Trellis
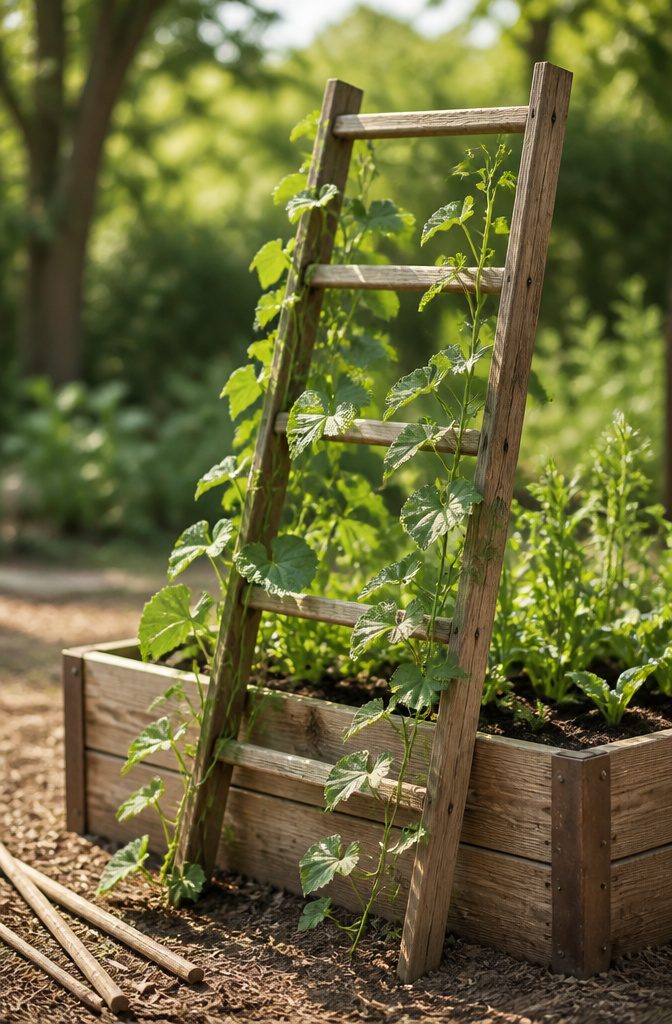
A ladder trellis is basically a small lean-to ladder built from wood or metal, and its portability is the real advantage for anyone working with raised beds.
You stake it into the soil or lean it against a fence at the back of the bed, and when the season ends you lift it out clean.
That matters for crop rotation, since tomatoes and cucumbers leave behind residue that next year’s plants do not need.
The rungs give vines something to weave through naturally, but the structure is open enough that you need to check the weight.
This style works for indeterminate tomatoes, vining cucumbers, and small pumpkin varieties, not for the heavy-fruited types that will pull lightweight rungs sideways. I would skip anything that fruits above a few pounds per vine.
Wood rungs grip tendrils better than metal, though metal lasts longer if your beds sit in damp soil.
Either way, the ladder takes up almost no storage space in a garage corner through winter, which matters when you are renting and the shed is already full.
What This Setup Does
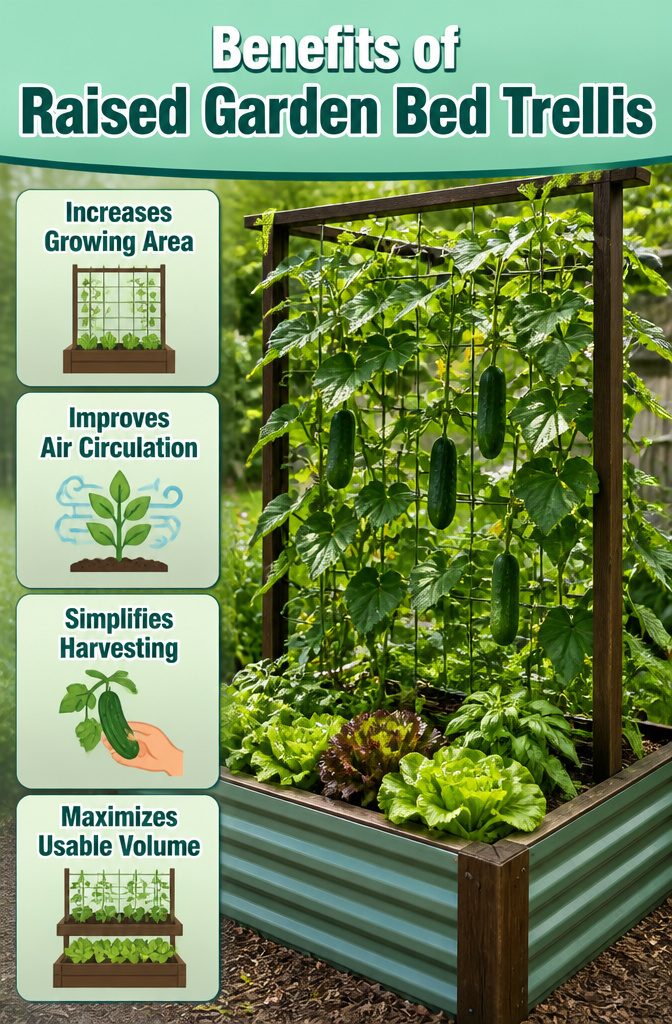
A raised garden bed trellis turns a flat growing area into a three-dimensional one.
Instead of cucumbers or pole beans sprawling across the soil and claiming half the bed, they climb upward, which leaves the ground level open for lettuce, herbs, carrots, or leafy greens underneath.
The same square footage now holds two layers of production.
That vertical growth also improves air circulation around the foliage. Leaves dry faster after rain, and the plants stay off damp soil where disease pressure builds.
Spotting pests like cucumber beetles or aphids gets simpler when the vines are at eye level, and harvesting means less bending down to search through tangled growth.
For a small urban garden or a rented backyard with limited space, this layering is the difference between a modest bed and one that actually feeds you. The trellis does not add square footage; it adds usable volume.
Best Vegetables to Trellis
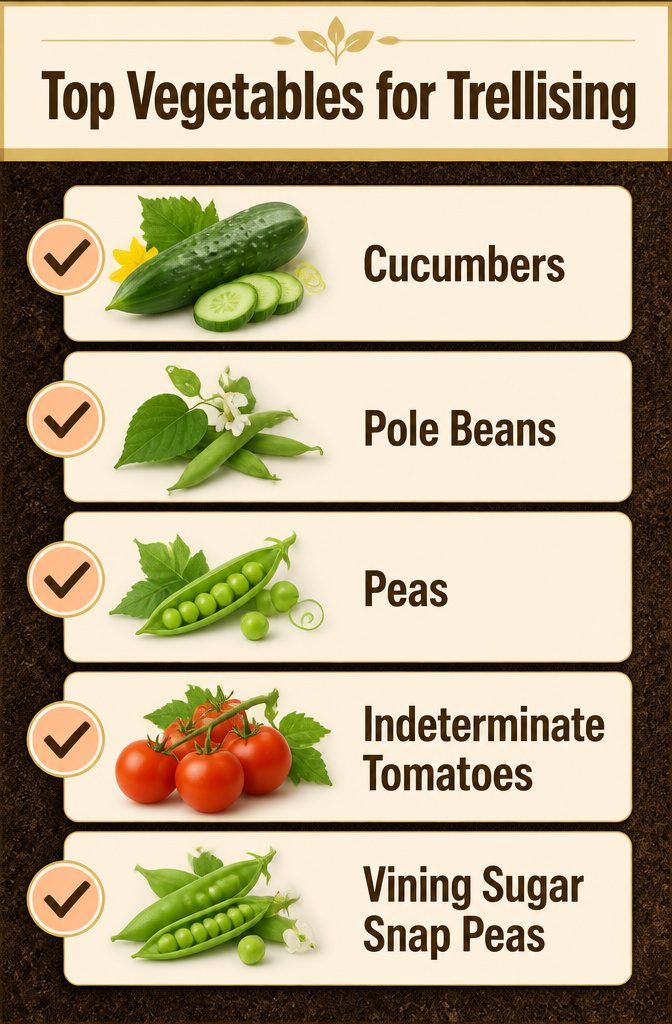
Cucumbers, pole beans, peas, and indeterminate tomatoes are the vegetables worth trellising in a raised bed, and the reason is straightforward: each one grows better and produces more when it climbs.
Cucumbers and pole beans are natural climbers.
Cucumbers send out tendrils that grab wire or string, while pole beans twine themselves around supports as they grow upward. Peas work the same way, and tall varieties like Sugar Snap reach 7 feet and practically demand something to grab.
Without a trellis, these plants sprawl across the soil, crowd neighboring vegetables, and leave fruit in the dirt where it rots or gets eaten.
Indeterminate tomatoes are a different case. They are not natural climbers, so you tie new growth to the trellis every 7 to 10 days with garden twine.
Skip the support and they collapse under their own weight, snapping stems and burying fruit in foliage that never dries out. The same 7-foot potential that makes them productive is what dooms them without structure.
Bush varieties of any of these will not climb, so check seed descriptions before you plant. Vining types are what you want for a raised garden bed trellis.
Install Before You Plant
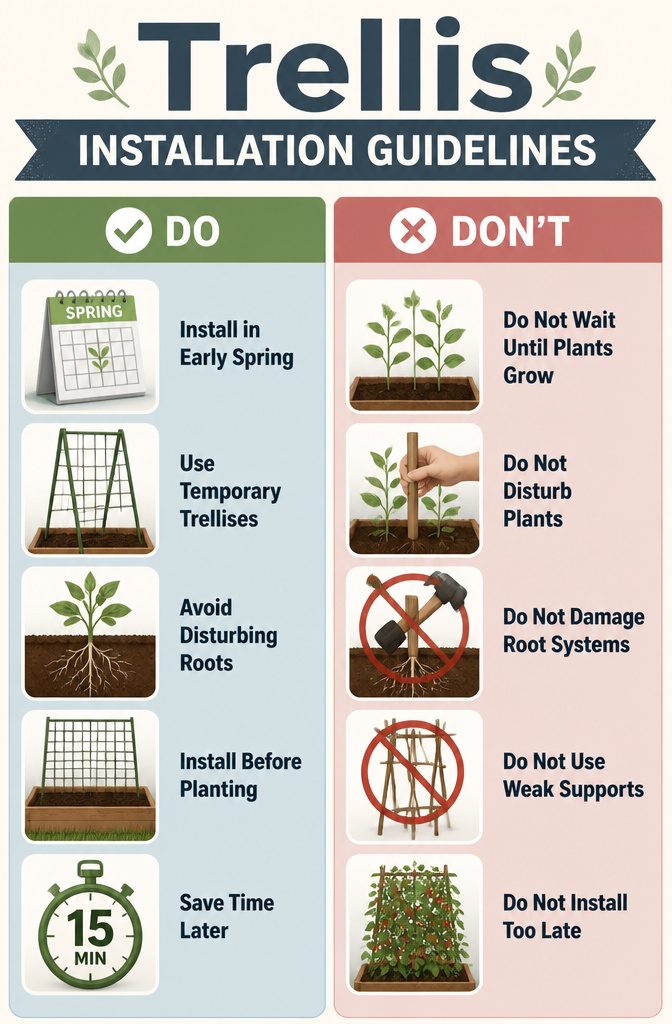
A raised garden bed trellis belongs in the ground before a single seed goes in.
Install the structure in early spring, while the bed is still empty and the soil is workable. Waiting until tomato or bean seedlings are already up means threading supports around fragile stems and driving stakes through developing root zones.
The roots you cannot see spread faster than you expect, and a post hammered in mid-season tears through them without warning.
Temporary trellises, the kind you store in a shed over winter, come back out just before planting time. Permanent posts or frames should go in during the same pre-season window.
Either way, the bed stays undisturbed once growth starts. Foliage fills in fast on climbing plants, and working around it late is awkward enough that most people put it off until the plant suffers for the delay.
The fifteen minutes of early installation saves an hour of careful maneuvering later, and it eliminates the risk of stunting a plant you have already spent weeks nurturing.
Metal or Wood
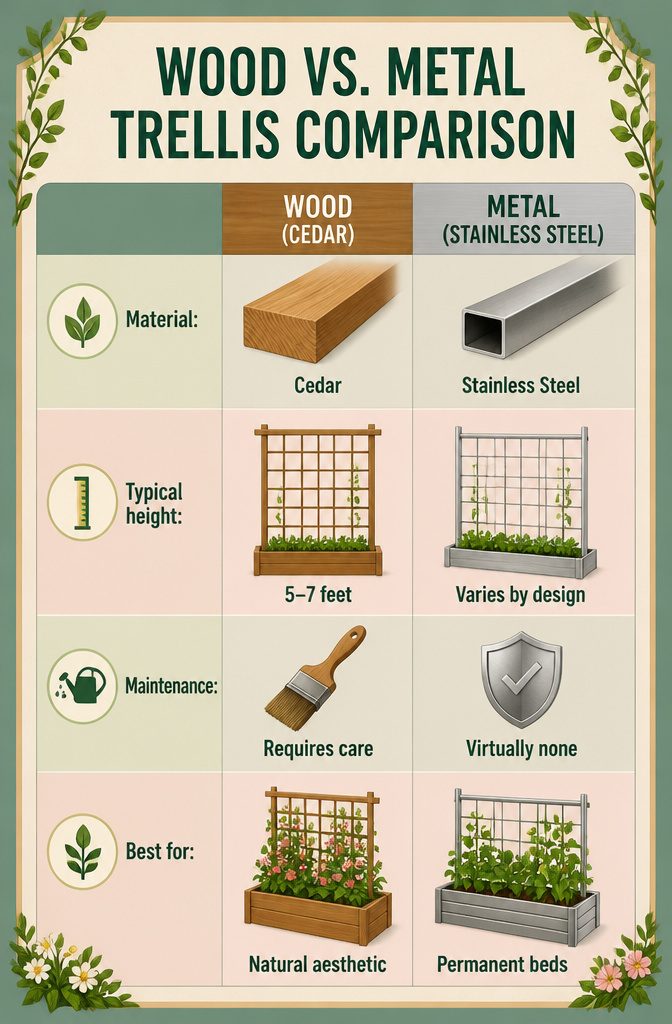
The material you choose for a raised garden bed trellis shapes how long you are willing to tend it.
Wood gives a softer look that blends with garden soil and green growth, but even cedar, chosen for its longevity, will eventually gray and need replacement.
Metal, particularly rustproof stainless steel, outlasts wood by seasons and carries heavy vines without sagging.
A panel supported by star pickets falls somewhere between: quick to install and durable for years, though the industrial profile suits vegetables more than ornamentals.
For a temporary solution, string and brackets work fine for a season or two. For something permanent, metal angle brackets and rustproof steel justify the upfront effort.
| Attribute | Wood (Cedar) | Metal (Stainless Steel) | Star Pickets + Panel |
|---|---|---|---|
| Typical height | 5–7 feet | Varies by design | Varies by design |
| Hardware needed | 1.5" and 3" angle brackets, wood screws | Rustproof fasteners | Panel, star pickets |
| Maintenance | Re-treat or replace as it weathers | Virtually none | Tighten fittings occasionally |
| Best for | Natural aesthetic, temporary budgets | Permanent beds, heavy crops | Quick install, maximum durability |
I would pick metal for any bed I plan to keep three years or longer. Wood wins only if I am already replacing the bed itself next season and want everything to match for now.
Space, Airflow, and Less Disease
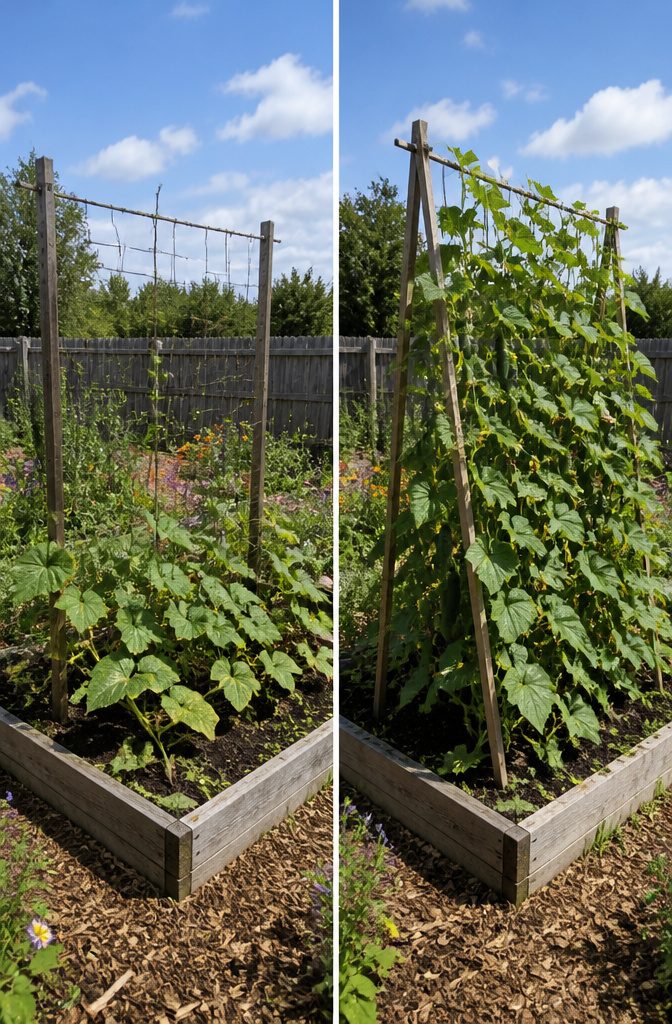
A raised garden bed trellis turns the same footprint into more usable growing area than you would get flat on the soil.
Vining cucumbers spread across roughly four square feet of bed surface if you let them sprawl; trained upward, they occupy a narrow vertical slice and leave the rest of that space for lettuce, herbs, or a second row of bush beans.
In a 4 x 8 foot bed, that difference matters. You are stacking your garden in three dimensions without buying more lumber or filling more bags of soil.
The airflow improvement is what sold me on vertical growing for tomatoes and melons. Leaves dry faster after rain or heavy dew when they are not pressed against damp ground or layered against each other.
That faster drying time directly cuts the fungal pressure that ruins lower foliage by July in humid climates. Better circulation means fewer sprays and less pruning out black-spotted branches.
You do sacrifice some ground-level shade that sprawling vines cast for heat-sensitive crops, and a dense trellis wall can still hold moisture if you plant too thickly against it.
I space my trellised row six to eight inches clear of anything bushy behind it. The downside is worth it: more plants per bed, healthier foliage, and no crouching to hunt fruit through a tangle of stems.
Frequently Asked Questions
What is a raised garden bed with a trellis?
It is a vertical support system that turns a flat growing area into a three-dimensional one, letting climbing plants grow upward instead of sprawling across the soil.
This leaves ground level open for additional crops like lettuce or herbs underneath the vines. The setup also improves air circulation around foliage and makes pest spotting and harvesting easier.
What vegetables grow best on a trellis?
Cucumbers, pole beans, peas, and indeterminate tomatoes are the vegetables worth trellising in a raised bed. Cucumbers, pole beans, and peas are natural climbers that use tendrils or twining stems to grip supports on their own.
Indeterminate tomatoes need tying to the trellis every 7 to 10 days with garden twine, since they are not natural climbers and will collapse under their own weight without support.
How do you attach a trellis to a raised garden bed?
For a cattle panel or wire mesh trellis, drive T-posts or fence posts into the ground at the back corners of the bed, then secure the panel to them with wire ties or zip ties at least four points per post.
A panel bent into an arch between two beds gains extra stiffness from the curve and needs posts driven a foot below ground level to prevent leaning.
For wooden frames, screw them directly to the bed boards or use metal angle brackets and rustproof fasteners.
When should I install a trellis?
Install the trellis in early spring before any seeds or seedlings go into the bed. Waiting until plants are already up means threading supports around fragile stems and risking damage to spreading root zones when you drive posts.
The fifteen minutes of pre-season installation saves an hour of careful maneuvering later and eliminates the risk of stunting plants you have already spent weeks nurturing.
How tall should a vegetable trellis be?
Most climbing vegetables want 5 to 6.5 feet of height, which is exactly what a standard cattle panel delivers.
Go taller only for truly aggressive vines, because every extra foot multiplies the wind load and tests whatever you have driven into the ground.
The higher you go, the deeper and stronger your supports need to be to keep the structure from leaning or pulling free by late summer.
Can I use a trellis in a raised garden bed?
Yes, and it is one of the most effective ways to maximize production from limited space.
A raised garden bed trellis lets you stack crops in three dimensions, with climbers above and shade-tolerant greens below. The vertical growth also keeps fruit clean, dry, and visible at harvest height instead of rotting against damp soil.
What is the cheapest way to make a garden trellis?
A string trellis built from lumber and durable twine costs under a hundred dollars and goes up fast for a weekend project.
For even less, a cattle panel runs about $25 for 16 feet and pairs with two T-posts at roughly $4 each to make a sturdy arch or flat panel.
Second-hand livestock panels from barn sales or farm auctions drop the cost further, and galvanized steel holds up for years.
How do you stabilize a freestanding trellis?
Drive anchor posts, preferably T-posts with a post driver, a full foot below ground level at the back corners of the bed; depth matters more than the height above soil.
Bend cattle panels into arches rather than leaving them flat, since the curve gives the structure stiffness against wind.
Check the frame when the first heavy fruit sets in mid-season and add a brace if posts start to bow, because a five-minute reinforcement in July saves the whole geometry by August.