These 8 bucket gardening ideas run from a single recycled food bucket on a balcony to a full hydroponic setup on a bench, so the deciding factor is how much space you have, how much you want to spend, and how hands-on you want to get with soil or bypass it entirely.
Some of these setups touch the ground and call for a wooden frame and drainage planning; others hang, stack, or sit on a balcony rail and keep your security deposit safe.
The detail that matters most across every version is the one inch of empty space left between soil and rim, that lip buys the water time to sink in rather than spilling onto the patio below.
[link-whisper-related-posts]1. Vertical Bucket Garden
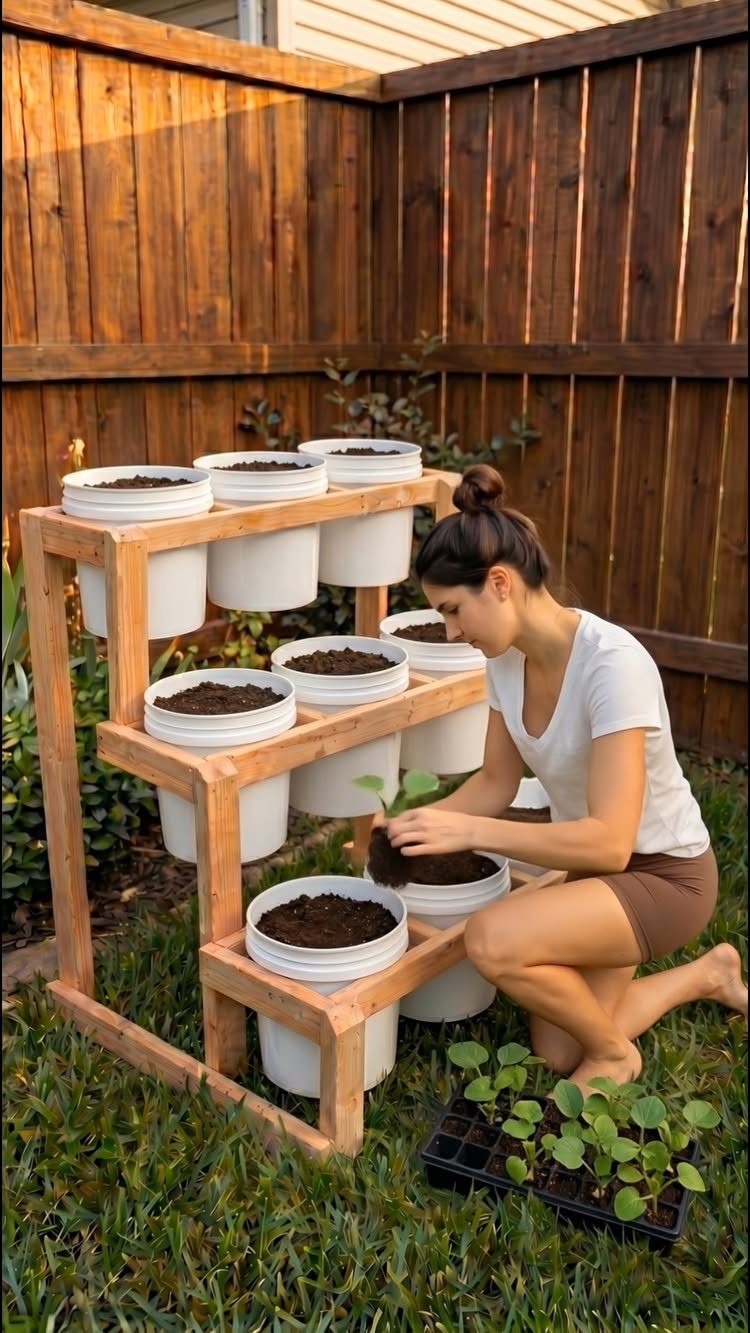
A vertical bucket garden stacks containers on a tiered wooden frame so you grow up instead of out.
I would check that the stand sits level and the buckets drain freely before filling them; water pooling on a lower tier will drown roots and rot the wood underneath.
This setup suits anyone with more vertical wall than floor, including narrow side yards where a fence already blocks the view.
2. 5-gallon-bucket Garden
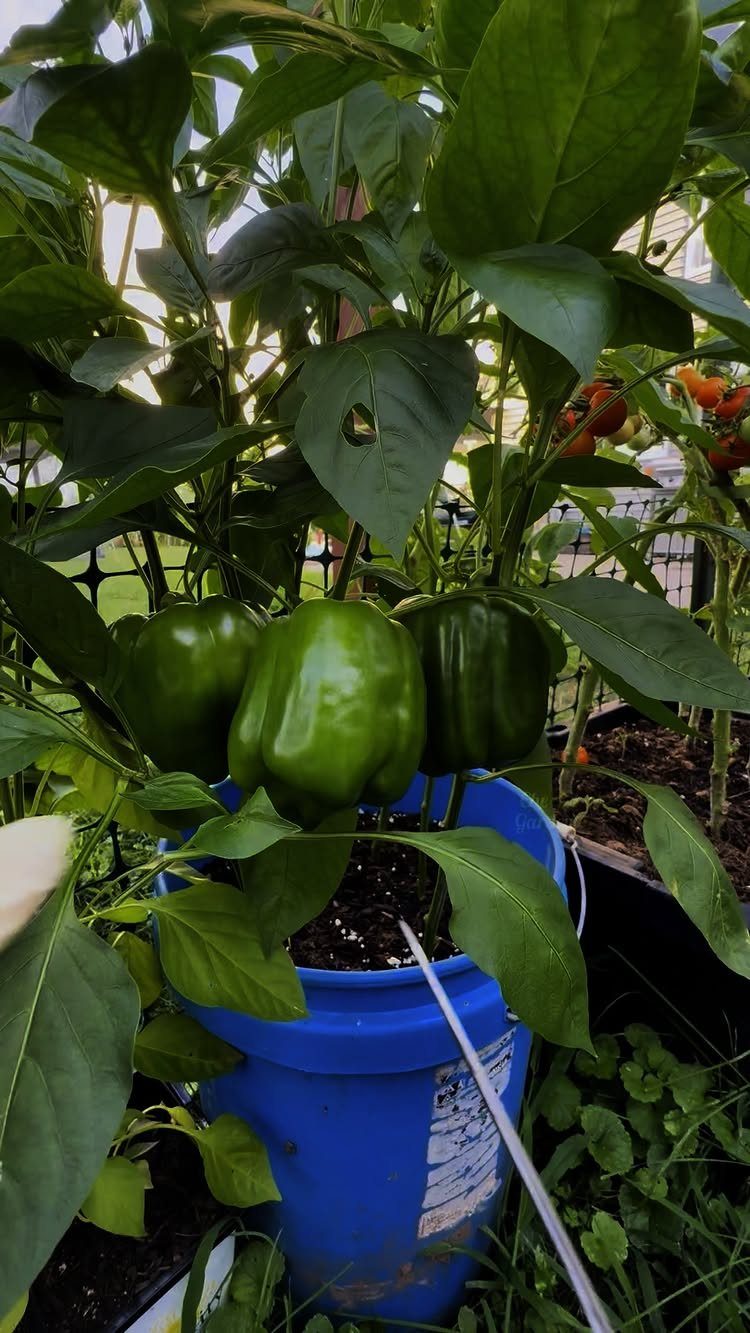
A standard 5-gallon food-grade utility bucket, the kind restaurants get pickles or syrup in, works fine as long as you rinse it well and drill drainage holes in the bottom.
I would skip any bucket whose previous life involved pool chemicals, tar, asphalt, or pesticides.
Water-based stains are usually fine after a scrub, but lingering petroleum residues bond to plastic and migrate into edibles. If the bucket smells like anything but plastic, I would find another.
3. Hanging Bucket
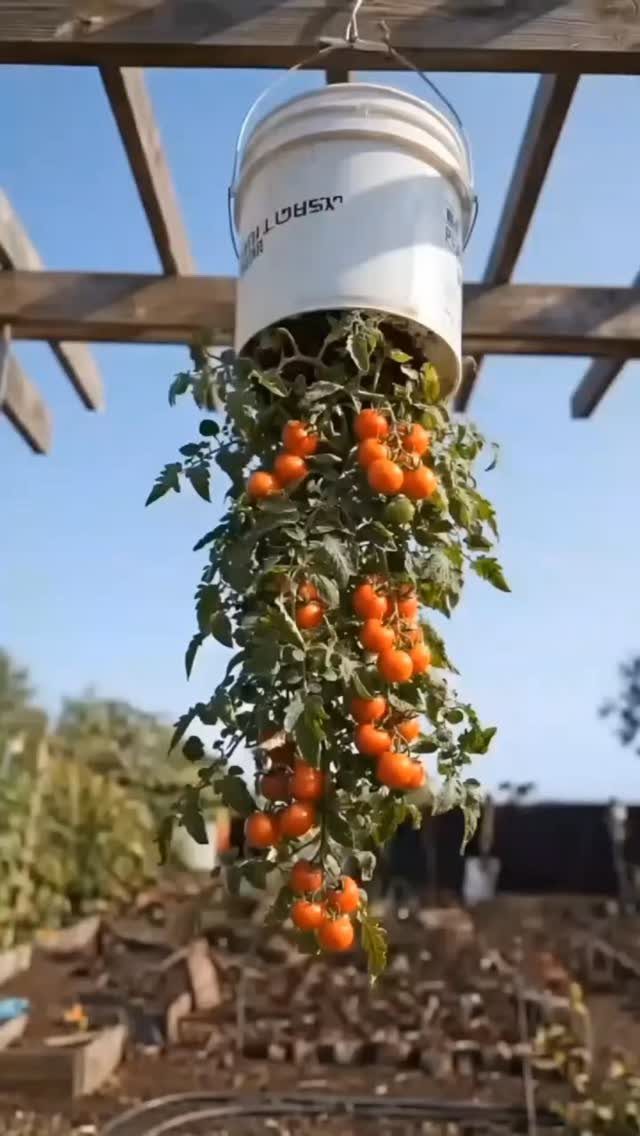
A hanging bucket turns the container upside down so the plant grows downward through a hole cut in the base. Hanging buckets under a pergola keeps cherry tomatoes off the ground and away from soil-borne disease.
I would pick a determinate or compact indeterminate tomato; beefsteaks get heavy enough to wrench the bucket loose in a wind. Check that your support beam can handle the weight when the bucket is wet; soaked soil gets heavy fast.
4. Buckets on Raised Wooden Stand
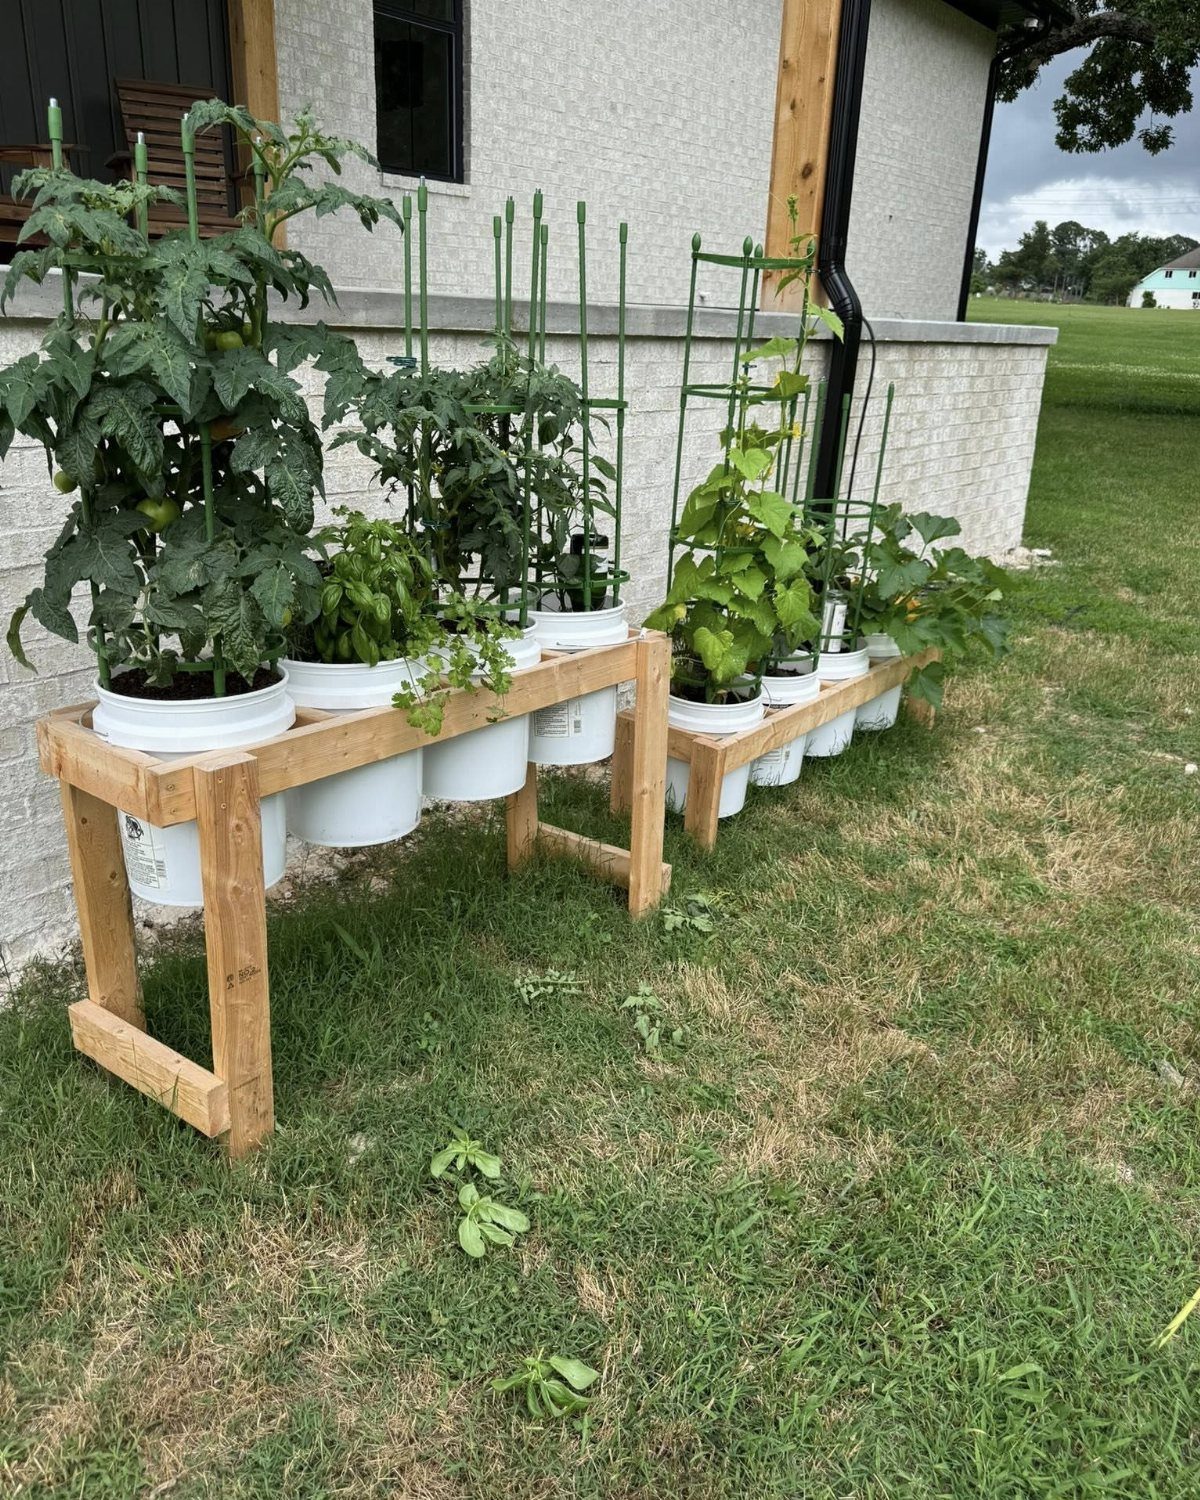
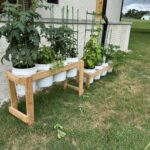
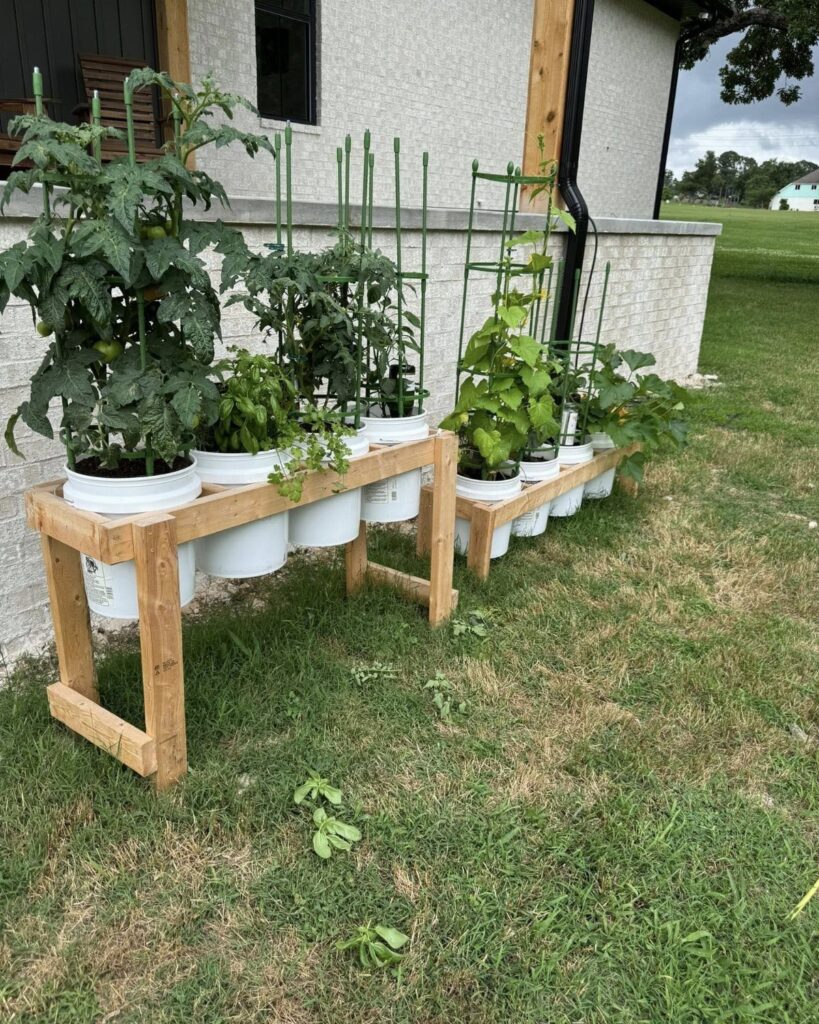
Raising buckets onto a wooden bench brings plants to working height and keeps roots warmer off cold ground. Running a stand along a brick wall adds reflected heat tomatoes appreciate.
I would build the frame wide enough to catch any drips; soaked soil gets surprisingly heavy, so solid legs and cross-bracing matter more than looks. A coat of exterior paint buys the wood a few extra seasons.
5. Bucket Garden on a Trellis
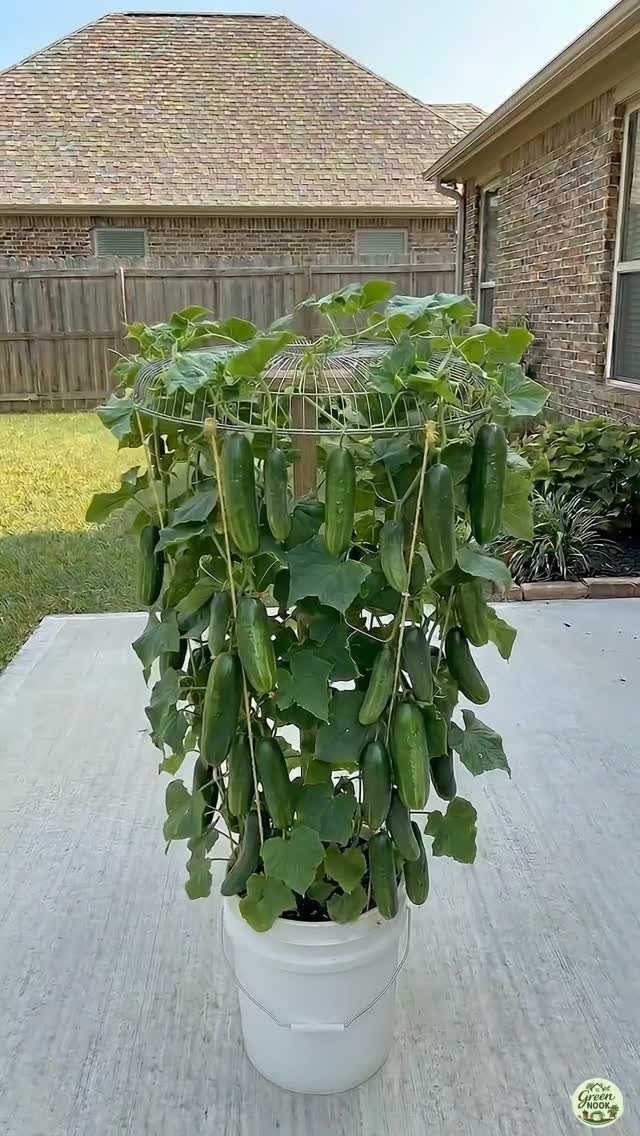
An umbrella-shaped wire trellis gives cucumber vines something to grip without sprawling across a patio floor. I would set the trellis at planting so you do not later disturb roots trying to wedge it in.
Cucumbers climb by tendrils, not twining stems, so wire mesh with moderate openings works better than smooth poles. One bucket this size holds two vines if you stay on top of water; they turn crisp and bitter when dry.
6. Balcony Bucket Garden
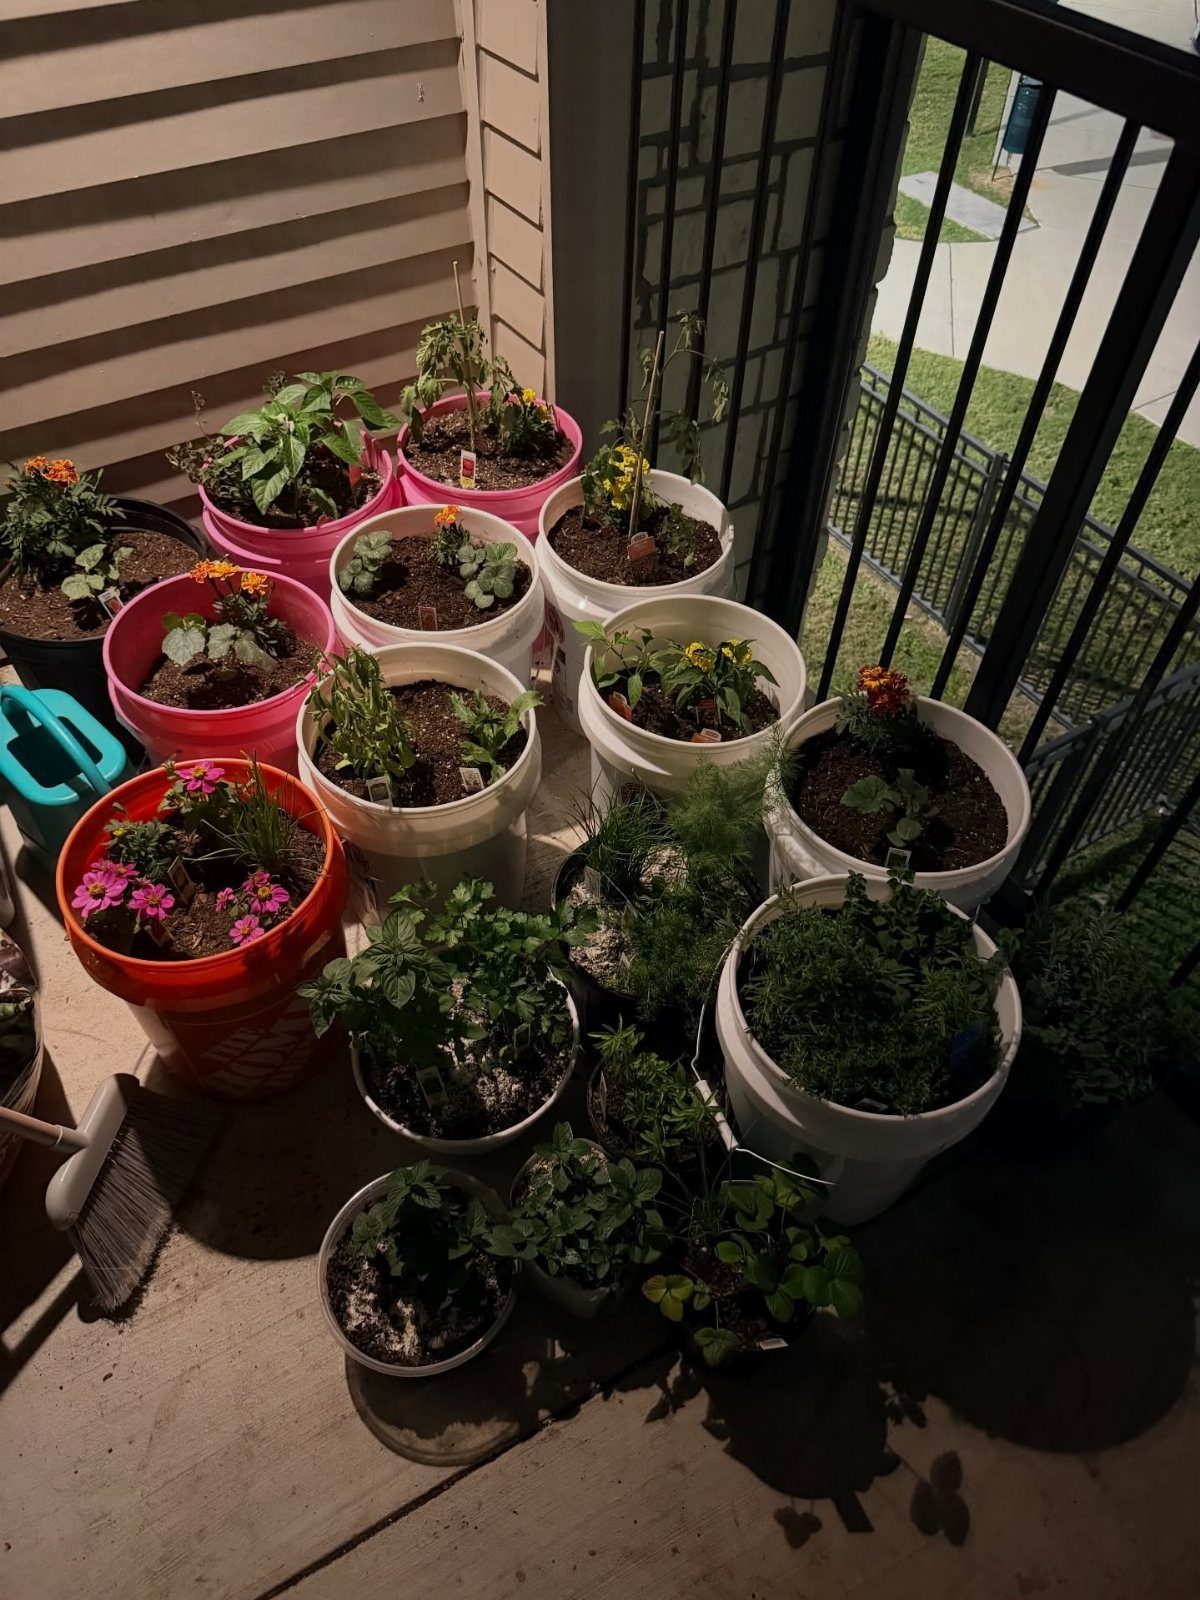
Colorful buckets on a balcony turn rental railings into growing space without asking permission for planters.
The mix of pink, orange, and white is cheerful, but I would stick to light colors for heat-sensitive herbs; dark plastic cooks roots on a south-facing balcony in July.
Weight is the real limit. Wet soil can push hard on a balcony floor, so I would cluster heavier buckets over load-bearing wall edges, not cantilevered slab corners.
7. Side-Hole Onion Bucket Planter
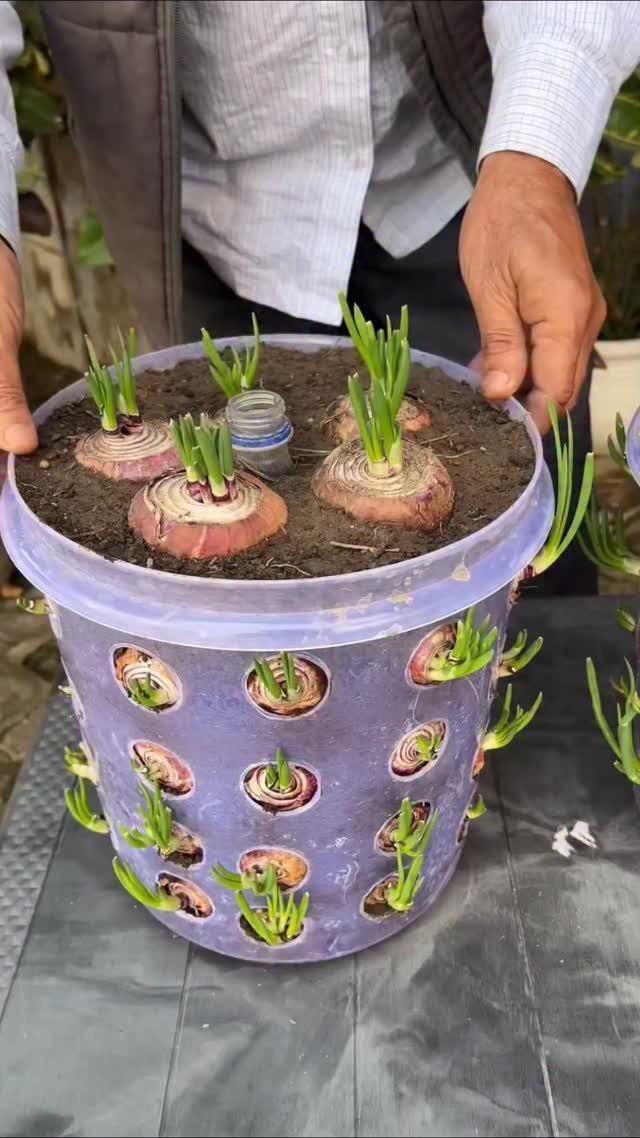
A side-hole bucket planter lets onions grow outward from holes drilled through the walls, not just the top. Thin purple plastic lets you see root growth against a window, which helps more bulbs fit one container without crowding.
I would mark holes at staggered heights so sprouts do not crowd each other for light. A hex pattern gives each bulb room to fatten in every direction, not just straight rows.
The bottle neck set into the top is a trick worth borrowing: watering at soil level keeps leaves dry and cuts down rot.
I would cut the bottom off a standard soda bottle and bury the neck deep enough to stay upright when the bucket is full.
8. Dutch Bucket Hydroponic System
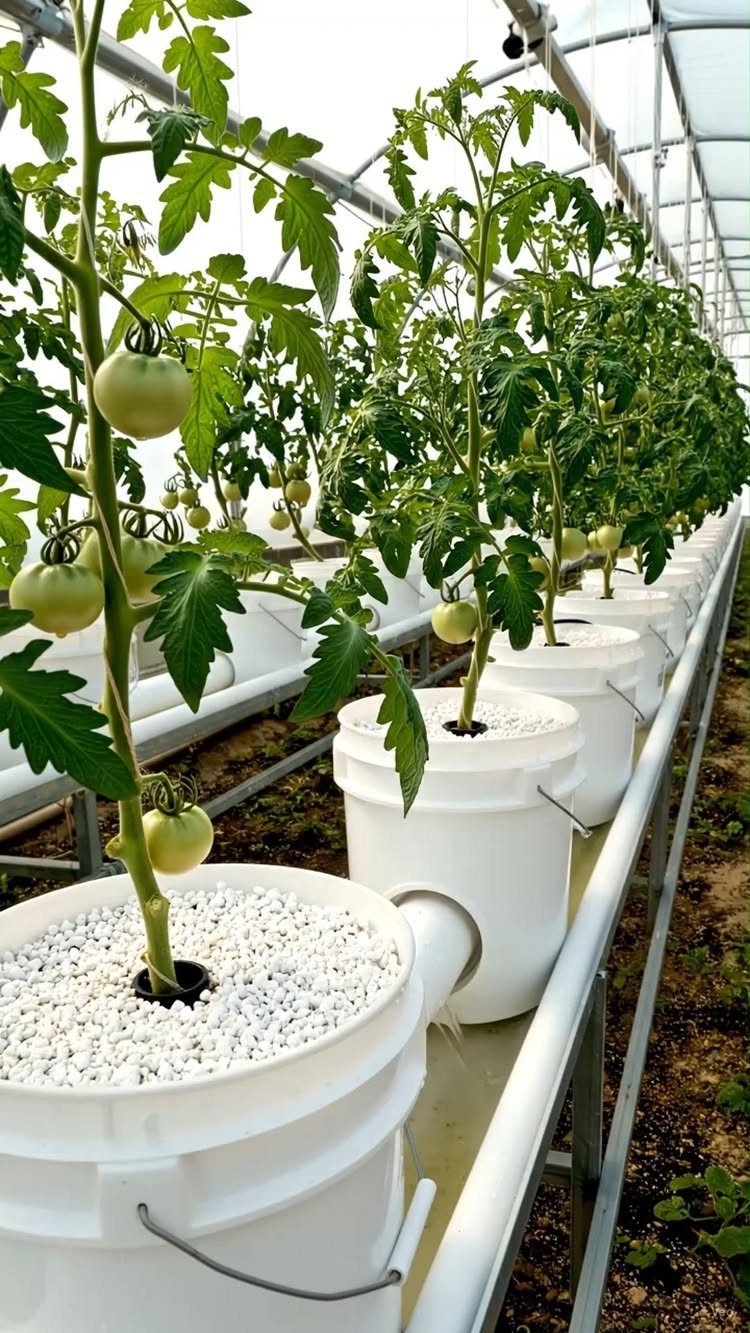
Dutch bucket hydroponics runs nutrient solution through containers filled with inert media, so plants feed without soil. White perlite is sterile, light, and cheap enough to replace each season if roots bind it.
A PVC drain line along the bench returns overflow to a reservoir, which saves water and nutrients in a loop. I would check that the pipe slope runs true; a flat spot leaves roots sitting wet and invites root rot.
This setup shines in greenhouses where soil pests or poor ground already rule out in-ground growing.
Up-front cost runs higher than dirt gardening, and the pump needs reliable power. For someone on city water with no yard, the trade is usually worth it.
Choosing the Right Plants
Plants that share a bucket need to want the same things. A cherry tomato sucking up water all day will leave a thyme plant stranded if they are paired without thinking through their habits first.
I look for varieties bred compact for containers, not full-size versions that crowd the bucket before midsummer.
Color and texture matter once the practical boxes are checked. A trailing herb at the bucket rim softens the edge and fills the gap while the main plant climbs or bushes upward.
Growth habit tells you whether 2 plants will cooperate or compete for the same real estate. I would rather underfill a bucket and let each plant breathe than stuff it and watch everything struggle.
If you don’t have enough garden space, you can always create more by growing crops in pots! For example, tomatoes make an ideal container plant when grown in 5-gallon buckets.
Watering and Maintenance Tips
Soil in a bucket dries faster than a bed because wind hits it from all sides and sun warms the thin plastic wall.
In July heat, daily watering is not unusual; I would check with a finger an inch down before deciding either way.
A watering wand or narrow-spout can lets me aim at the base without spraying the leaves. Wet foliage in a humid bucket turns into mildew faster than in open ground.
A soil moisture meter takes the guesswork out for anyone who is unsure. I would set one in the first season and learn the rhythm; it is cheaper than losing plants to drought stress.
Drip irrigation on a timer handles the schedule when travel or a packed week threatens the routine.
The key is consistency, not volume. Roots adapt to a pattern and suffer more from erratic soaking than from moderate, regular moisture.
Soil and Growing Medium
Garden soil is too heavy for buckets.
It compacts, it drains poorly, and it invites problems that a commercial soilless mix avoids. I start with a peat-based potting mix because it holds water without drowning roots and stays loose enough for container life.
Slow-release fertilizer mixed in at planting feeds steadily without the risk of burning roots that liquid doses can bring. I would not skip it; a bucket has no deeper soil profile to draw from.
Dry potting mix straight from the bag repels water. The first soak runs straight through and leaves the root ball still dry underneath.
I would wet the mix before filling or pour water in and turn it with my hands until it feels like a squeezed sponge. Seed starting mix gets the same treatment if I am sowing direct into the bucket.
Leave an inch between soil surface and rim. That lip catches the water long enough to soak in instead of running over the edge onto the patio below.