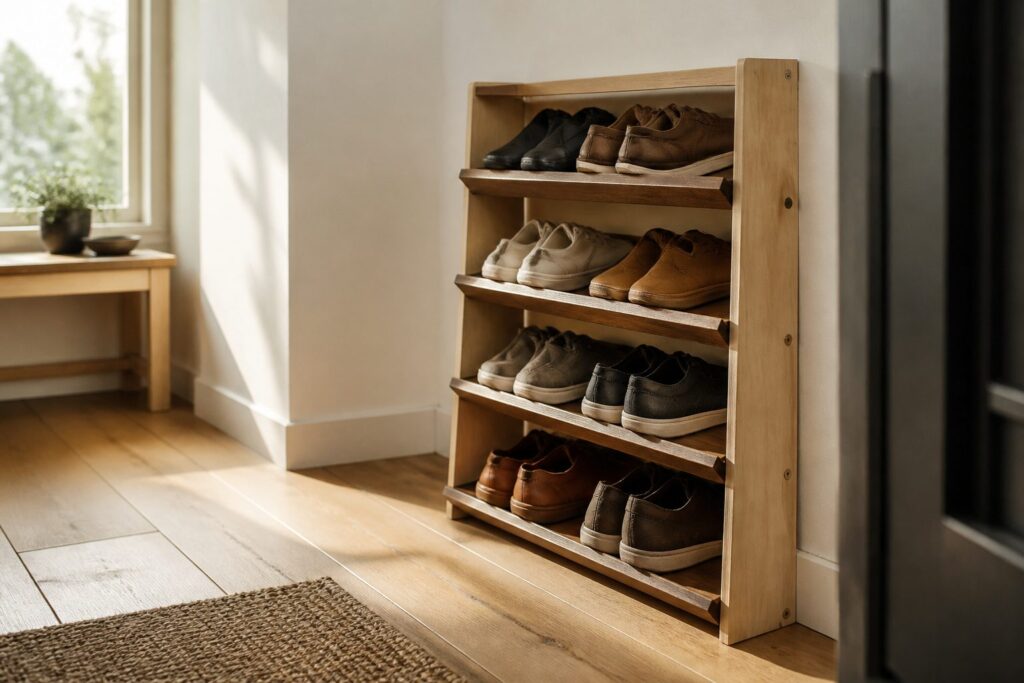
You can build a narrow shoe rack that actually fits your hallway in a single Saturday for the cost of a sheet of plywood and a few furring strips.
The point where most builds fail is depth: anything past 10 inches front to back and shoes sit in shadow, or the rack blocks the path it was meant to clear.
The slanted shelf trick from closet builds buys back a few inches of perceived depth, but only if your wall has the width to angle into.
[link-whisper-related-posts]1. DIY Under Bed Shoe Organizer
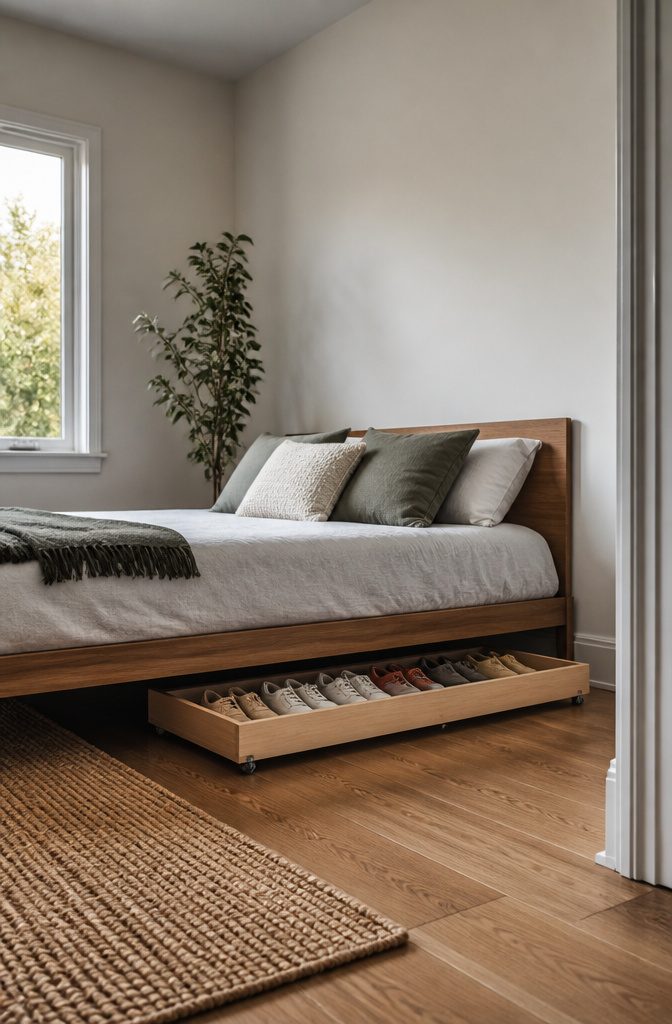
A rolling under-bed organizer is the narrow shoe rack you never see, and that is exactly why it works.
The frame is a simple rectangle of 1×2 furring strips or straight pine boards, screwed together and fitted with four casters rated for at least 50 lbs apiece so the loaded unit glides on carpet or hardwood without catching.
The platform is ½-inch plywood, prefinished if you want to skip sanding; a track saw leaves the cleanest edge, though a circular saw with a sharp blade and a straightedge guide will do.
Rip the plywood to width first, then cut to length.
Sides keep shoes from sliding into the dust bunnies.
A 3-inch lip on all four edges, formed from the same 1×2 stock or from salvaged bed slats with a rounded edge, is enough to corral sneakers and flats without turning the tray into a bin you have to dig through.
The height adjusts to whatever clearance your bed frame allows, but the build stays the same: lower the sides, shorten the caster stems, or skip the swivel plate and use fixed casters if you are down to 4 inches of space.
The length is where you gain capacity. A 28-inch organizer holds four pairs across; 36-inch takes six.
Width rarely needs to pass 24 inches or you will bump the center support rail on most platform beds. I would skip the transparent top some builds add.
It looks tidy in a photo, but lifting it every morning is a step that does not survive real routines, and shoes in a closed dark space need airflow more than they need display.
2. DIY Slanted Shoe Shelves
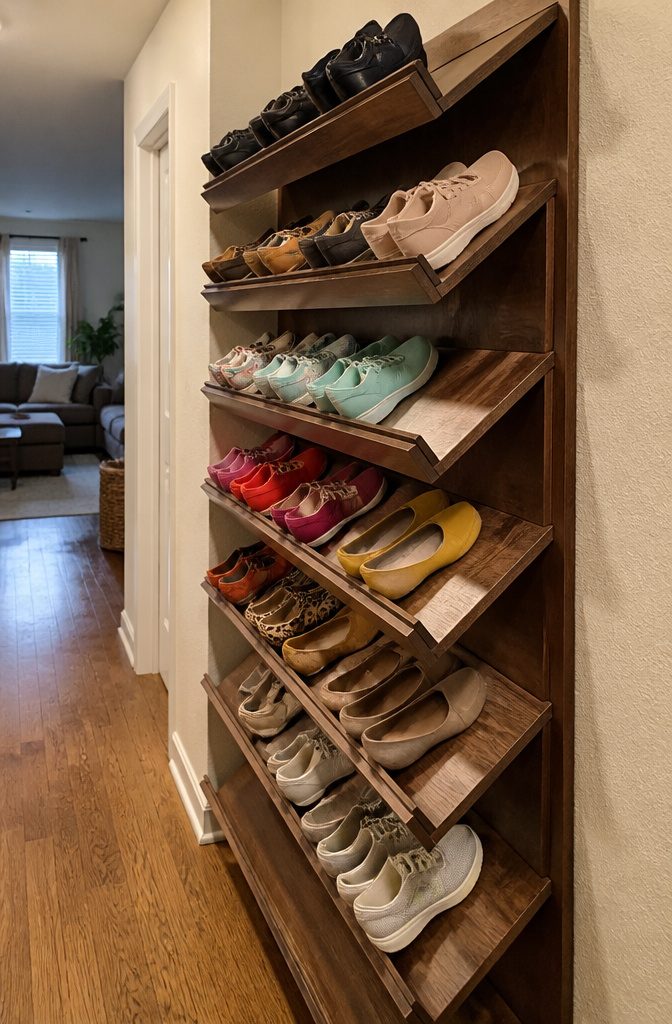
Angled shelves turn a tight footprint into usable storage because the shoes sit heel-down, toe-up, taking less horizontal depth than they would lying flat.
For a diy narrow shoe rack, I would build each shelf from 3/4 inch plywood cut 12 inches deep with a 3/4 inch lip screwed across the front edge to keep pairs from sliding.
The slope itself comes from screwing the back of each shelf into 1×2 furring strips mounted to the sides, which sets the angle without complicated joinery.
Three-inch screws driven through the strips into the plywood hold everything solid even with heavier boots.
Flat shelves in a narrow space waste depth; the toe of one shoe bumps the heel of the next, so you either stagger pairs awkwardly or build deeper than the hallway allows.
The slant lets you line shoes up in single file, heels catching the lip, and you still see enough of each pair to grab what you need.
I would space shelves about 7 inches apart for flats and sneakers, closer to 9 inches if you wear heels or chunkier soles regularly.
Plywood at this thickness runs roughly $50 for a 4×8 sheet, enough for a four-shelf unit with scraps left, and furring strips are cheap insurance against racking.
Dust settles on the toe box with this design, so I would skip it for a closet that stays closed; for an open entryway, the display is worth the occasional wipe.
3. DIY Shoe Shelf Bench
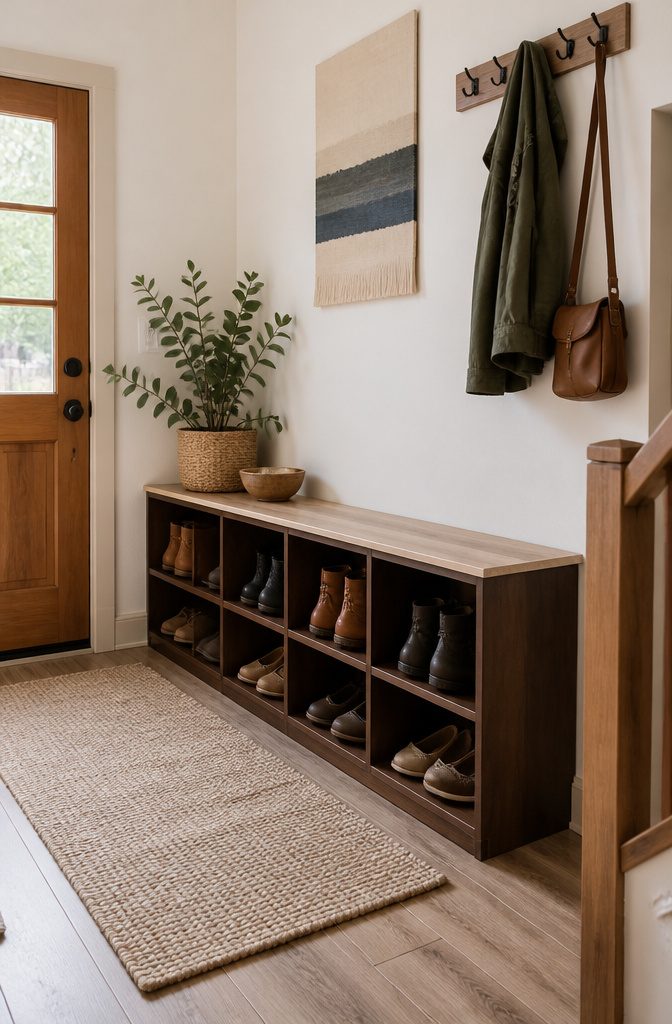
A bench with shoe storage underneath solves two entryway problems at once, but only if the proportions actually fit the space.
Size the frame to your wall, not to a plan you found online; a bench that juts even six inches past the door frame becomes an obstacle the first time you carry groceries inside.
The build starts with a simple box frame. Two-by-twos work well for the base; cut two short stretchers and one long front piece, then join them with wood glue and a single pocket hole screw at each corner.
One source found that driving two screws into a 2×2 often splits the wood, so I stick to one screw plus glue and have had no issues with stability.
Stain the base before assembly if you want contrast; ebony against a lighter bench top reads more finished than matching everything.
Cubby height is where most people guess wrong. Men’s boots need about eight inches of clearance; sneakers and flats live comfortably at six.
I would build a mix if the household wears both, or split the difference at seven inches and accept that taller boots lean rather than stand upright.
The top surface takes the real wear, so plywood with a two-inch foam cushion works, but I would skip the loose pillow and upholster directly to a plywood lid that lifts off for access.
A fixed cushion collects dirt and eventually smells like the shoes beneath it.
The whole unit stays narrow enough that it does not dominate the hallway, and because every dimension is cut to order, it fits alcoves that no store-bought piece ever would.
4. DIY Ladder Shoe Shelf
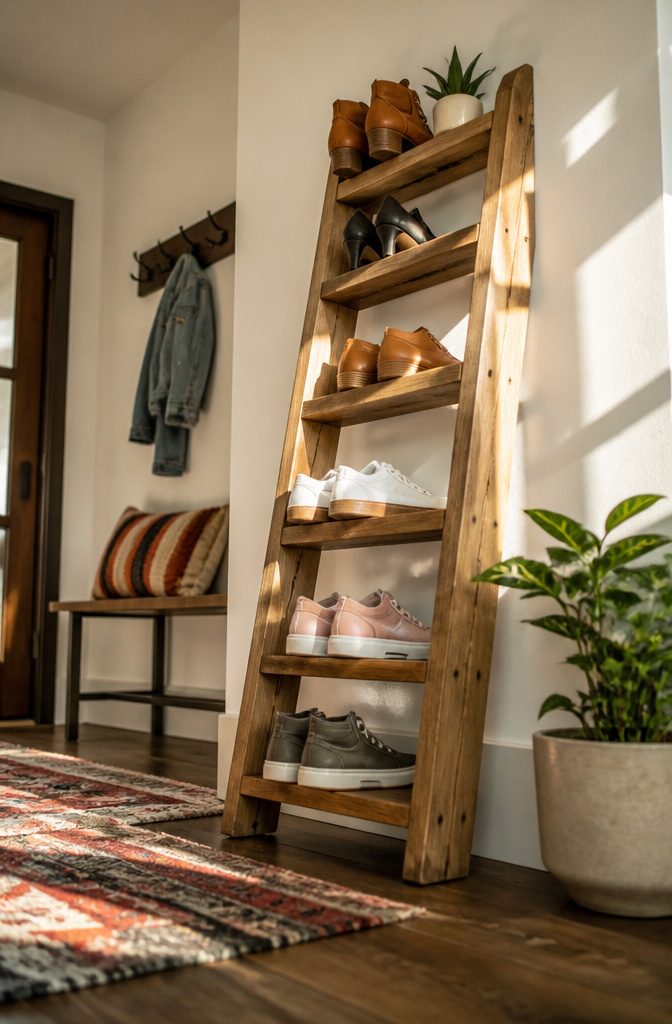
A ladder shelf gives you vertical storage without eating floor depth, which matters when your entry is basically a hallway.
I would build the A-frame from two 1x3s joined at the top with a simple half-lap and a carriage bolt, then cut the rungs from 1×10 pine so each shoe sits flat without hanging over.
Space the rungs 6 inches apart for flats and sneakers, 8 inches for heels or ankle boots; anything tighter and you are fighting the stack, anything looser wastes height you do not have.
The back brace is what keeps the thing from racking when someone bumps it.
I would run a single 1×3 horizontally across the lower third, screwed through the rear legs, which also gives you a place to anchor to the wall if you lean it.
Freestanding works only if you widen the feet with a crossbar or add a weighted bottom shelf, and in a rental I would skip that complication.
Lean it against the wall, add two small L-brackets behind the top rung, and you get stability without drilling into the floor.
5. DIY Shoe Storage Console Table
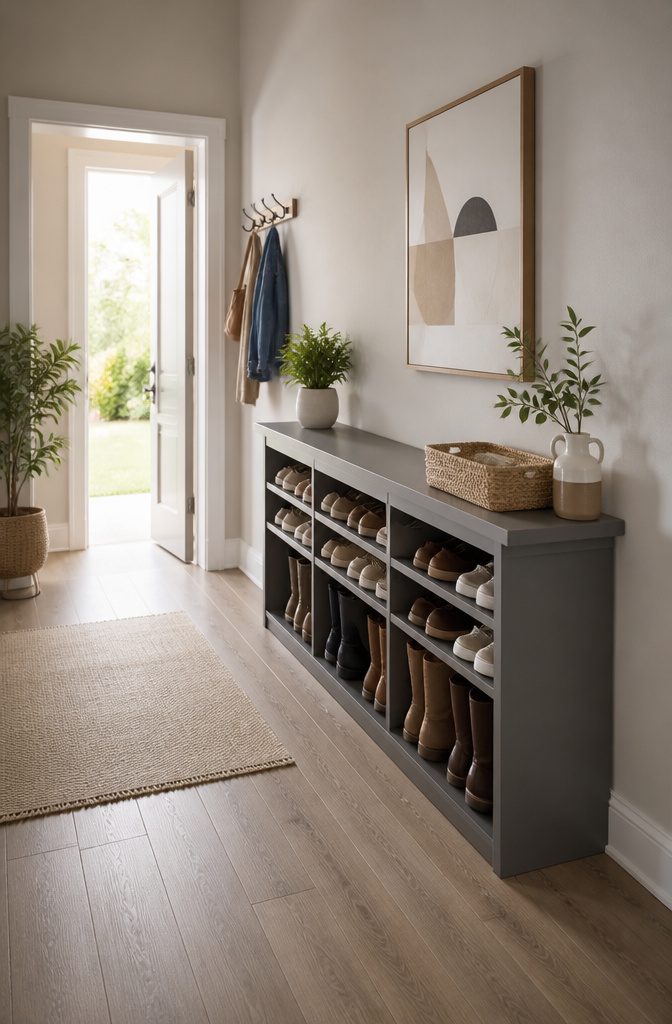
A console table that doubles as shoe storage gives you a surface for keys and mail while keeping pairs tucked out of sight.
The shallow depth is what makes this work in a narrow hallway; I would keep the interior no deeper than a single pair of shoes laid toe-to-heel, which leaves the frame slim enough that you are not brushing against it every time you pass.
Dividing the interior matters more than you might think.
Fixed shelves spaced for one pair each keep the space from turning into a jumbled pile, but I would build in one or two taller slots for ankle boots rather than forcing everything into identical cubbies.
That small bit of variation stops the daily frustration of wedging a taller shoe into a space that was not made for it.
The top surface takes the real beating. I would go with a hardwood or a laminate with an ABS edge band, not a soft pine that dents the first time someone drops their bag.
A water-resistant finish handles wet shoes set there in a rush, and a slight overhang on the front disguises the storage below so the piece reads as furniture first.
For renters, a console on furniture sliders lets you pull it out for cleaning without scratching the floor, and the whole thing sits flush enough to the wall that it never steals walkway from an already tight entry.
6. DIY Hidden Shoe Cabinet
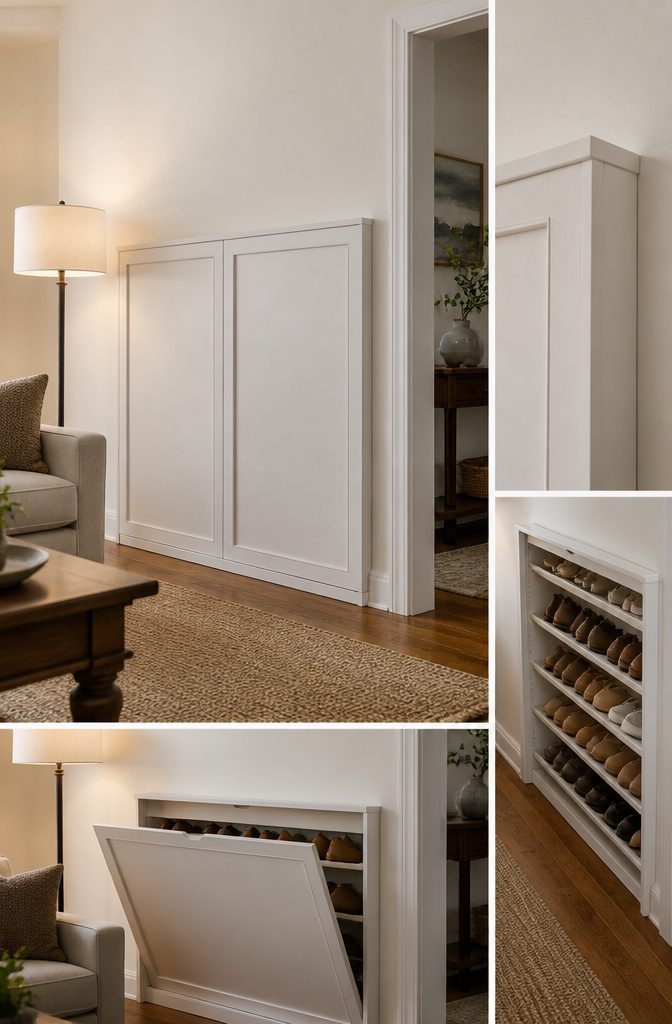
A hidden cabinet keeps the visual clutter out of sight, which matters when the only spot for shoes is a hallway that also serves as your living room.
I would build the carcass from ¾-inch plywood at roughly 6 ½ inches deep, 25 inches wide, and 42 ¾ inches tall, though those dimensions flex to whatever gap you are filling.
Hinge choice matters most here: a piano hinge or concealed soft-close hinges sit flush and need less than an inch of swing clearance, whereas a standard butt hinge catches on the wall in a tight entry and chips the paint every time.
Inside, tier the shelves at a slight angle, maybe 15 degrees, with a 1-inch lip across the front edge to stop pairs from sliding.
The lip can be glued and brad-nailed, which is faster than pocket screws in that cramped interior space.
For the finish, I would skip the raw plywood look and apply iron-on edge banding to the visible edges, then paint the exterior in a color that matches your trim so the box reads as built-in furniture, not a storage unit.
A satin sheen holds up to scuffs better than matte and does not show every fingerprint the way high-gloss does.
7. DIY Cardboard Shoe Rack
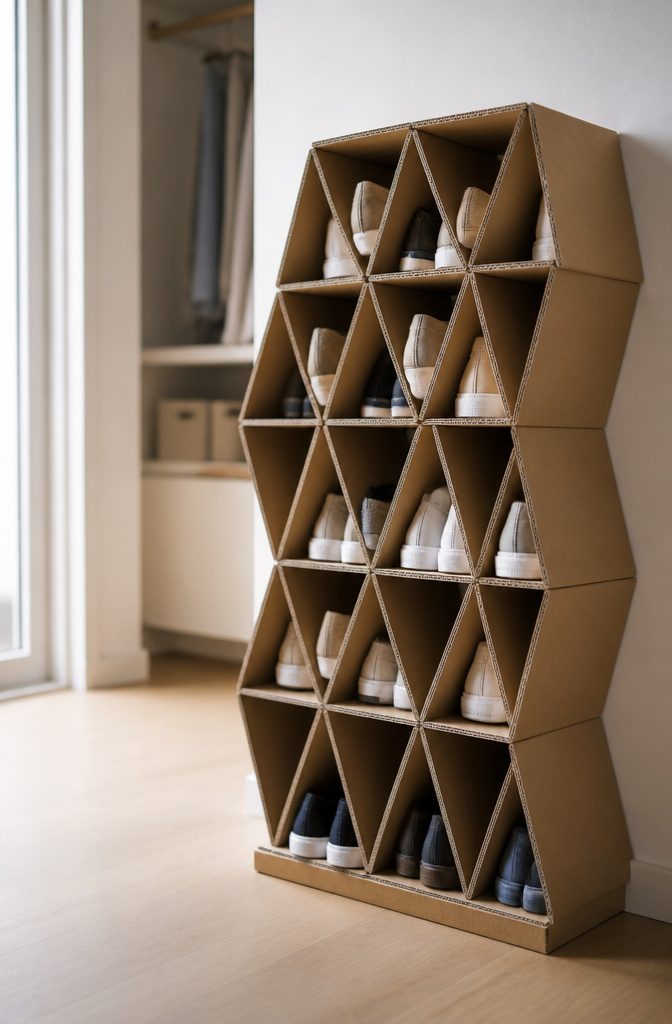
Corrugated cardboard can form a surprisingly rigid structure when you turn it into triangular tubes. For this build, each module is a triangle with 7 inches per side and 24 inches long, sized to fit roughly a women’s US 7 shoe pair toe-to-heel.
You cut a sheet about 21 inches by 24 inches, score it into three equal strips, fold, and tape the seam with duct tape.
The triangles stack in alternating rows, four then five then four, and interlock because the flat sides sit flush against each other.
Glue each row to a cardboard base plate so the whole assembly does not shift when you slide shoes in, one pair per opening.
Thick board matters. Standard shipping boxes will sag within weeks; you want double-wall corrugated or the heavy sheets used for furniture packaging, free from most warehouse loading docks or appliance stores if you ask.
Even then, this is a 20-pound-max structure. Moisture kills it fast, so keep it off basement floors and away from muddy boots.
I would use this only inside a closet with a door, not in an entryway where wet shoes land. It costs nearly nothing and takes an afternoon, but plan to rebuild it in a year or two.
8. DIY Shoe Cubby
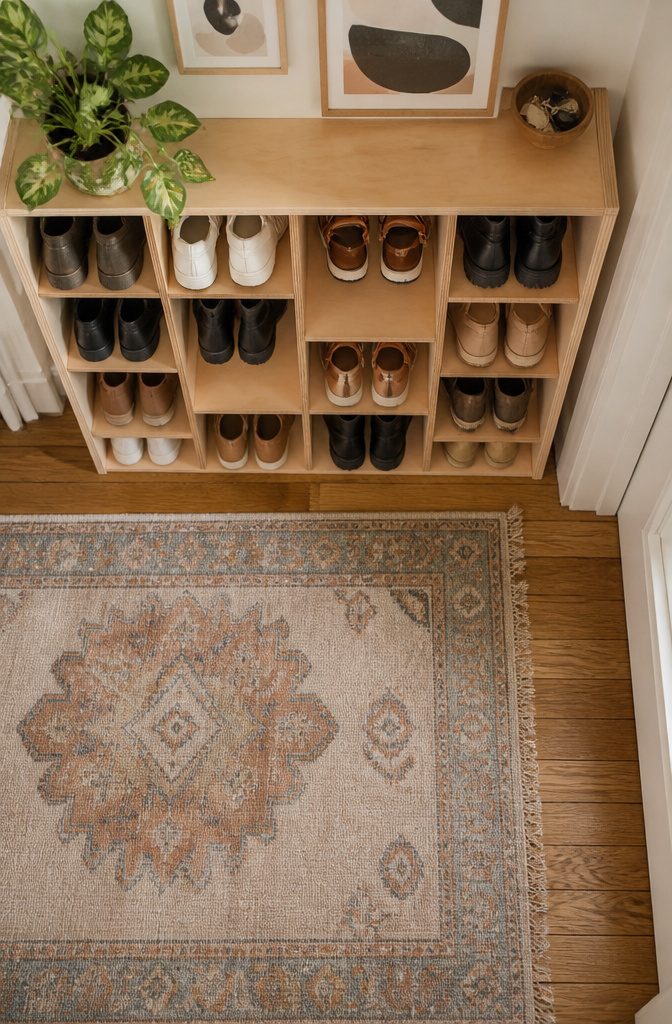
A shoe cubby only works if the compartments match the shoes you actually own, not the ones you wish you owned.
Start by measuring the tallest pair and the widest pair, then add half an inch to each dimension for easy sliding.
My own rule is simple: men’s sneakers need about 7 inches square, ankle boots need 8, and anything taller than that deserves its own taller slot rather than forcing the whole unit to one height.
Open cubbies keep the build straightforward and let you see what you have, but pull-out trays, like the kind The Created Home uses, make narrow spaces far more usable.
You lose about an inch of depth to the drawer hardware, which matters in a tight footprint, but you gain the ability to reach the back pair without emptying the front.
For a narrow space, I would stack two units vertically rather than line them side by side.
A single column of staggered cubbies, as Brittany Goldwyn’s design shows, breaks up the bulk and lets boots and flats share the same wall without anyone getting squashed.
Glue and cardboard can hold the structure, though plywood scraps with pocket holes will survive longer in a closet that gets opened twice a day.
9. DIY Shoe Peg Organization
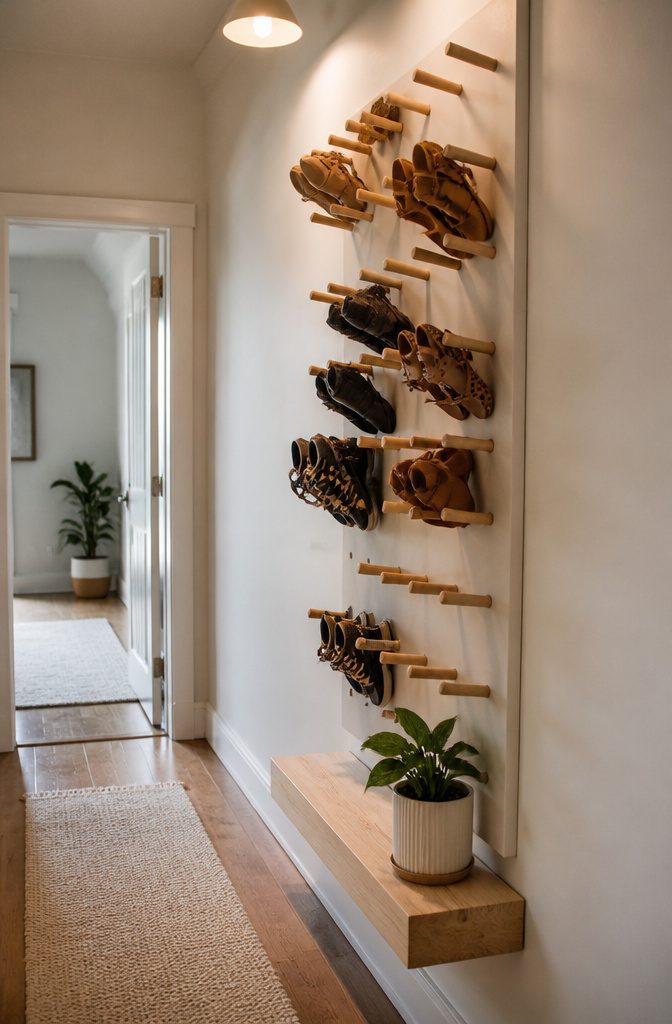
A wall-mounted peg system eats almost zero floor space, which makes it the first thing I would look at in a truly tight entry.
Space the dowels far enough apart that heels do not knock against the wall below, and a 3/4-inch diameter gives the right grip without stretching out the backs of sneakers or ballet flats.
Go thinner and loafers slide off; go thicker and you risk deforming soft leather over time.
Open heels and ankle straps hang naturally. Anything with a rigid toe box, like a men’s oxford or a running shoe, wants to sit on a shelf instead; the weight sits wrong and they drop if bumped.
For mounting, a solid backing board screwed into studs keeps the whole system from levering out of drywall the first time someone brushes past in a coat.
Plywood works, though I would paint it before assembly so the gap between pegs does not collect shoe prints.
10. DIY Boot Tray
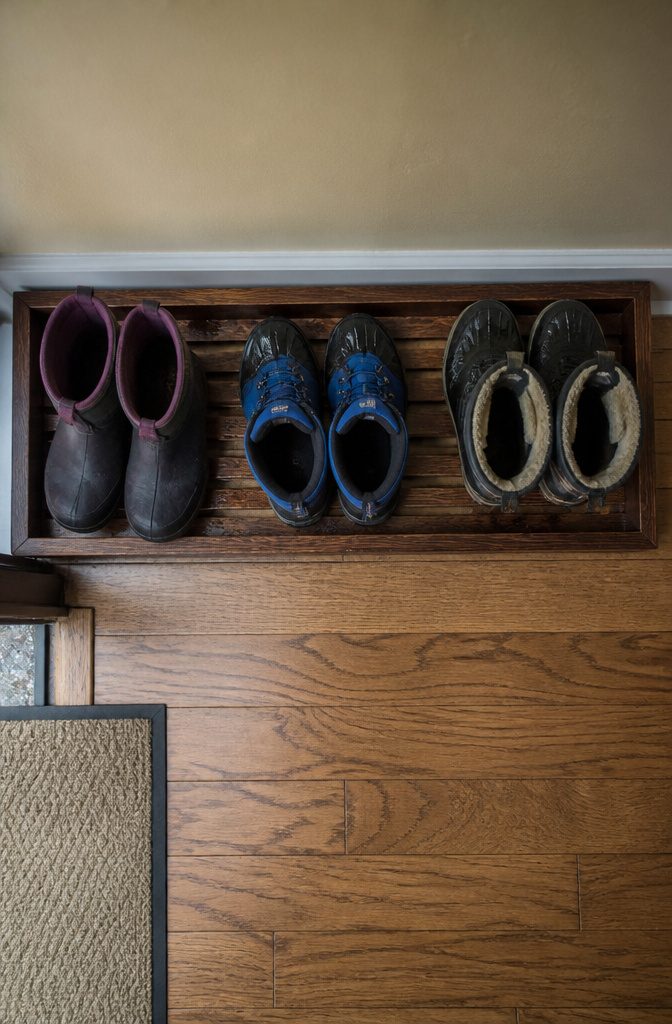
A contained boot tray is the narrow-space answer for about three months of the year, and only if your entry is already tight on every other solution.
For a household that keeps two to four pairs of winter boots in rotation, a tray roughly 30 inches long and 14 inches deep fits most doorways without blocking the swing.
I would build the bottom from cedar slats or vinyl lattice rather than solid wood; meltwater needs somewhere to go or you are growing mildew by February.
The lip wants to sit 3 inches above the slats, high enough to corral slush but low enough that you are not lifting boots over a wall with frozen hands.
I keep a plastic boot tray under my own rack for now, and that is the trade-off: it works, it is cheap, but it occupies the same floor space whether there is snow on the ground or not.
For a true narrow entry, I would rather stack vertically eleven months and accept the seasonal shuffle.
11. DIY Built-In Shoe Shelves
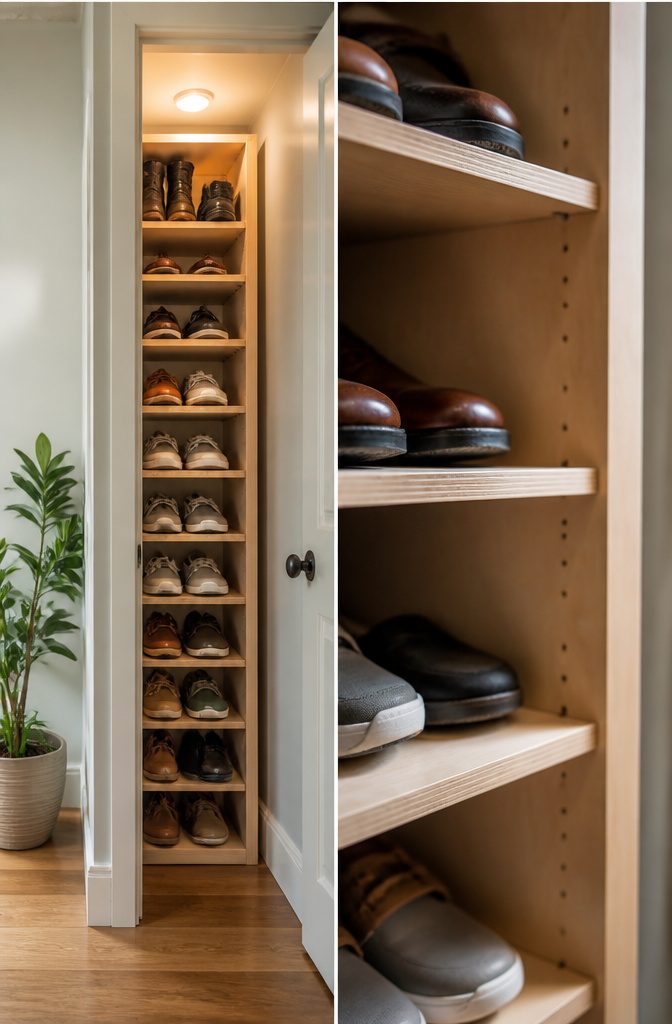
Built-in shelves turn the dead zone inside a closet into storage that looks intentional. The cavity rarely cooperates: back walls bow, side walls lean, and the floor slopes toward the door.
I measure at three heights on each wall, then cut shelves ¼ inch short of the smallest width so they slide in without fighting the opening.
Scribing is what saves the fit; a compass or a washer-and-pencil rig transfers the wall’s curve to the shelf edge, and a belt sander or jigsaw nibbles away the waste until the gap disappears.
Support without visible brackets means cleats. A 1×2 pine strip screwed into studs carries the back edge, and a narrower strip along each side locks the shelf in place.
Prefinished ¾-inch plywood from the home center holds the load without sagging across a 24-inch span, and the factory finish saves a weekend of painting.
For the front edge, a face frame strips the raw plywood sandwich clean: 1×2 poplar, pocket-screwed and filled, then painted to match the closet trim.
The lip at the front, maybe a ¾-inch square strip tacked on, stops shoes from sliding off if you angle the shelves.
I would skip the angle in a truly narrow cavity; flat shelves buy you two extra pairs per row, and the lip still corrals them fine.
12. DIY Shoe Storage Rack
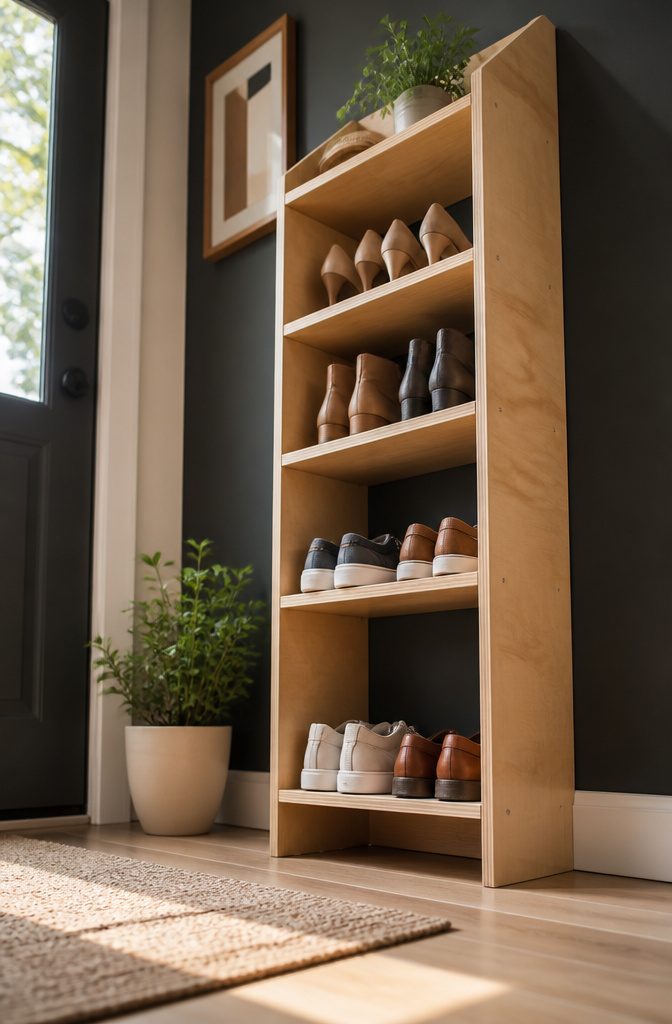
A diy narrow shoe rack that actually fits a tight entryway lives or dies on its depth.
I would build for 8 to 10 inches front to back, no more. Anything deeper and shoes sit in shadow against the wall, or the rack blocks the walking path it was meant to clear.
Wall-mounted designs buy you the most floor space. One approach uses two legs and a front-mounted base piece, with the back edge inset so the unit sits flush against the wall above the baseboards.
Freestanding works too, but tall narrow units need anti-tip hardware. A 42 ¾ inch height is workable if you anchor it; without that bracket, I would stop around 30 inches or watch it lean with every pair you add.
Vertical tiers trade reach for capacity. I like four to five shelves for adult shoes: low enough that the top row is still reachable without a step stool, high enough to justify the wall space.
A ¾ inch plywood lip at each shelf front, like the slanted closet designs use, keeps pairs from sliding. Skip the lip and you will find heels and sneakers on the floor by Tuesday.
Plywood at ¾ inch thickness holds the weight without sagging; prefinished sheet saves a weekend of sanding and sealing.
The slanted shelf trick from closet builds, where the angle buys back a few inches of perceived depth, works here too if you have the wall width to angle into.
Materials and Tools
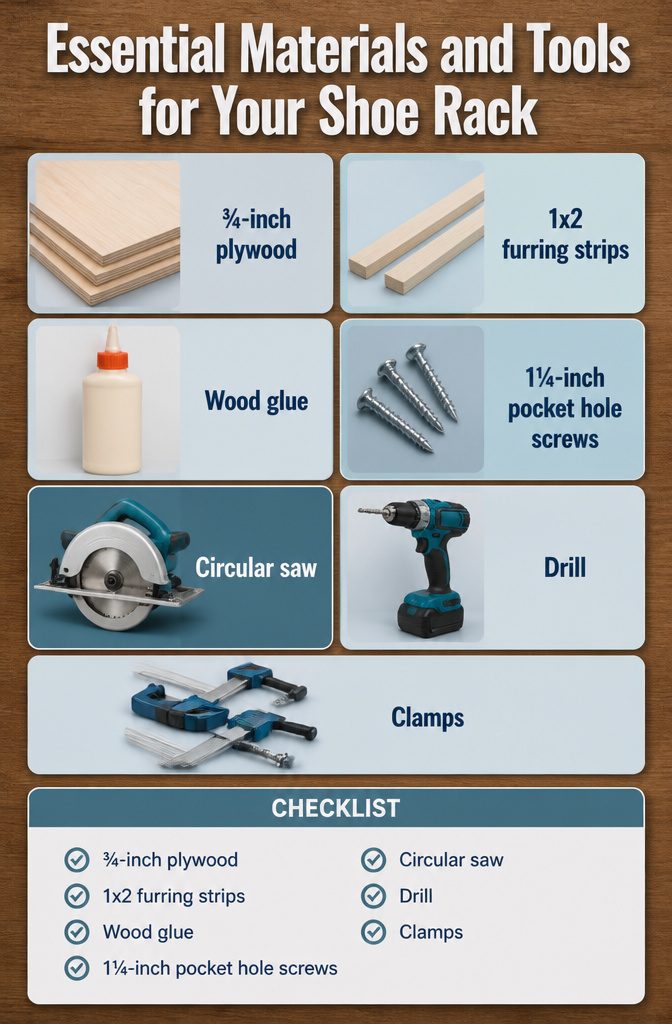
Most narrow shoe rack builds draw from the same short list of materials, and the tool kit is smaller than you might expect.
- ¾-inch plywood is the standard choice for shelves and back panels; half a sheet is often enough for a single rack, and prefinished plywood saves you from sanding every surface later
- 1×2 furring strips work for front lips, frame edges, or anywhere you need a clean border without the bulk of a 1×3; round the front edge with a router or heavy sanding if you want the look of store-bought trim
- Wood glue at every joint is what keeps the rack from wobbling after six months of use; screws alone will loosen where the wood swells and shrinks
- 1¼-inch pocket hole screws are what I would reach for when shelves meet sides or a back panel joins the frame; the pocket hole jig is not strictly required, but without it you are either toe-nailing into end grain or accepting weaker joints
On tools, the non-negotiables are a circular saw, a drill, and clamps to hold pieces square while the glue sets.
A miter saw or nailer speeds up repeat cuts and trim work, yet I have built perfectly usable racks without either.
The pocket hole jig falls in the middle: you can substitute butt joints with screws driven straight through, though they will not look as clean and they will not pull the pieces together the way a pocket screw does.
Sizing Your Rack to the Space
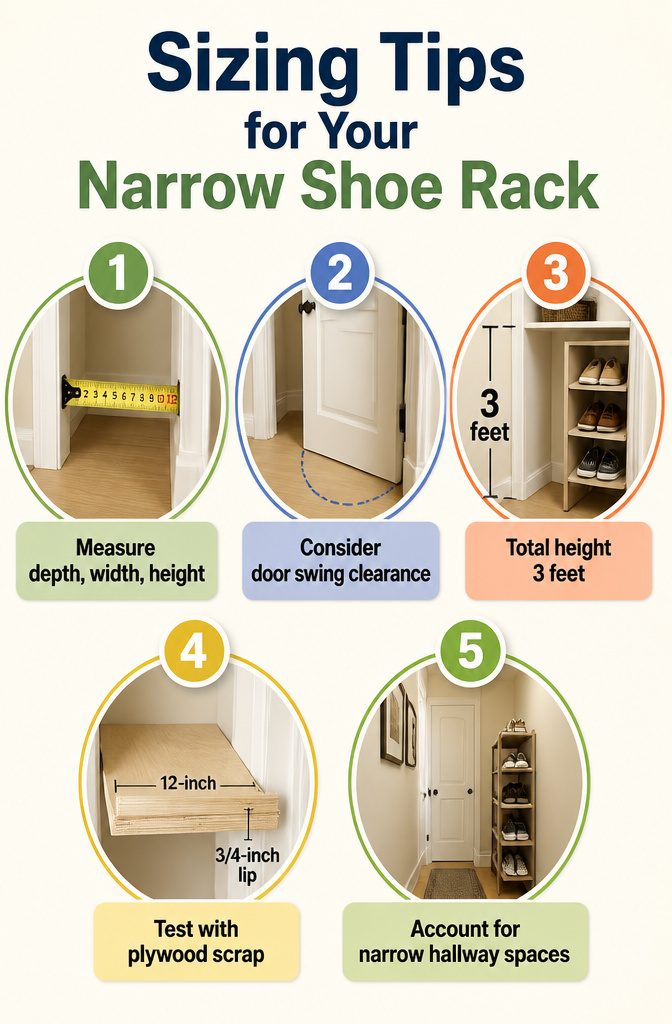
A diy narrow shoe rack only works if the numbers match your actual space, not the average closet.
I start by clearing the floor and measuring depth, width, and height to the nearest obstacle: door trim, baseboards, existing shelves. That top shelf sitting three feet off the floor in a reach-in closet?
It becomes your hard ceiling. The berry.home build used a 12-inch plywood scrap to test slanted shelf depth, and with a three-quarter-inch lip the whole unit tucked just inside the door jamb.
That test piece matters because slanted shelves eat less depth than flat ones, but the lip and angle still need real clearance.
Door swing is where a rack that fits becomes one that functions. A door needs its full arc, and you need walking room beyond it.
I would skip any design that puts shoes where the door sweeps, unless you are mounting directly to wall studs inside the closet and skipping an outer frame entirely.
Even then, weight on slanted shelves adds up fast, and brackets into drywall alone will sag.
If your hallway is the only option, traffic paths narrow your workable width more than wall measurements suggest. No standard dimension exists because the constraint is always your particular trim, your door, your morning routine brushing past it.
Adjusting Dimensions to Need
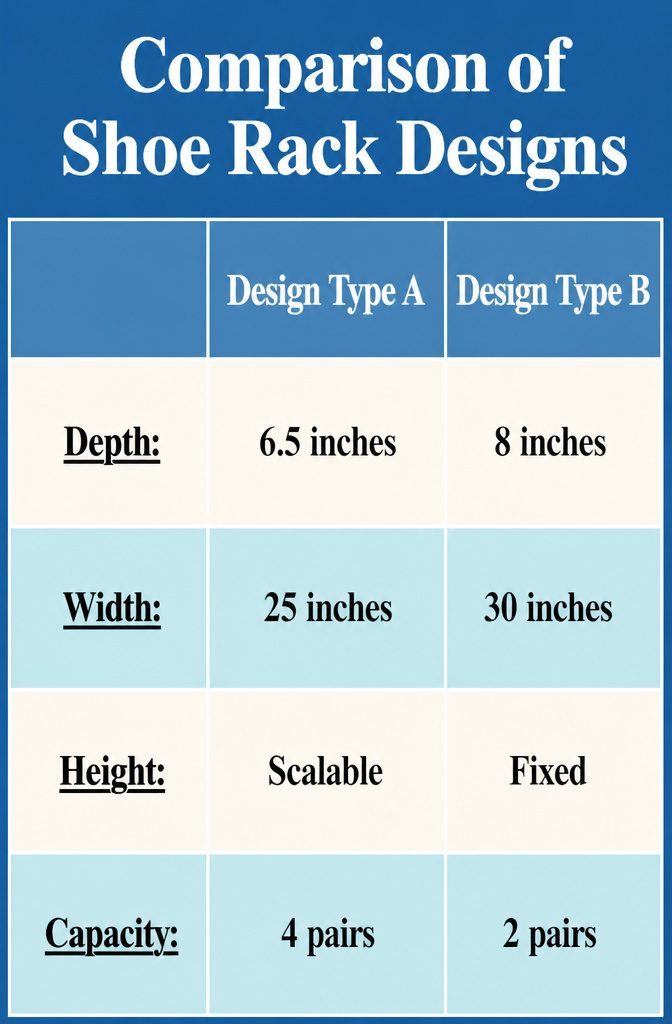
The 6 ½ inch depth on a wall-mounted unit works for sneakers and flats, but men’s boots or high heels need more.
I would add depth before I add width; a 25 inch wide rack that holds four pairs across stays useful in a hallway, while a deeper version that only fits two pairs wastes the narrow advantage.
Children’s sizes let you scale down the whole module.
The triangular tube design from cardboard scores here because each tube is sized to the foot that slides into it, a 7 inch side for a women’s seven, smaller for a kid, longer for a boot.
Stack rows of 4, 5, and 4 onto a cardboard base and the whole assembly gains height without eating more floor.
Scaling up means adding modules, not stretching them, because a 24 inch tube that fits one pair neatly collapses into a lump if you force two.
For athletic pairs with bulky soles, skip the triangle entirely; the flat shelf variants give each pair its own headroom without the geometry fighting the shape of the shoe.
Why I Skip the Boot Tray
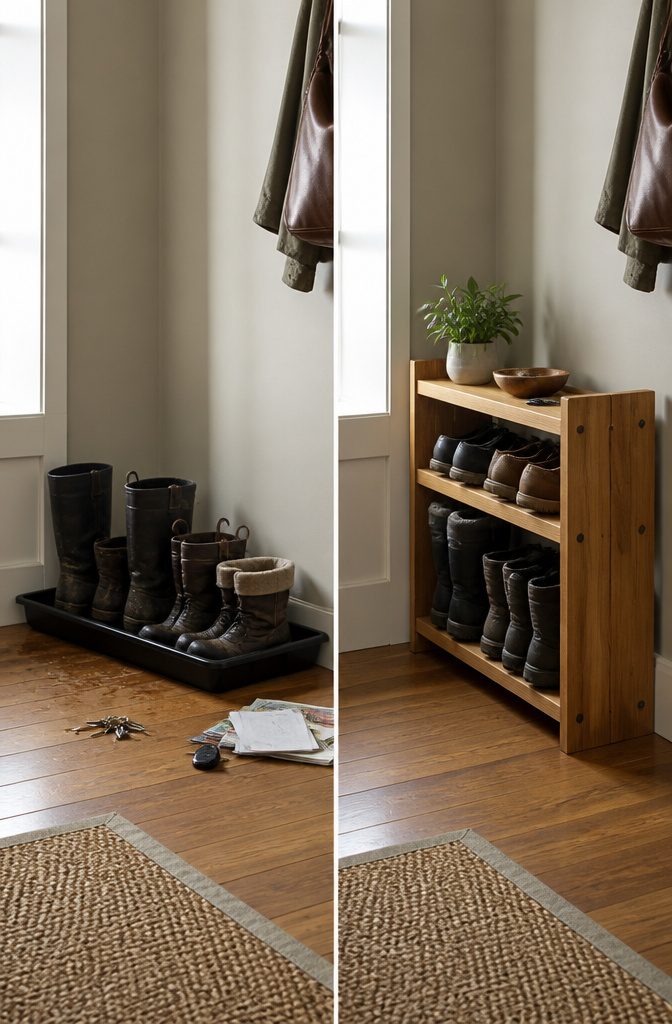
A boot tray looks like an answer for narrow spaces because it sits flat against a wall and costs almost nothing.
I have seen the appeal, especially after a February slush storm when boots come off dripping and there is nowhere else to put them.
That is the problem. It works for exactly one season in climates with real winter, and even then it handles only the footwear you wore that day, not the eight other pairs cluttering your entryway.
For the other nine months, the tray becomes a low dish you step over or a catch-all for keys and junk mail.
It does not stack, it does not sort, and it trains you to leave shoes in a pile because the tray is already full.
If you are renting and can drill nothing into the wall, a tray feels like the safe choice.
I would skip it and spend the same fifteen dollars on a tension rod and a few S-hooks to hang sneakers by their heels, which clears the floor year-round.
A boot tray asks for zero effort today and gives back zero function tomorrow. A narrow rack asks for an hour of your Saturday and actually holds your shoes.
Frequently Asked Questions
How do I build a narrow shoe rack?
Build the frame from 1×2 furring strips or pine boards, then add shelves from 3/4-inch plywood cut 8 to 10 inches deep.
A front lip of the same 1×2 stock keeps shoes from sliding off, and wall-mounted designs with two legs and an inset back edge sit flush above baseboards without eating floor space.
Wood glue at every joint prevents wobbling after months of use.
What materials do I need for a DIY shoe rack?
3/4-inch plywood for shelves and back panels, 1×2 furring strips for front lips and frame edges, wood glue, and 1 1/4-inch pocket hole screws.
Prefinished plywood skips the sanding step, and furring strips give clean borders without the bulk of wider stock.
Can I customize the size of my shoe rack?
Yes, every dimension adjusts to your space and your shoes. Measure the tallest and widest pairs you own, then add 1/2 inch to each dimension for easy sliding.
Men’s sneakers need about 7-inch cubbies, ankle boots need 8 inches, and slanted shelves at 12 inches deep with a 3/4-inch lip work for a hallway rack that tucks inside a door jamb.